Overview
To authenticate with Workday, you need:- Hostname - The base URL for the Workday Web Services endpoint.
- Tenant - The unique identifier for your Workday instance, often included in the URL.
- Username - The Workday Integration System User (ISU) username.
- Password – The password for the ISU user, used in combination with the ISU username to authenticate API requests to Workday.
Prerequisites:
- You must have an account with Workday with administrator access.
Step 1: Finding your Hostname
- Log in to your Workday instance.
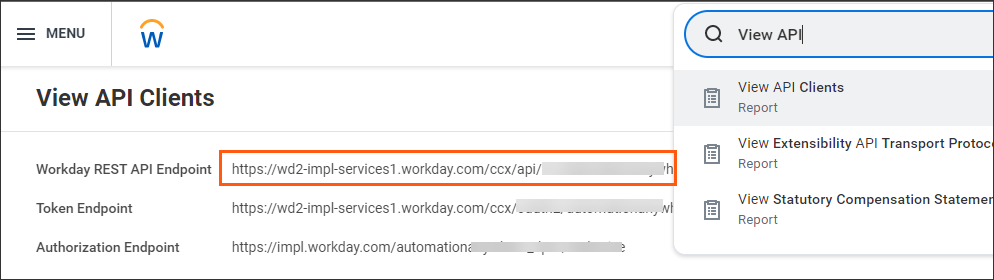
- In your Workday homepage, go to the search bar and type View API Clients then select it.
- Look for the Workday REST API Endpoint field.
- The Hostname is everything after
https://and before/ccx/api/v1/.
- Example: If the endpoint is
https://wd2-impl-services1.workday.com/ccx/api/v1/acme, the hostname iswd2-impl-services1.workday.com.
Step 2: Finding your Tenant
- In the same Workday REST API Endpoint field from the View API Clients report, the Tenant is the final part of the URL after /v1/.
- Example: If the endpoint is
https://wd2-impl-services1.workday.com/ccx/api/v1/acme, the Tenant isacme.
Step 3: Create Integration System User (ISU)
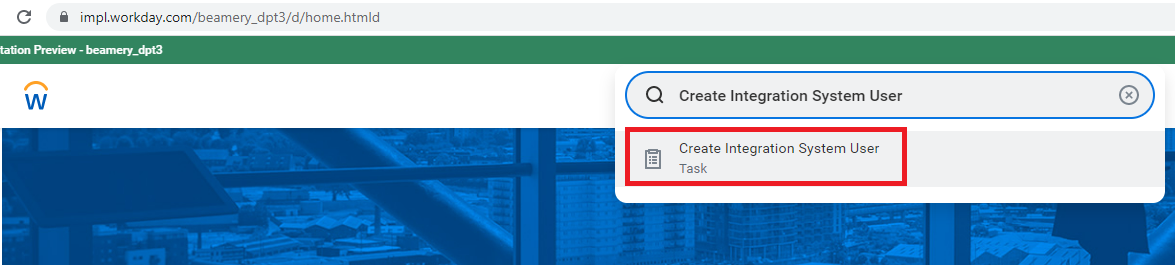
- Log into your Workday instance.
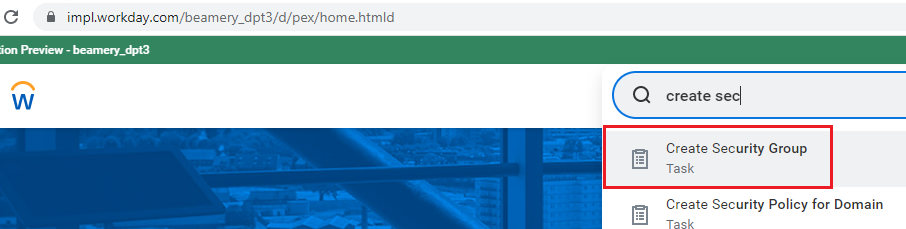
- In your Workday homepage, go to the search bar and type Create Integration System User then select it.
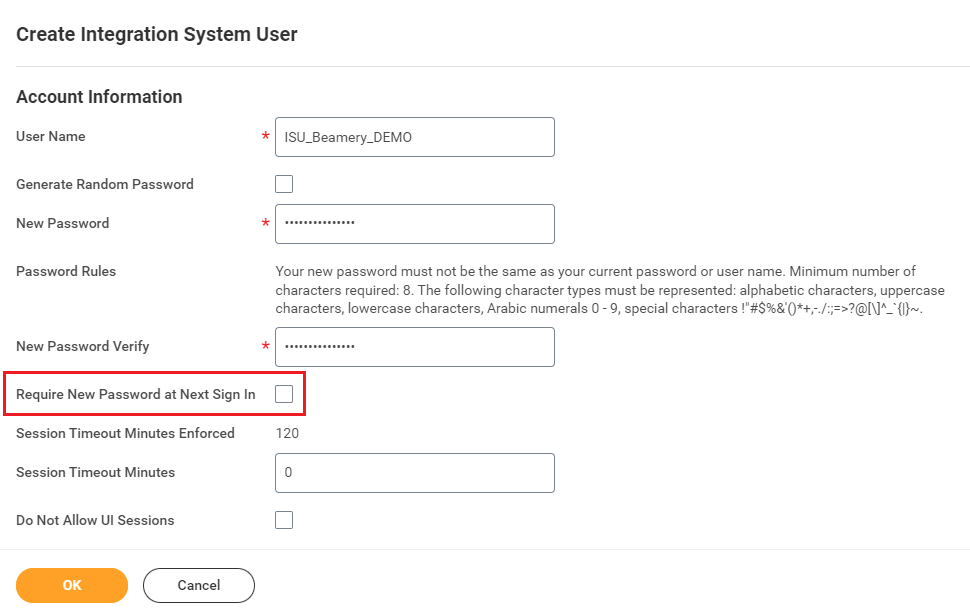
- Add in a Username and type in a secure Password of your choosing. Uncheck the box: Require New Password at Next Sign In, then click Done.
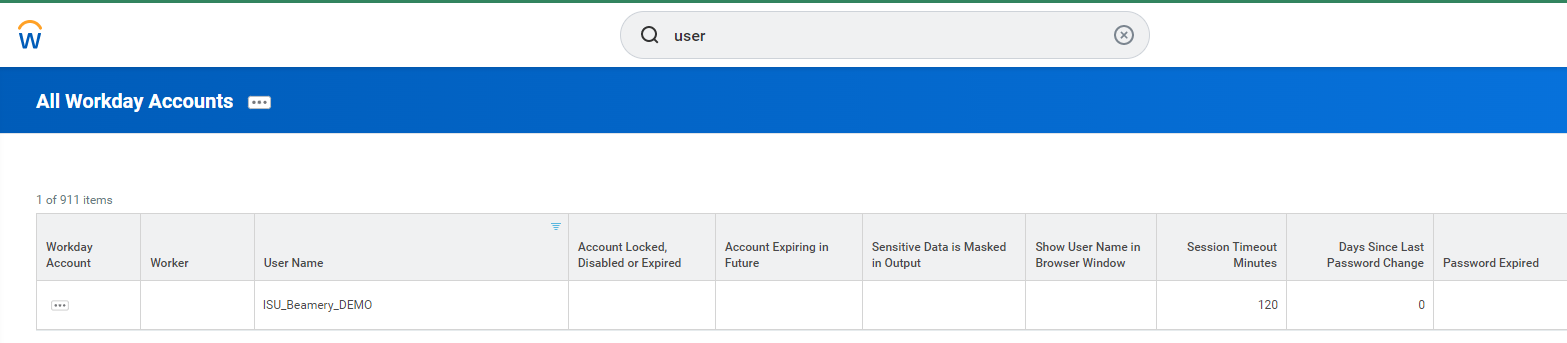
- Confirm the ISU account has been created by viewing All Workday Accounts and filter on the Username you created.
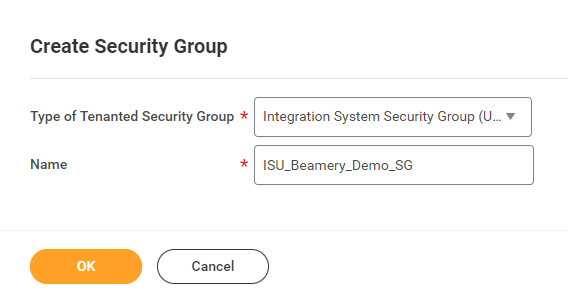
Creating a security group allows you to assign the necessary permissions to the ISU account
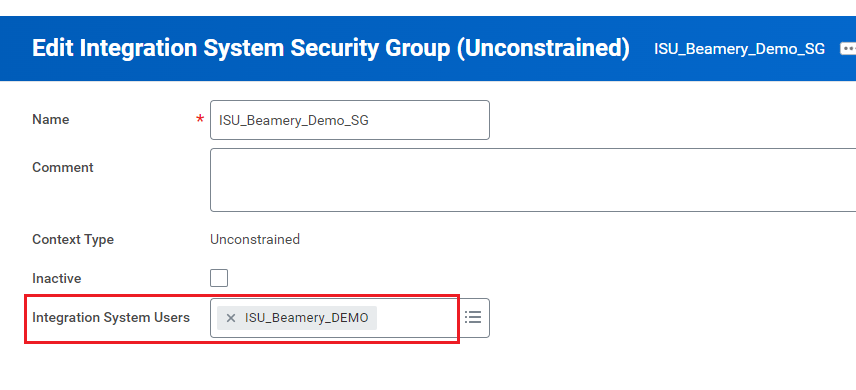
- Assign the ISU account we created in step 3 above to your new security group and click OK.
- Go to the search bar and type View Security Groups for User then select it.
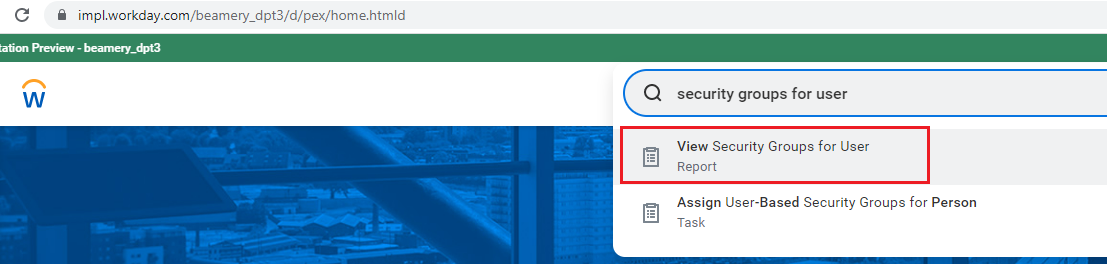
- In the Person field, search for the ISU username we created above and click OK.
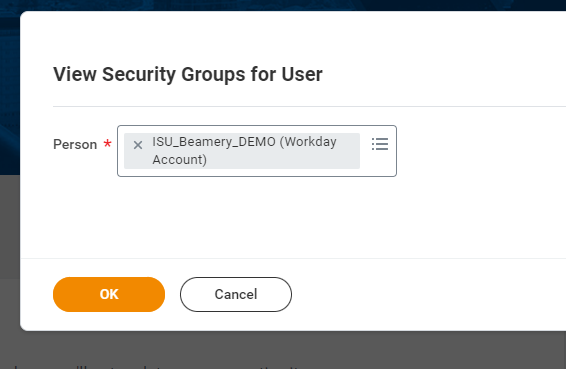
- You should see the security groups associated with the ISU account, including the one you just created (Integration System Security Group (Unconstrained)). Scroll down to find this security group, then click on it.
- Navigate to ellipses > Security Group > Maintain Domain Permissions for Security Group.
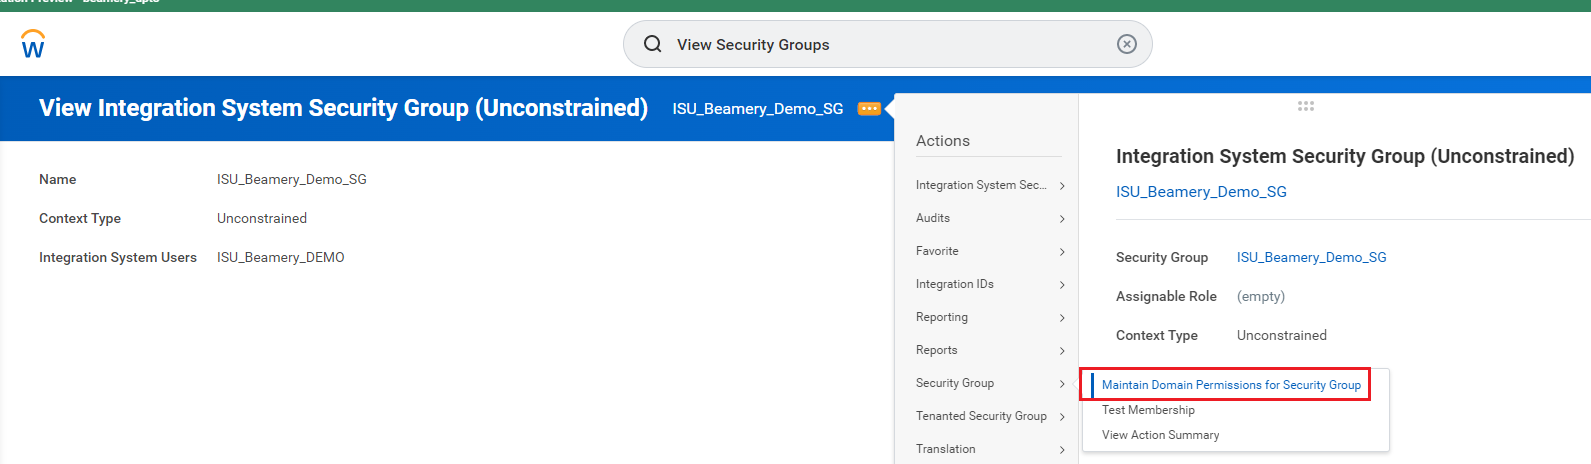
- Add all of the required domain security policies with the proper view/modify access for the Integration Permissions.
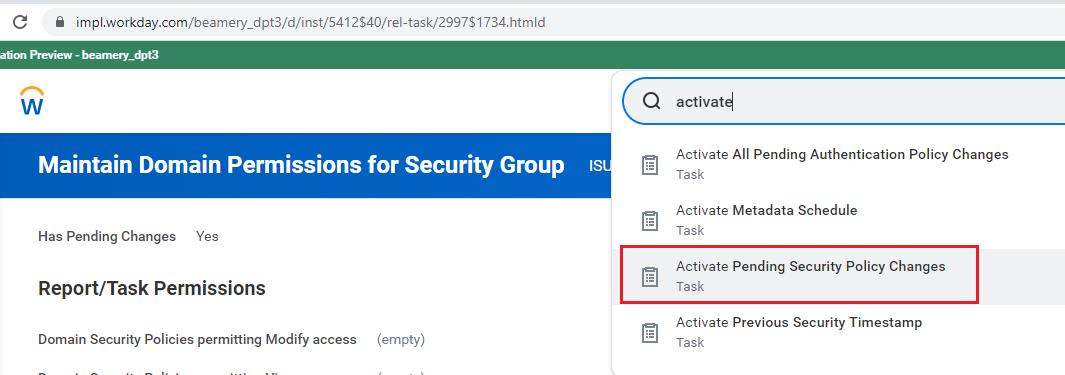
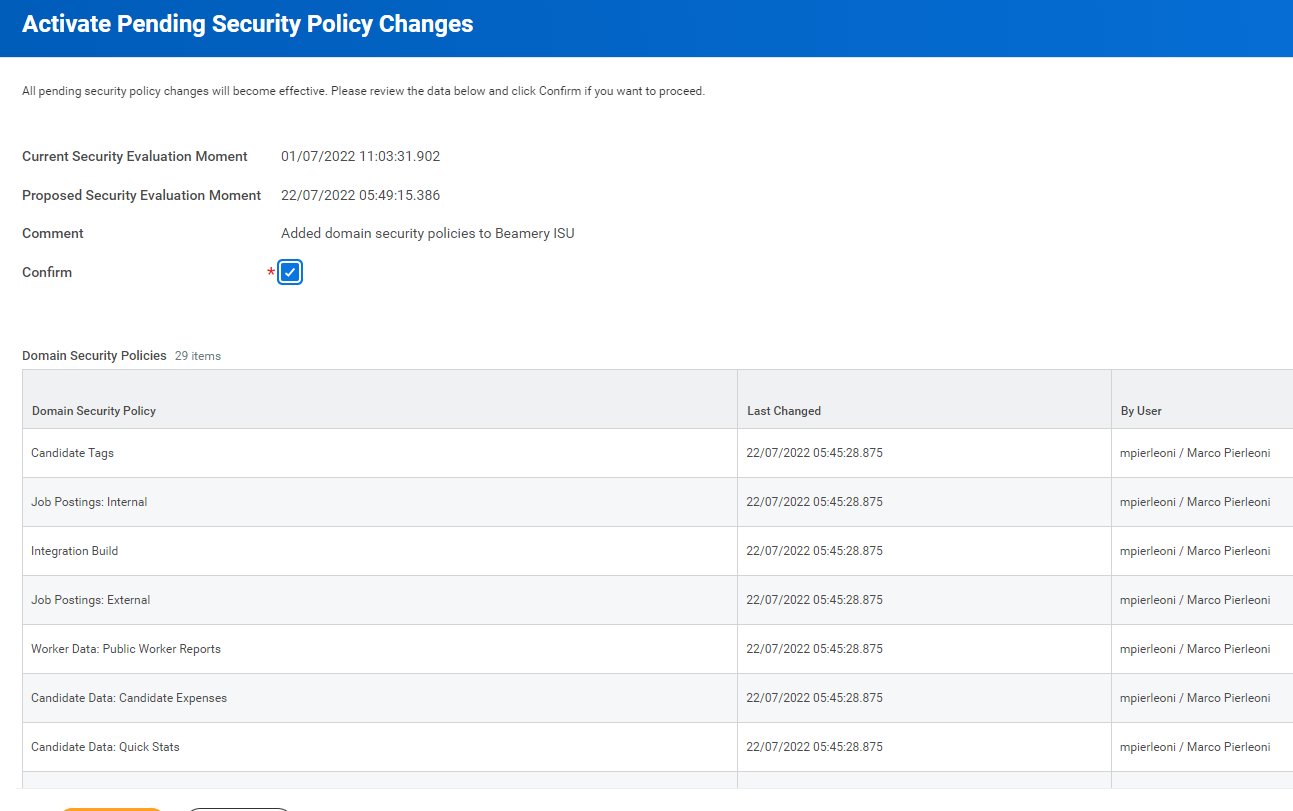
In Workday, all security changes remain pending until they are activated by a user with the appropriate permissions.
- Activate your security policy changes by;
- Go to the search bar and type Activate Pending Security Policy Changes then select it.
- Enter a comment and click OK.
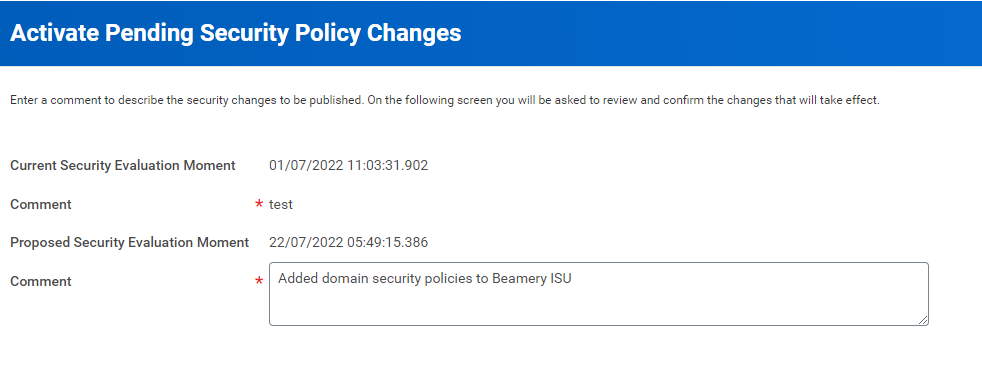
- You will see a list of changes that were made. You must check the Confirm box and click OK.
Step 4: Generating your Username
- This is the Username from the Integration System User (ISU) you created above, followed by
@and your Workday tenant name from above. - Format:
username@yourtenant - Example:
ISU Nango@acme
Step 5: Finding your Password
- This is the Password you set when creating the Integration System User (ISU) above.
Step 6: Enter credentials in the Connect UI
Once you have your Hostname, Tenant, Username and Password:- Open the form where you need to authenticate with Workday.
- Enter your Hostname, Tenant, Username and Password in their designated fields.
- Submit the form, and you should be successfully authenticated.
