Overview

To authenticate with SharePoint Online (v1), you need:

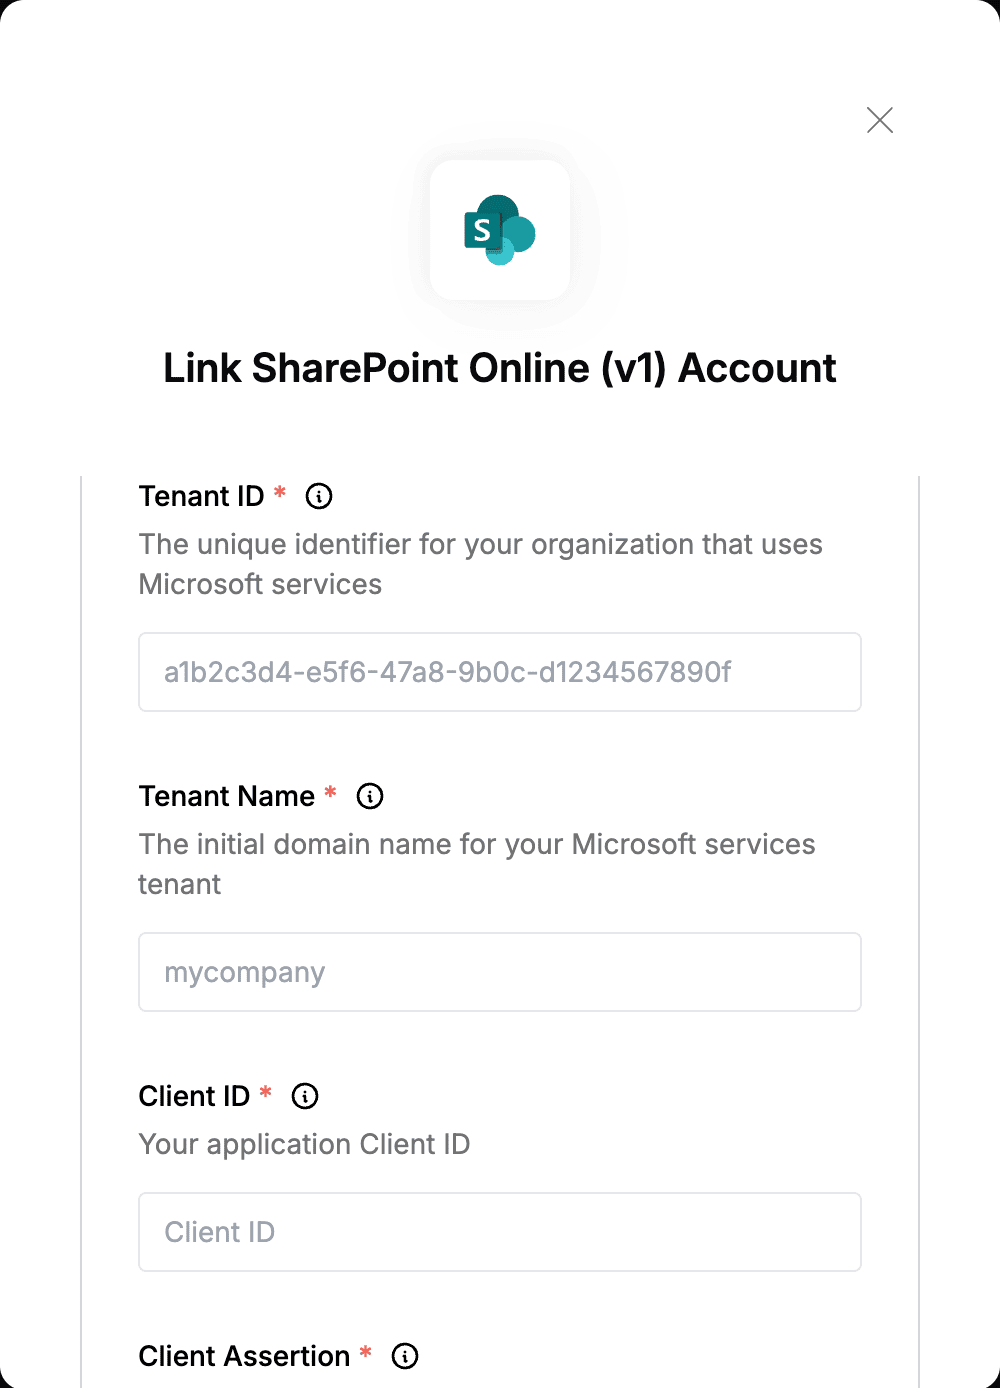
  1. Tenant ID - The unique identifier for your organization that uses Microsoft services.
  2. Tenant Name - The initial domain name for your Microsoft services tenant.
  3. Client ID - The unique identifier that Azure assigns to your application when it’s registered.
  4. Client Assertion - A unique string that enables client applications to access Azure resources without requiring users to provide their credentials.

This guide will walk you through generating and finding these credentials within Azure.

Prerequisites:

  • You must have an Azure account with an active SharePoint subscription.

Instructions:

Step 1: Finding your Tenant ID

  1. Your Tenant ID can be found in the Tenant ID field on the Overview page.

Step 2: Finding your Tenant Name

  1. Your Tenant Name can be found in the Primary domain field on the Overview page. It is the text that appears before onmicrosoft.com. For example, if the primary domain is mycompany.onmicrosoft.com, the Tenant Name would be mycompany.

Step 3: Finding your Client ID

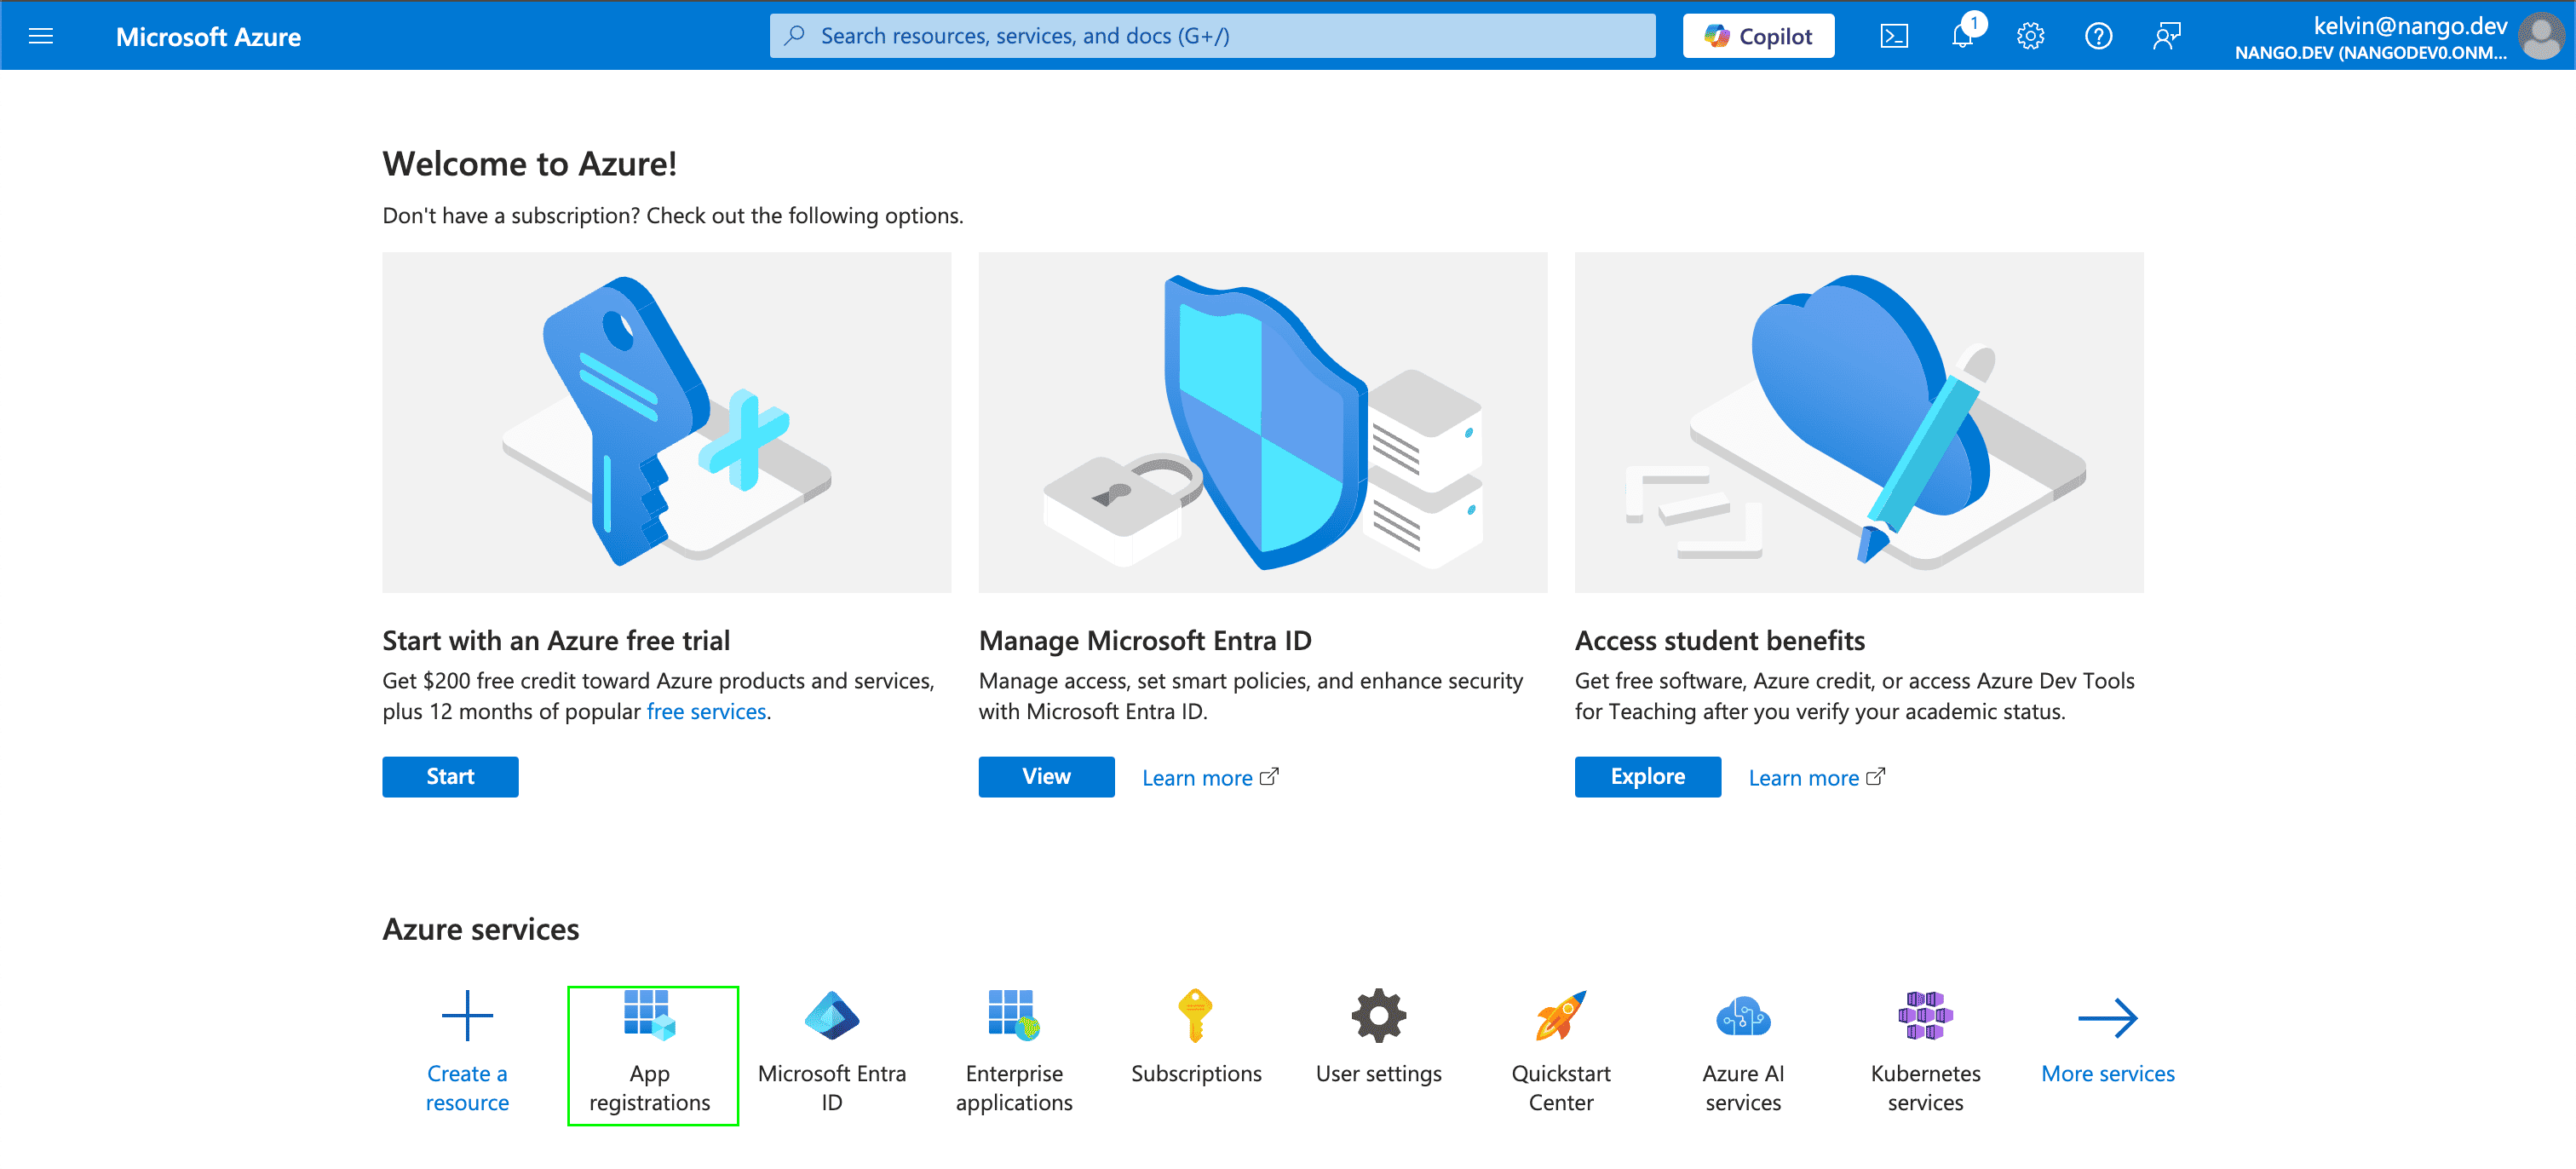
  1. Navigate to the Azure portal home page and sign in using the credentials of an administrator.
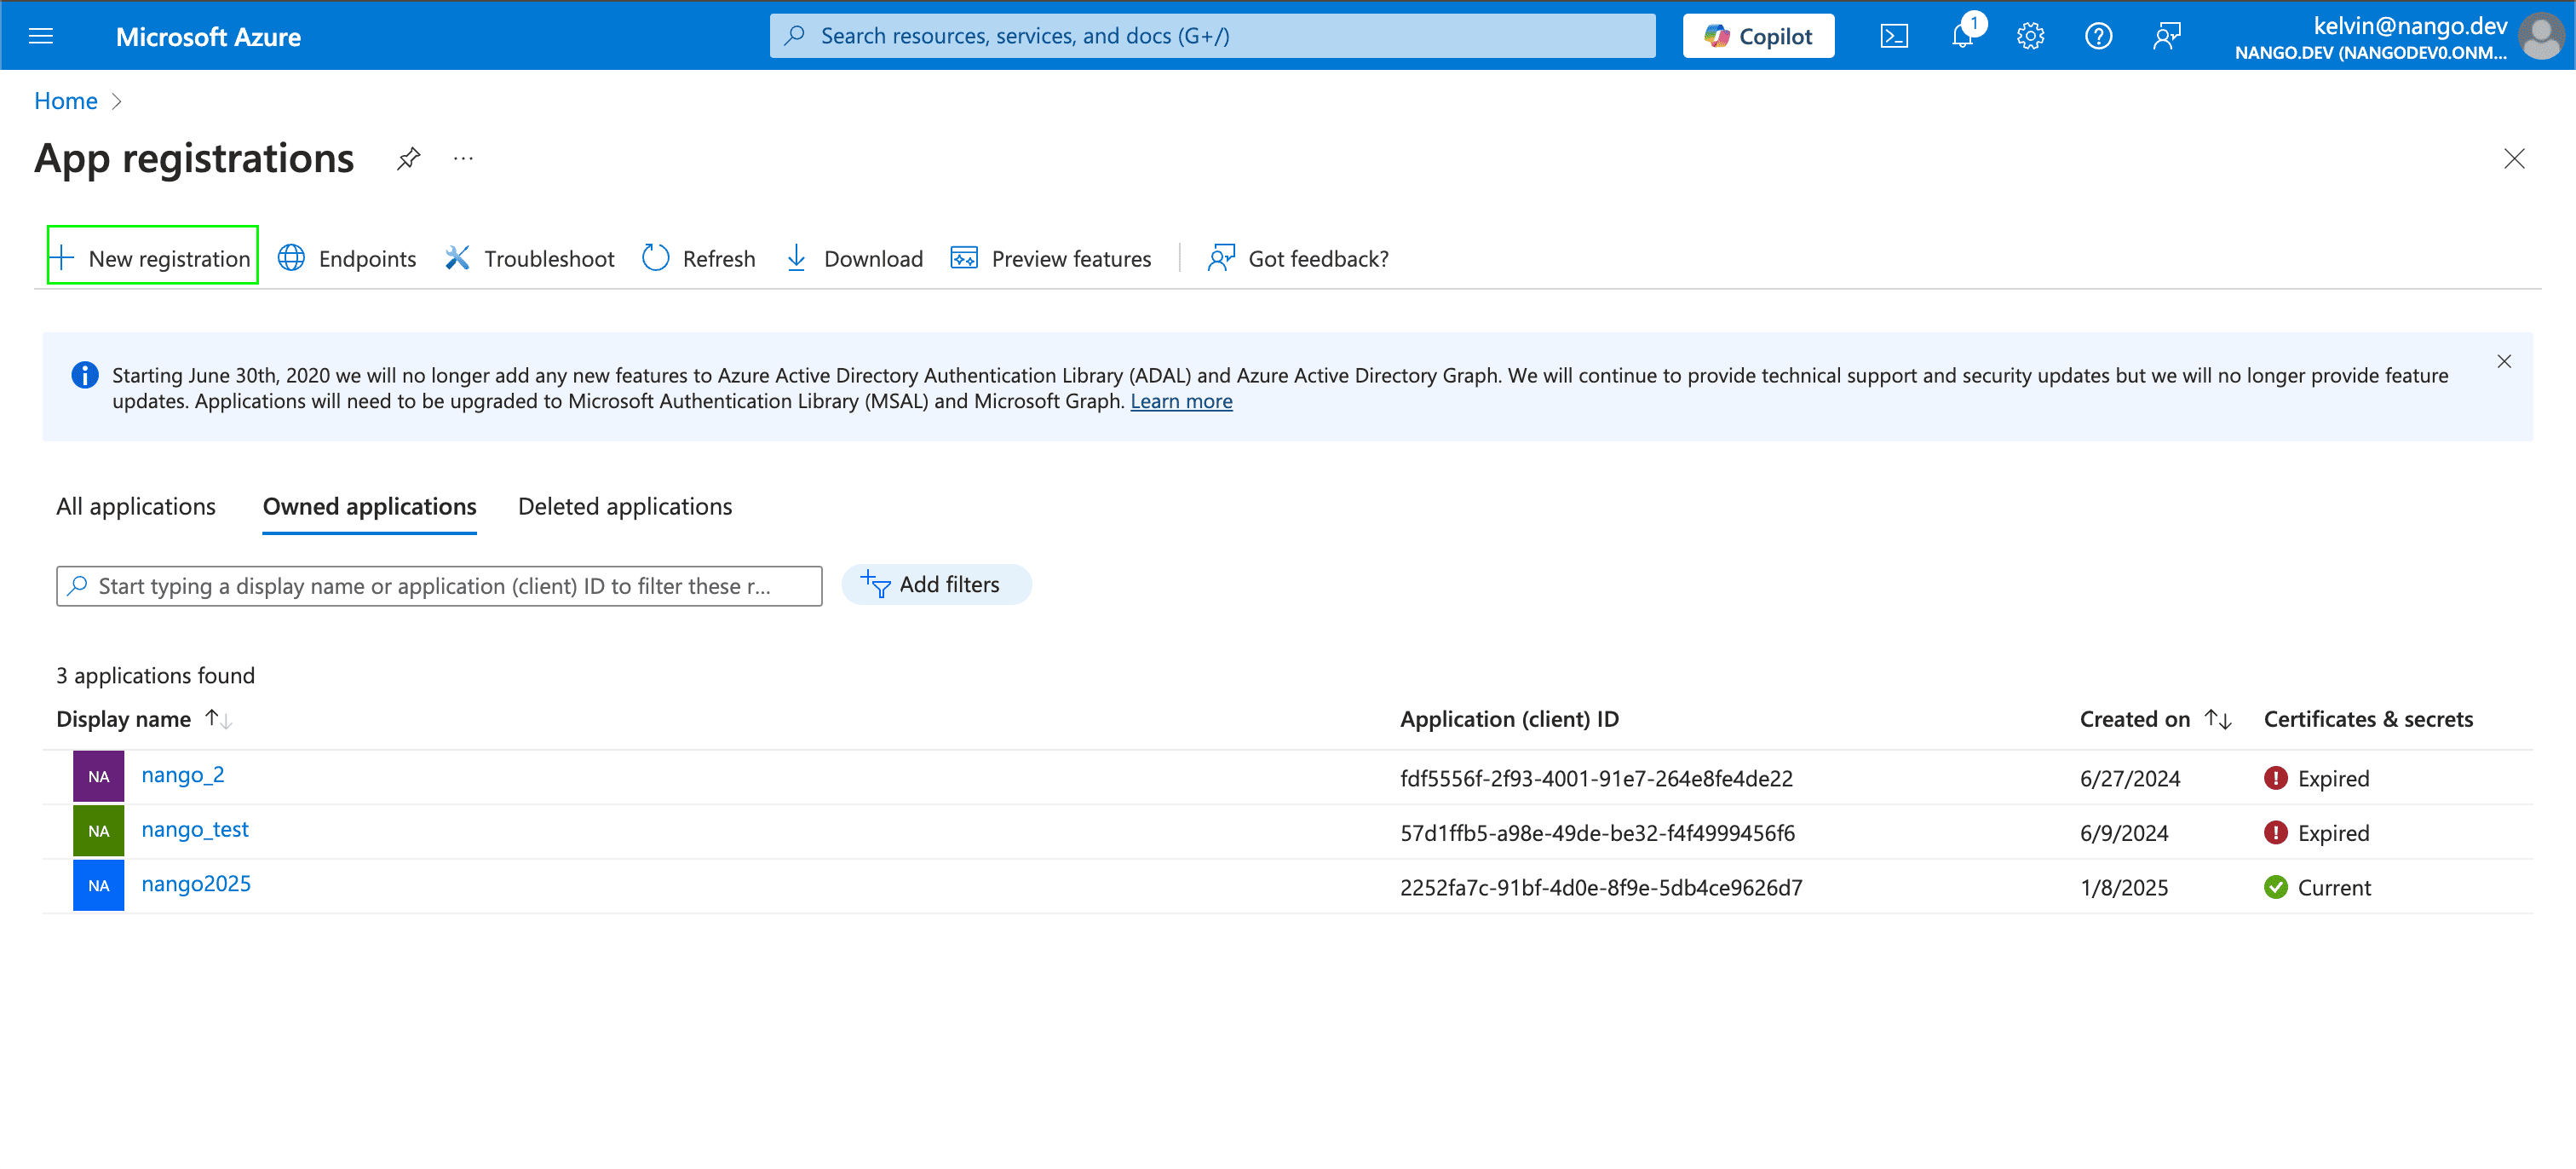
  2. Select App registrations.
  1. Select New registration.
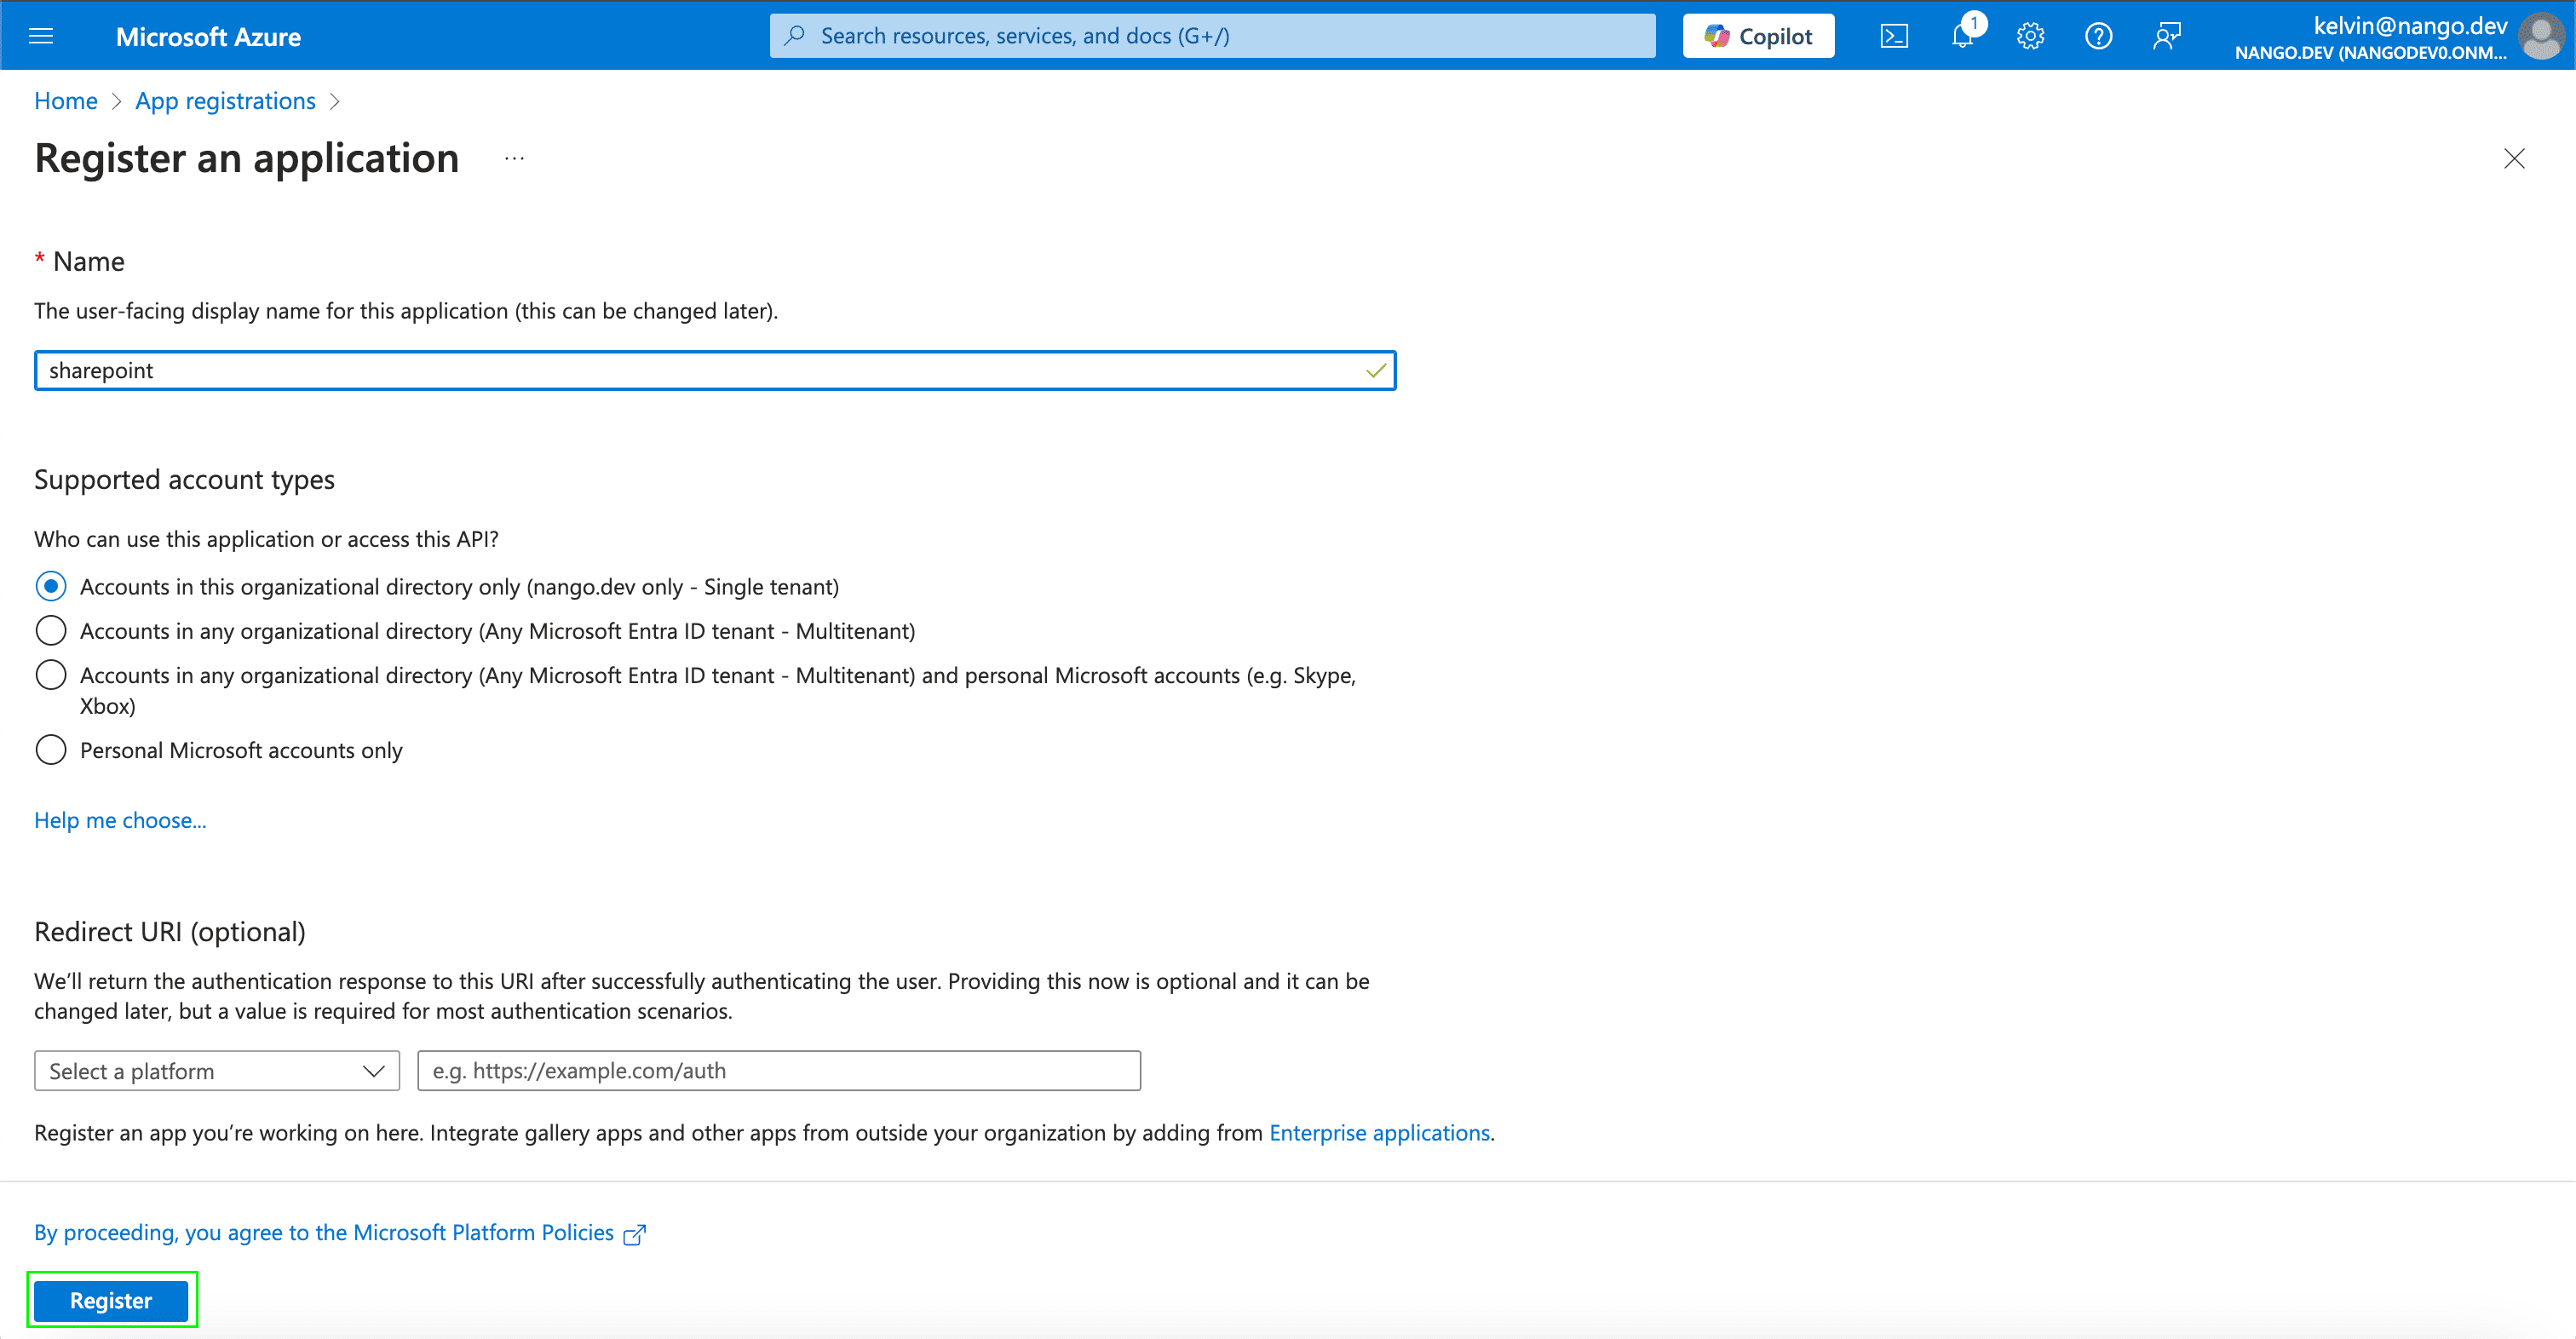
  1. In the Register an application section, enter a meaningful application name to display to users. Select who can use this application based on your environment and click Register.
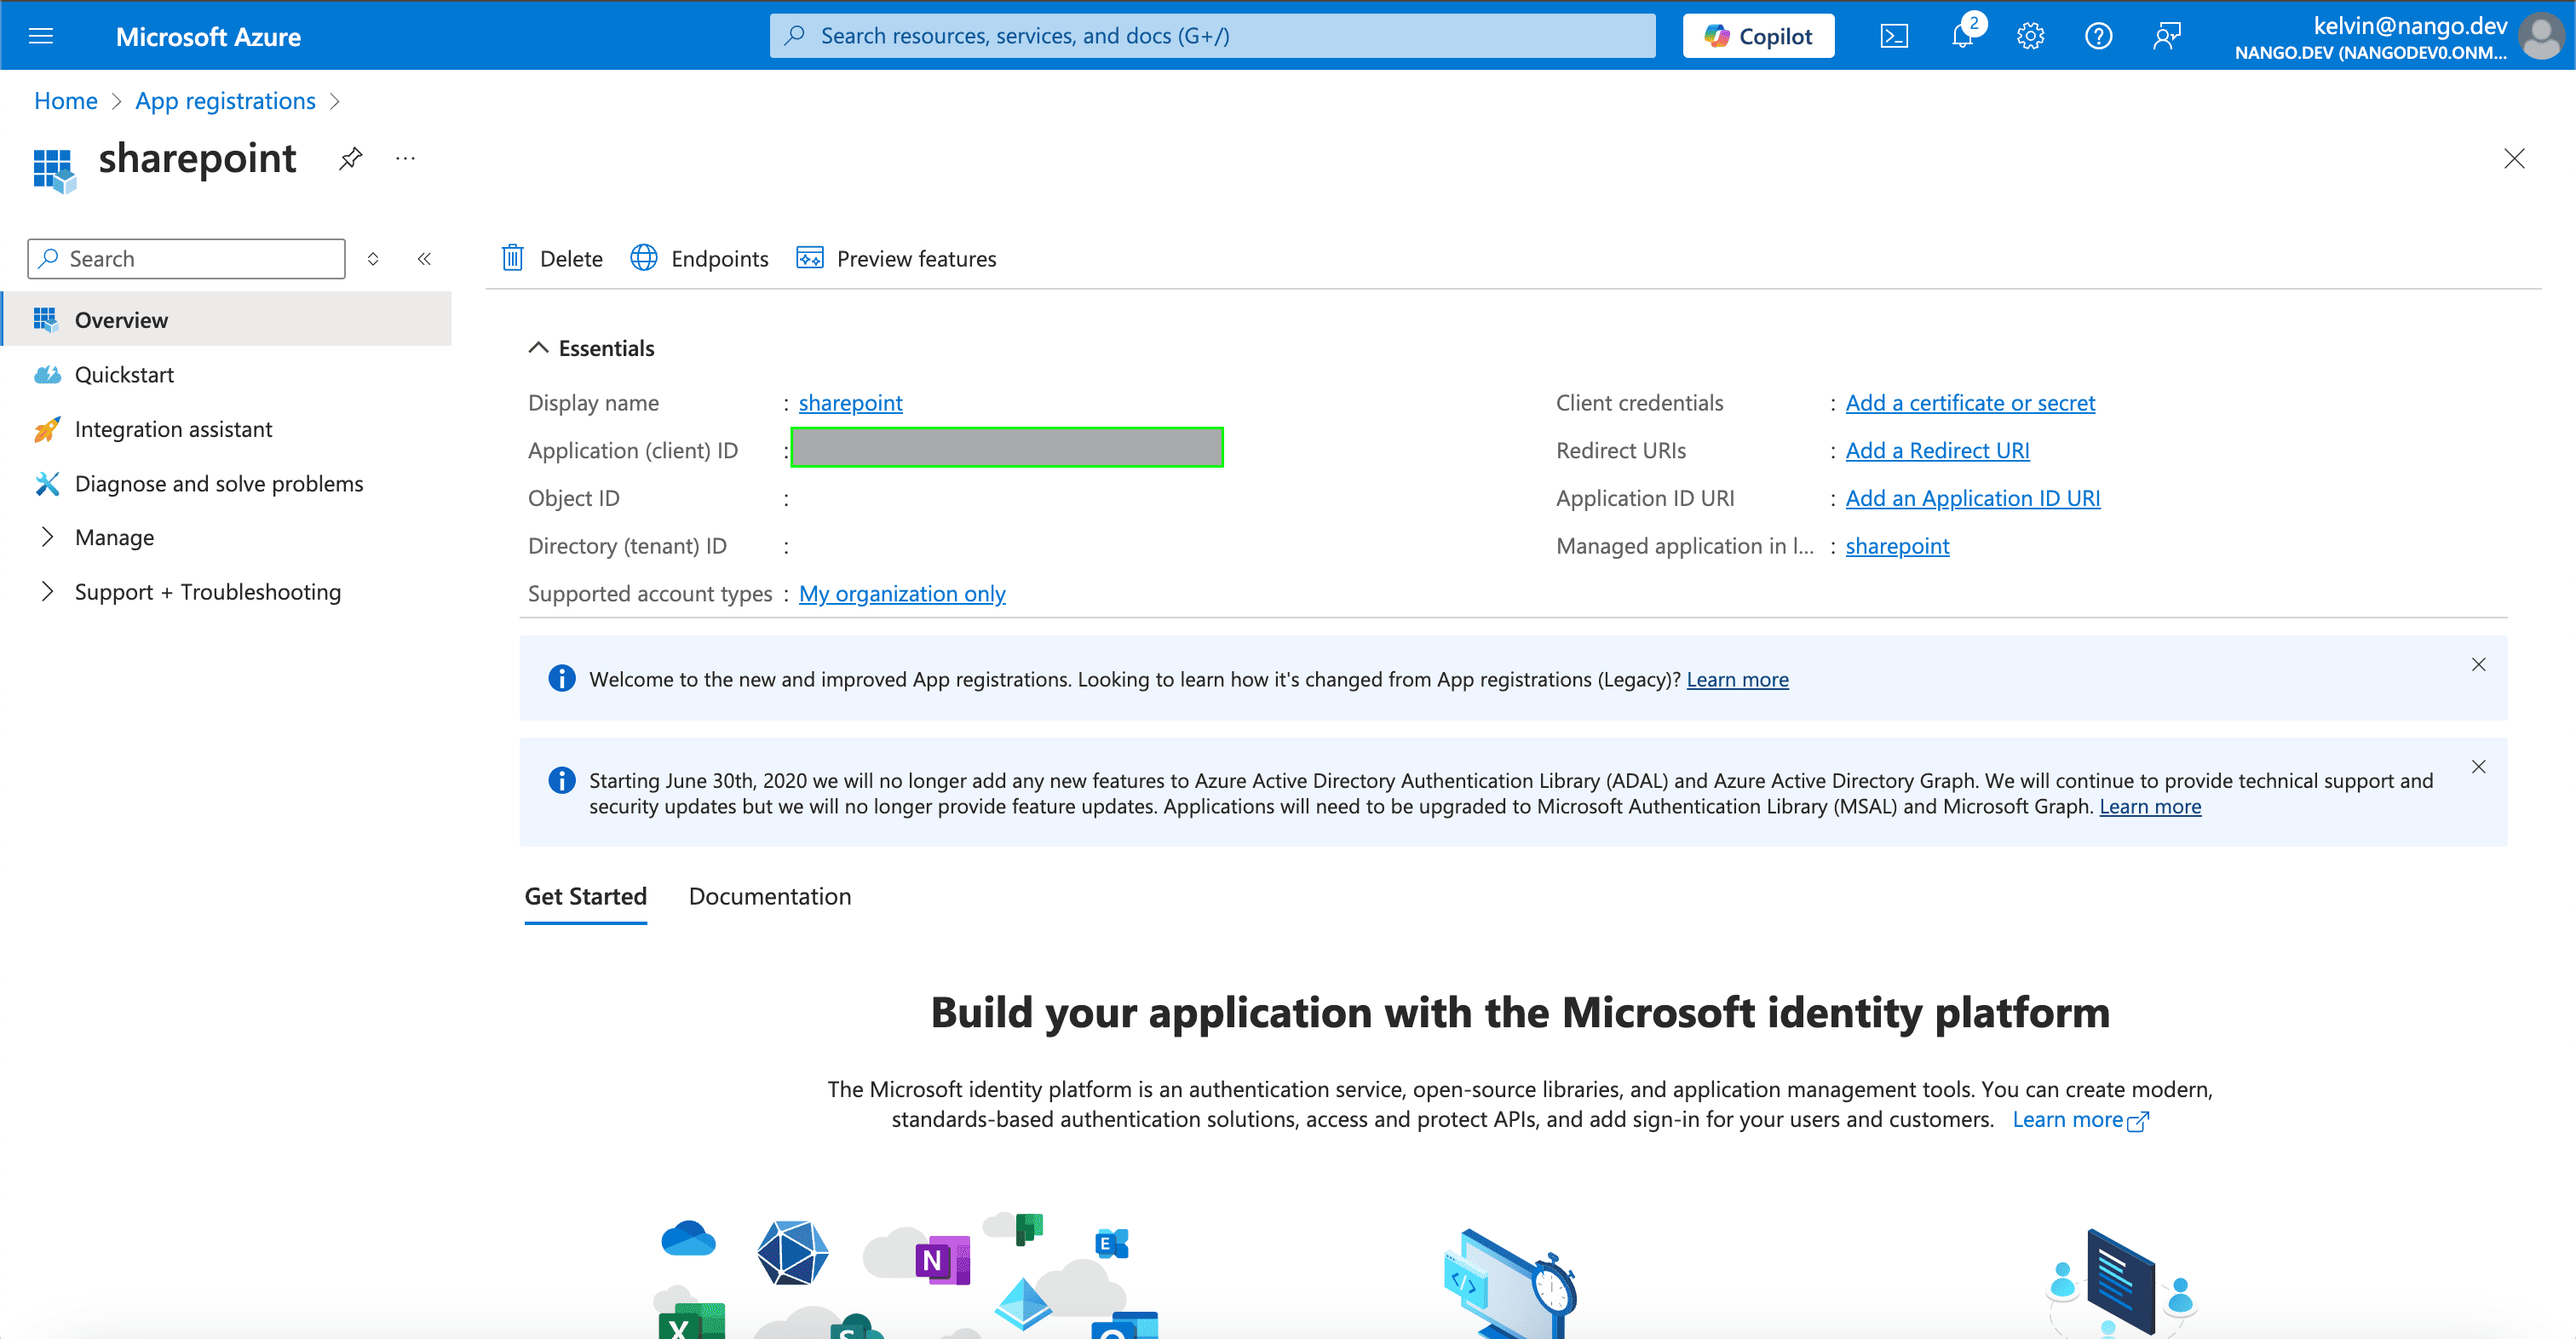
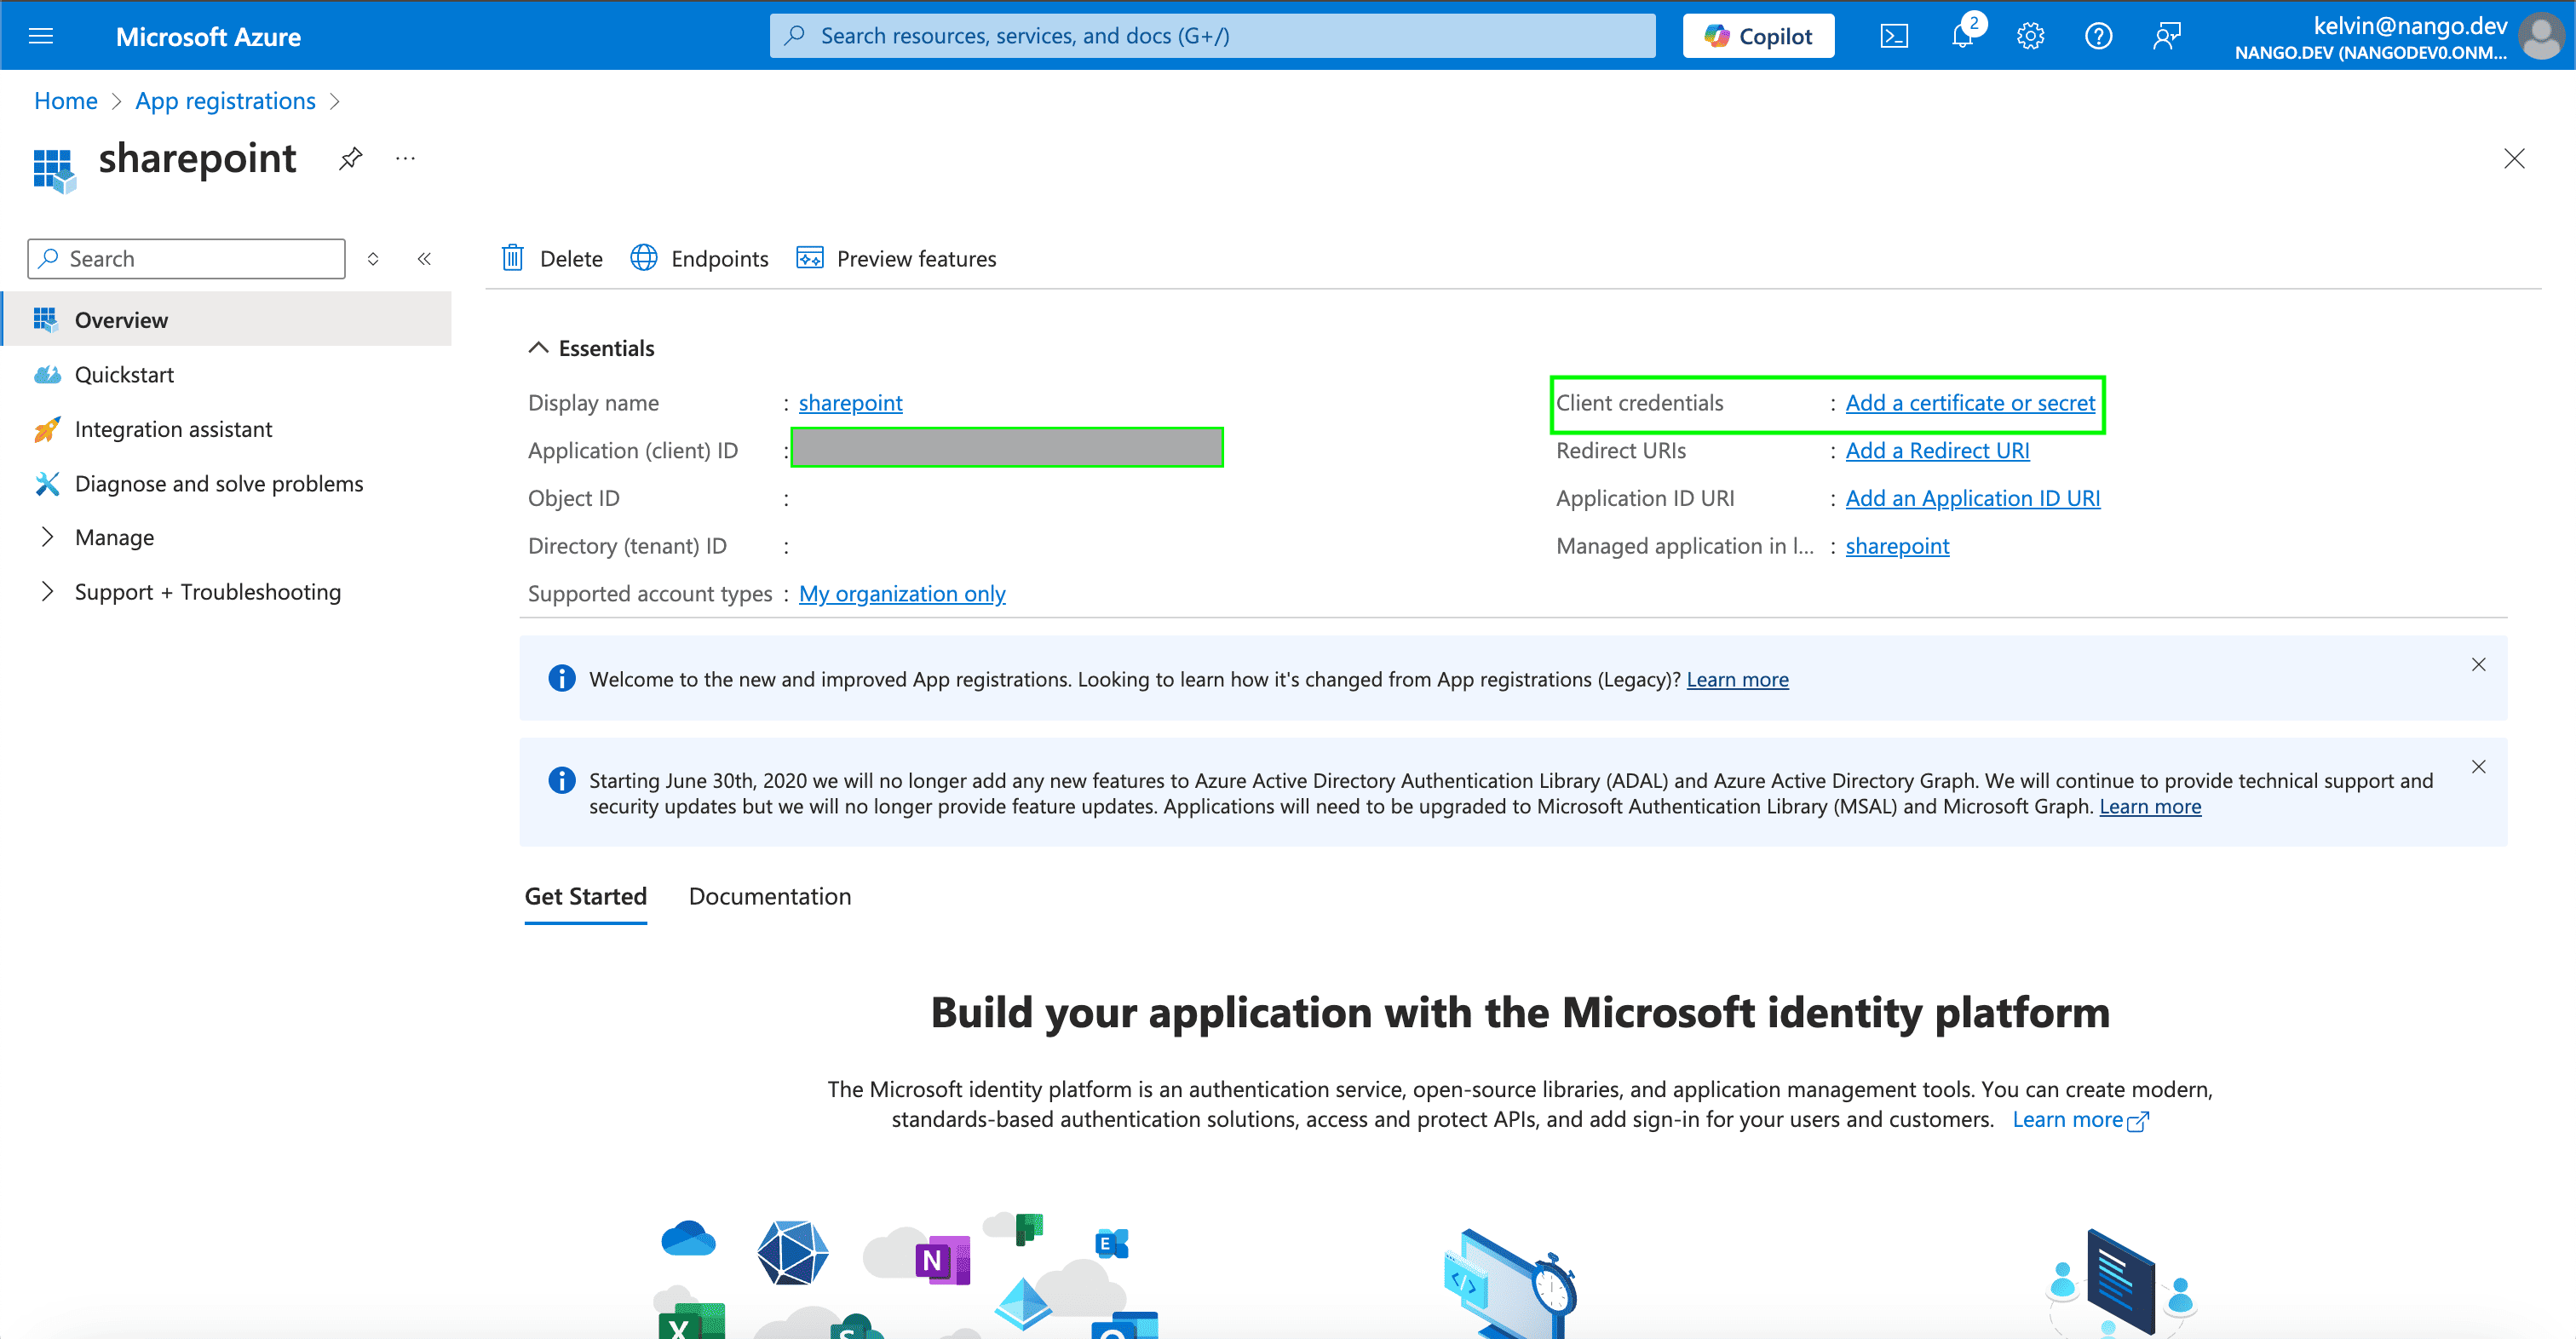
  1. Once you have registered your application, your Client ID will be displayed in the Application (client) ID field within the Essentials.

Step 4: Generating your Client Assertion

  • After successfully registering your application in Step 3: Finding your Client ID, the next step is to generate a client assertion for the registered application. To do this, you must first create a private key and a certificate for your application. This guide will walk you through generating these locally.
  1. Run the following command to generate a 2048-bit RSA private key:
openssl genpkey -algorithm RSA -out private.key -pkeyopt rsa_keygen_bits:2048
  1. Run the following to create a CSR based on the private key generated above:
openssl req -new -key private.key -out csr.csr
  • You will be prompted to enter information such as country, organization, and Common Name (CN). Make sure that the CN matches the identity of your application.
  1. Use the CSR to create a self-signed certificate:
openssl req -x509 -key private.key -in csr.csr -out certificate.crt -days 3650
  • This will generate a .crt certificate that is valid for 10 years.
  1. To convert the certificate and private key to PEM format:
openssl pkcs12 -export -out certificate.pem -inkey private.key -in certificate.crt
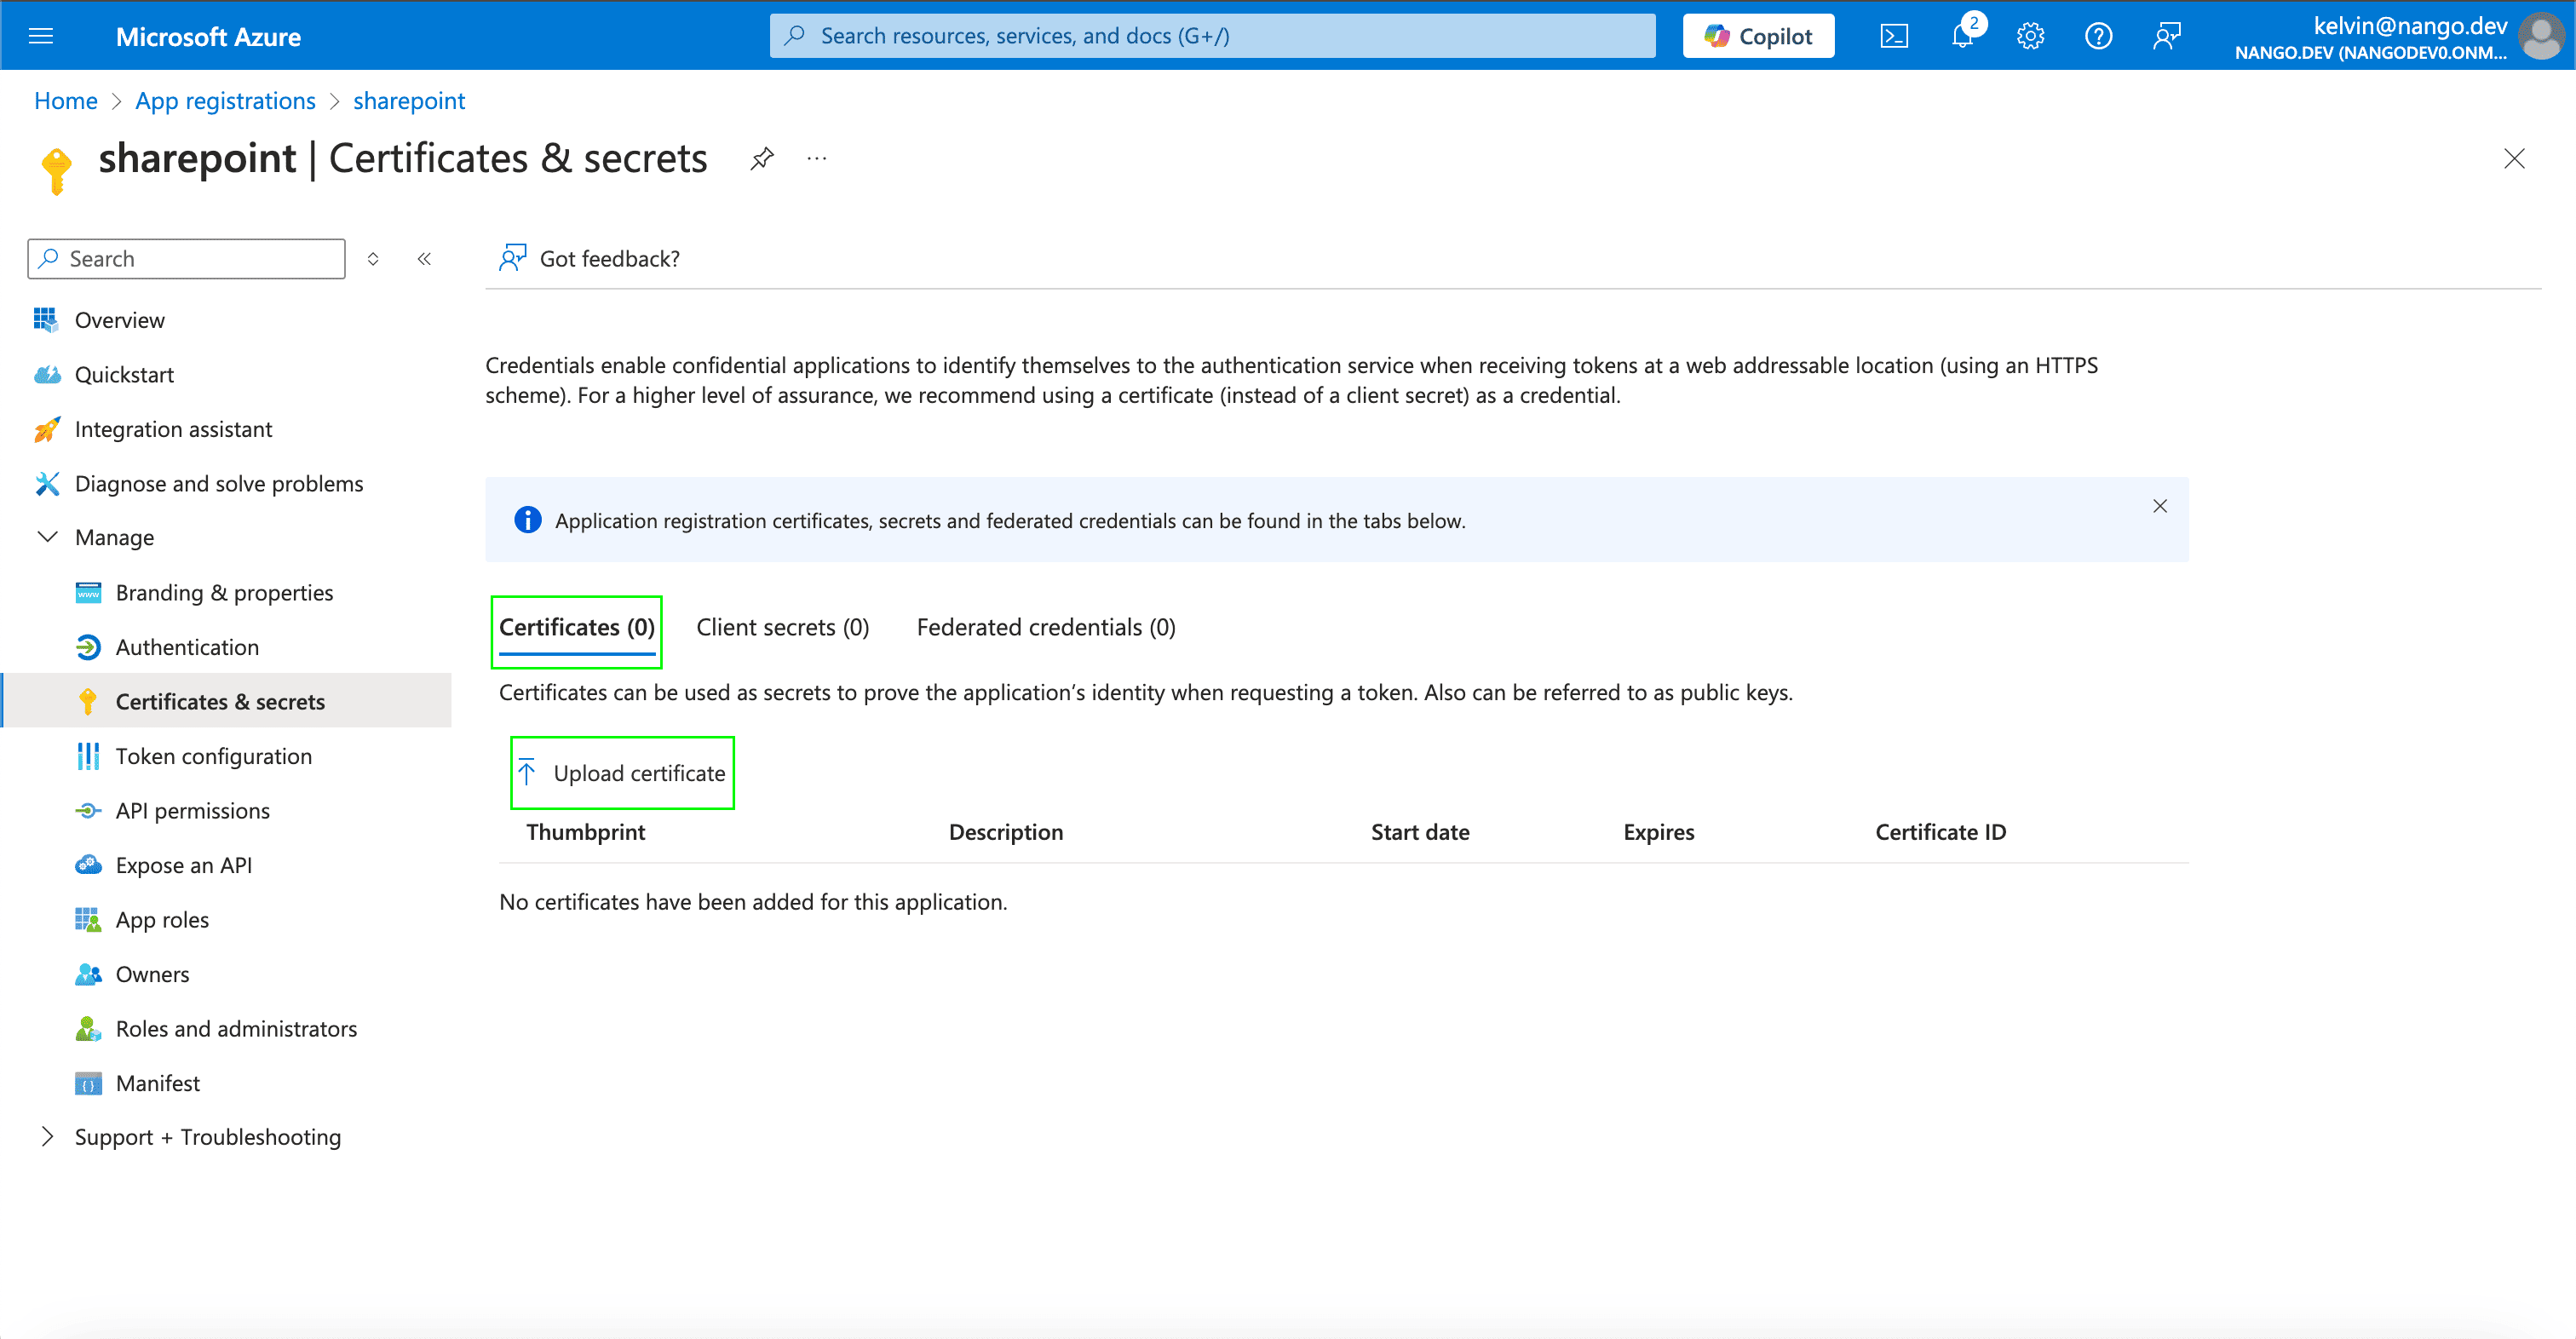
  1. Once the above certificate is generated, navigate to App registrations and select your above registered application.
  2. Under the Client credentials section, click Add a certificate or Secret.
  1. Choose the .crt certificate file you generated above and upload it.
  • After uploading, the thumbprint and certificate details will appear in the portal.
  1. Now that your certificate is registered with Microsoft, you need to generate a JWT Client Assertion using the private key and the certificate’s thumbprint. You can use the code from the following script to generate the JWT.
import { readFileSync } from 'fs';
import { execSync } from 'child_process';
import jwt from 'jsonwebtoken';
import readlineSync from 'readline-sync';

const getUserInput = () => {
  const tenantId = readlineSync.question('Please enter your tenant ID: ');
  const clientId = readlineSync.question('Please enter your client ID: ');
  return { tenantId, clientId };
};

const readPrivateKey = (path) => {
  try {
    return readFileSync(path, 'utf8');
  } catch (error) {
    console.error(`Error reading private key from ${path}:`, error);
    throw error;
  }
};

const getX5tThumbprint = (certPath) => {
  const command = `echo $(openssl x509 -in ${certPath} -fingerprint -noout) | sed 's/SHA1 Fingerprint=//g' | sed 's/://g' | xxd -r -ps | base64`;
  
  try {
    const thumbprint = execSync(command).toString().trim();
    return thumbprint;
  } catch (error) {
    console.error(`Error calculating x5t thumbprint for certificate ${certPath}:`, error);
    throw error;
  }
};

const TEN_YEARS_MS = 10 * 365 * 24 * 60 * 60 * 1000;

// Microsoft Entra ID doesn't place restrictions on the exp time currently.
const createJwtClaims = (tenantId, clientId, expirationInSeconds = TEN_YEARS_MS) => ({
  aud: `https://login.microsoftonline.com/${tenantId}/oauth2/token`,
  iss: clientId,
  sub: clientId,
  nbf: Math.floor(Date.now() / 1000),
  exp: Math.floor(Date.now() / 1000) + expirationInSeconds,
  jti: generateUniqueJti(),
});

const generateUniqueJti = () => `jti-${Math.random().toString(36).substr(2, 9)}`;

const createJwt = (claims, privateKey, x5tThumbprint) => {
  const header = {
    alg: "PS256",
    typ: "JWT",
    x5t: x5tThumbprint,
  };

  try {
    return jwt.sign(claims, privateKey, {
      algorithm: 'RS256',
      header: header,
    });
  } catch (error) {
    console.error('Error signing JWT:', error);
    throw error;
  }
};

const generateJwtAssertion = () => {
  const { tenantId, clientId } = getUserInput();
  const certPath = 'certificate.pem';
  const privateKeyPath = 'private.key';

  const privateKey = readPrivateKey(privateKeyPath);
  const x5tThumbprint = getX5tThumbprint(certPath);

  console.log('Calculated x5t Thumbprint:', x5tThumbprint);

  const claims = createJwtClaims(tenantId, clientId);

  const token = createJwt(claims, privateKey, x5tThumbprint);

  console.log('JWT Assertion:', token);
};

generateJwtAssertion();


  • Run the script above in the same directory where your certificates were generated. It will prompt you for your Client ID, Tenant ID, and the Password set during the certificate generation process. A JWT Client Assertion will then be generated.

Note: The generated Client Assertion is valid for ten years. After this period, you will need to regenerate the assertion and reauthenticate.

Once you have your credentials:

  1. Open the form where you need to authenticate with SharePoint Online (v1).
  2. Enter the Tenant ID, Tenant Name, Client ID and Client Assertion in their designated fields.
  3. Submit the form, and you should be successfully authenticated.

You are now connected to SharePoint Online (v1).