Overview
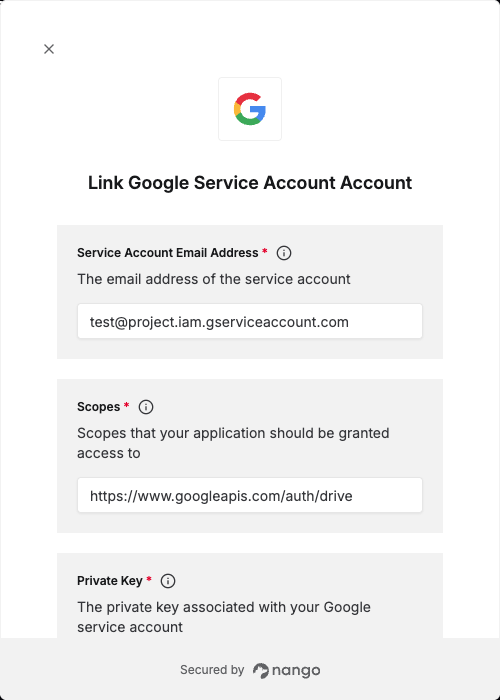
To authenticate with Google Service Account, you need:- Service Account Email Address – The unique email assigned to your service account.
- Private Key – The private key generated when creating a service account key.
- Scopes – A space-separated list of Google API scopes that your application should have access to.
- Delegated Access Email Address (optional) – The user’s email address that the service account should impersonate when domain-wide delegation is enabled.
Prerequisites
- If you don’t already have one, sign up for a Google Cloud account.
Instructions
Step 1: Create a Service Account
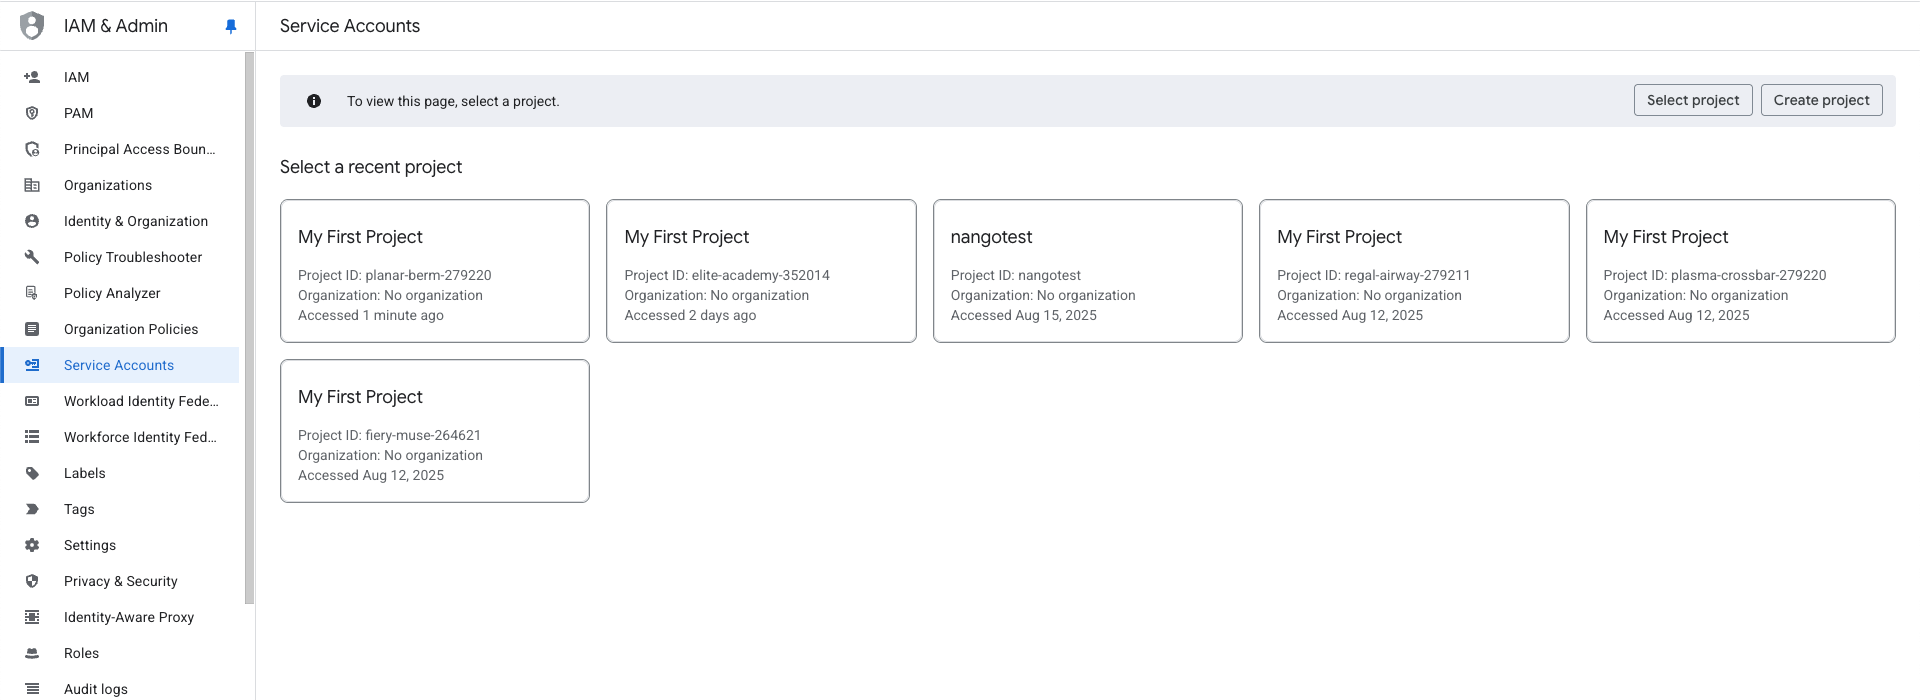
- Go to the Service Accounts page.
- Select an existing project, or create a new one.
- Click + Create Service Account.
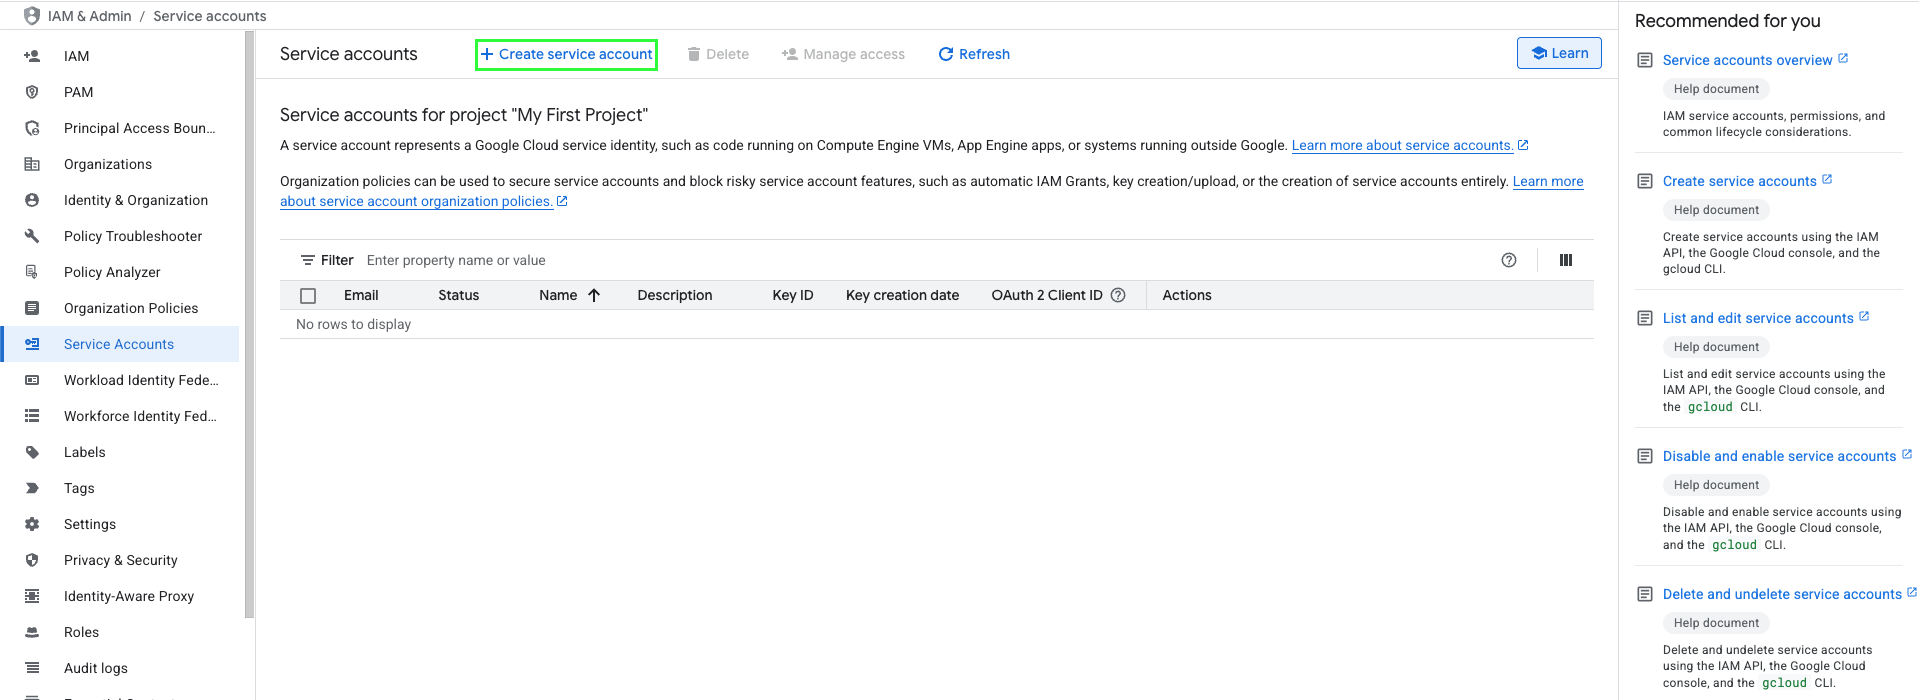
- Fill in all the required information, then click Create and continue.
- (Optional) Assign Permissions and Principals with access.
- Click Done.
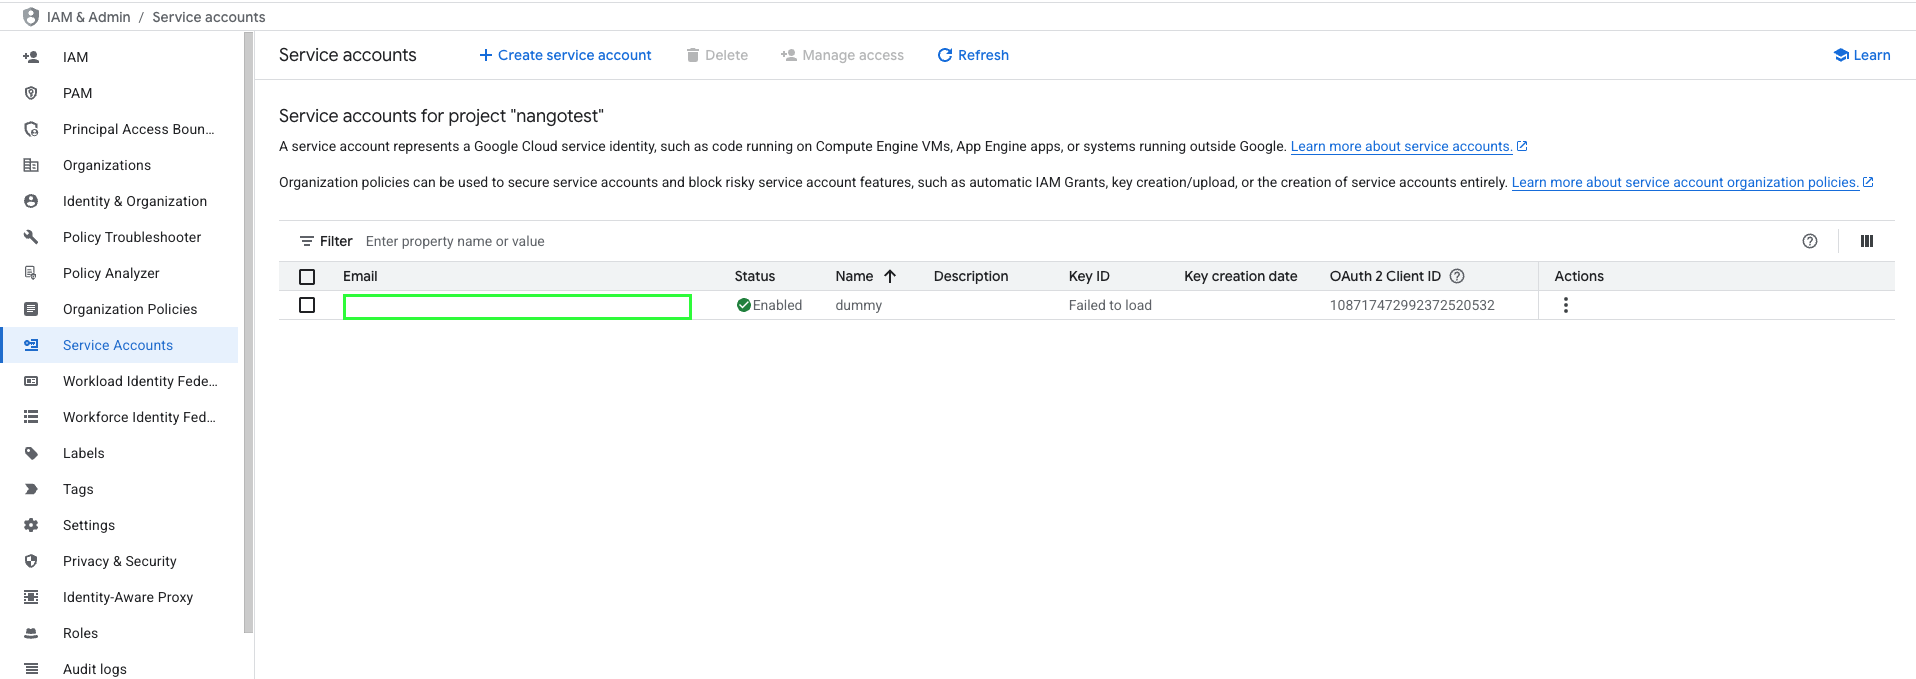
- From your Service accounts list, you can obtain your Service Account Email Address in the Email column.
Step 2: Generate a Service Account Key
- From the Service accounts page, click the Email address of the service account you created.
- Navigate to the Keys tab.
- Click Add key → Create new key.
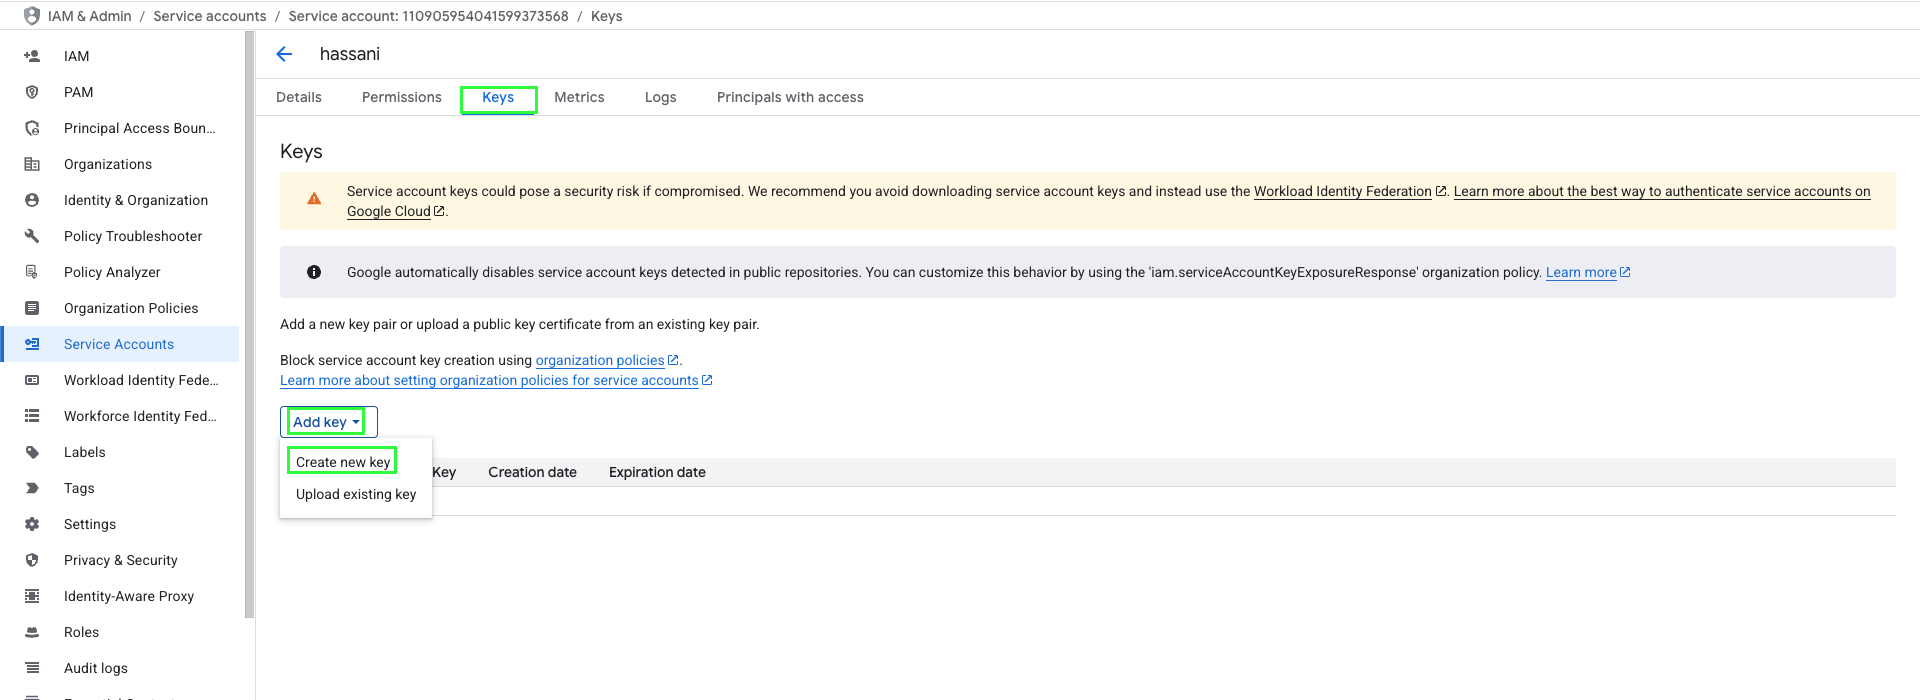
- Select JSON format and click Create.
- A
.jsonkey file will be downloaded to your machine. Store it securely — this file contains your Private Key.
⚠️ Google does not keep a copy of the private key. If you lose it, you’ll need to generate a new one.
Step 3: Delegate Domain-Wide Authority (optional for Google Workspace)
If your application needs to act on behalf of users in your domain (e.g. read all users’ calendars), you must enable domain-wide delegation:- From your Google Workspace Admin console, go to Main menu > Security > Access and data control > API Controls.
- Under Domain-wide delegation, click Manage Domain Wide Delegation.
- Click Add new.
- Enter the Client ID of your service account (from the Service Accounts page).
- In OAuth scopes, enter the list of scopes you want to grant, for example: if your application needs domain-wide full access to the Google Drive API and the Google Calendar API, enter:
https://www.googleapis.com/auth/drive, https://www.googleapis.com/auth/calendar. - Click Authorize.
Your application now has the authority to make API calls on behalf of users in your Workspace domain (
impersonating them). You can specify the user to impersonate explicitly in the Delegated Access Email Address field. Step 4: Finding your application’s scopes
Ensure you enable the API library you want access to, then you can find a list of scopes at OAuth 2.0 Scopes for Google APIs. This should be a space-separated list.Step 5: Enter credentials in the Connect UI
Once you have all the required credentials:- Open the form to authenticate with Google Service Account.
- Enter your credentials in their respective fields.
- Submit the form, and you should be successfully authenticated.