Overview
To authenticate with Dayforce, you will need:- Company ID - Your unique Dayforce company identifier.
- Username - Your Dayforce account username.
- Password - Your Dayforce account password.
Prerequisites:
- You must have a Dayforce account with administrative access.
Important Note: Having a live integration will hide the option to edit member details manually. This is because the integration automatically becomes a Provision Master (main expected source of employee data) and other member updating methods become unavailable to prevent conflicting data sources. If you need to do a manual edit, please disable the integration by going to Integrations > Tools > Edit > turn the toggle OFF. Once you finish your edits, turn it back ON from the same toggle.
Instructions:
Step 1: Finding your Company ID
- Once logged in, look at the URL in your browser’s address bar.
- For example if the url is
https://test.dayforcehcm.com/acme, the Company ID would beacme.
Step 2: Configure your Dayforce user
- Log in to your Dayforce account.
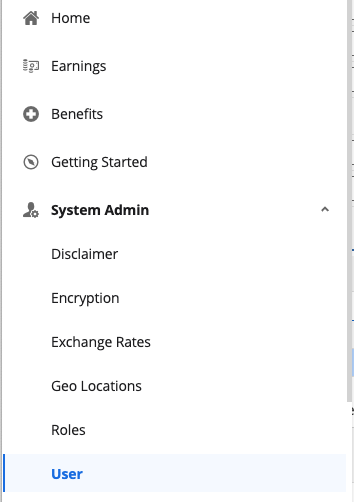
- Navigate to System Admin > User and find your user account.
- Important: Click on your user and select the “Is Default” checkbox for the role you will be configuring for this integration. This step is crucial for the integration to work properly.
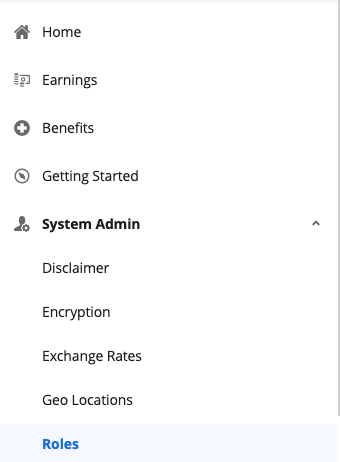
- From the hamburger menu in the top left, click System Admin > Roles.
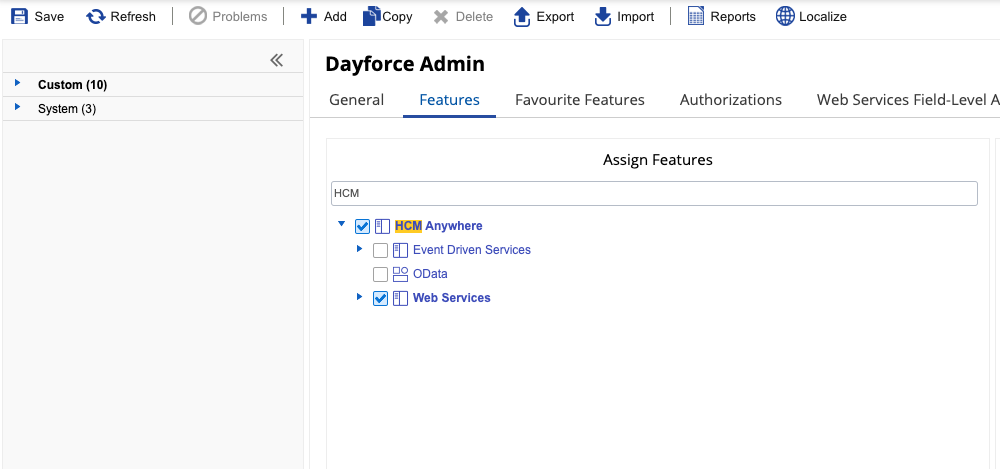
- Navigate to Features and ensure HCM Anywhere and Web Services are checked, with Read Data enabled at a minimum.
- Navigate to Web Services Field-Level Access.
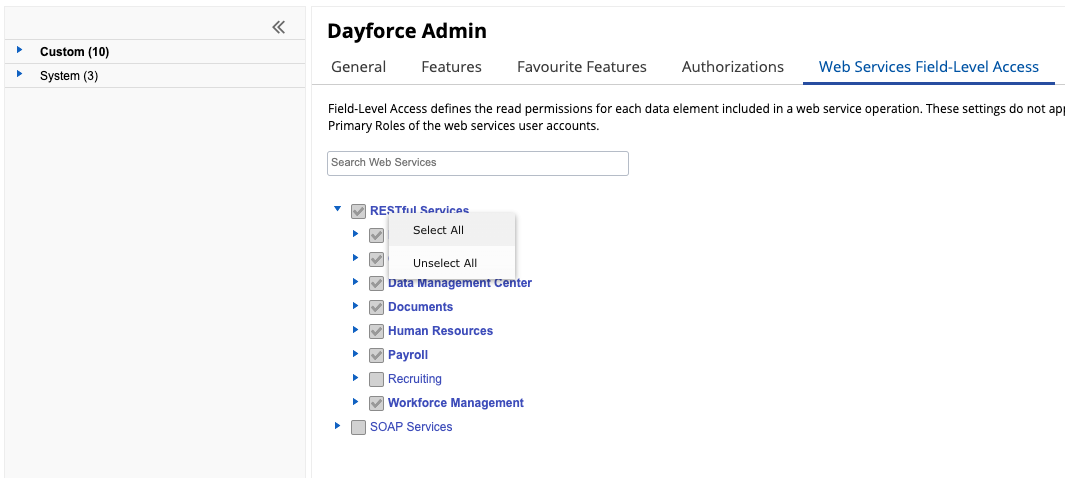
- Depending on your use case, click on the words (not the empty check box) and click Select All.
- Navigate to the Human Resources section of RESTful Services.
- Expand Employee, and scroll to the very last one to ensure XRefCode is enabled.
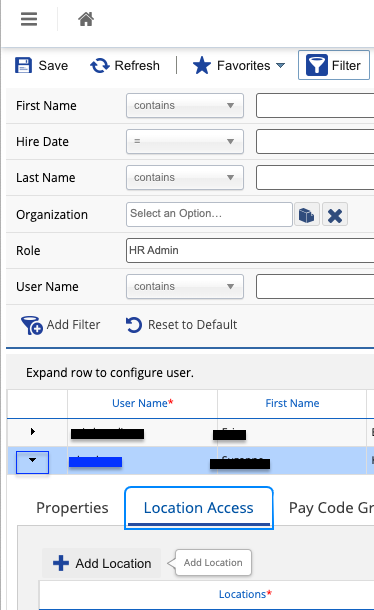
- Navigate to System Admin > User. Please note, the user authenticating will need “Can See Self” enabled.
- Expand the User by clicking the small down arrow.
- Click on Location Access, then + Add Location, and add the Company Level Location.
- Optional: If you need support for writes functionality (i.e. POST /Time-Off), navigate to System Admin > Roles > Features and ensure under HCM Anywhere and Web Services, Patch/Post Employee Time Off is enabled.
Step 3: Enter credentials in the Connect UI
Once you have your Company ID, Username, and Password:- Open the form where you need to authenticate with Dayforce.
- Enter your Company ID, Username, and Password in the designated fields.
- Submit the form, and you should be successfully authenticated.