Overview
To authenticate with Coda.io, you will need:- API Key - A key that grants Nango permission to interact with Coda.io’s API resources and services.
Prerequisites:
- You should have a registered account with Coda.io. Create one on Coda.io’s website.
- Permission to generate an API Key.
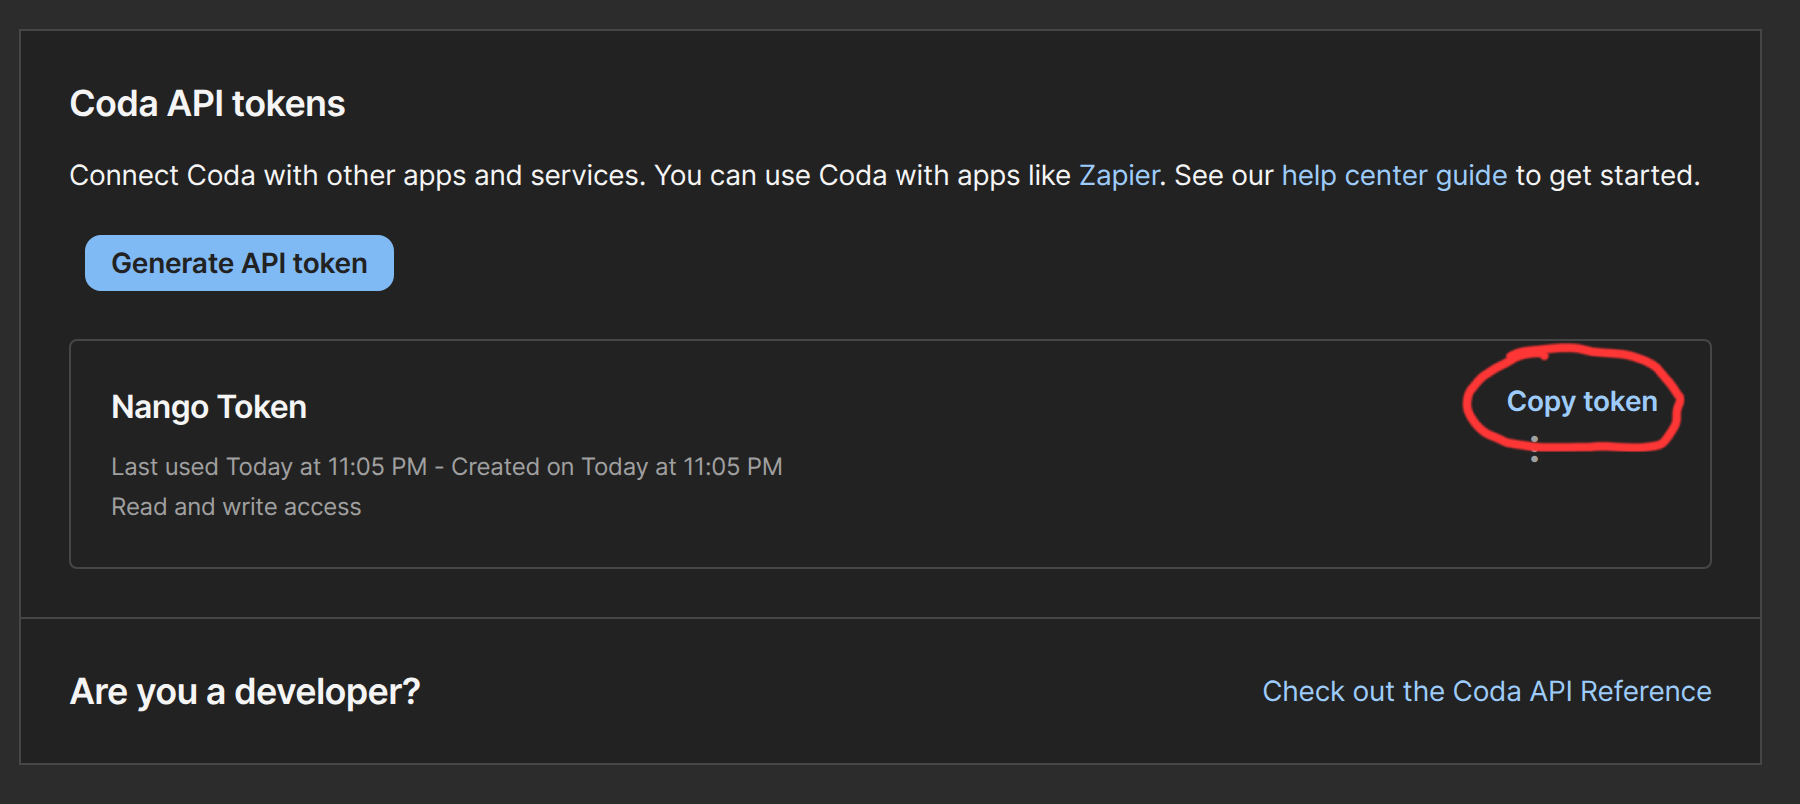
Step 1: Creating an API Key
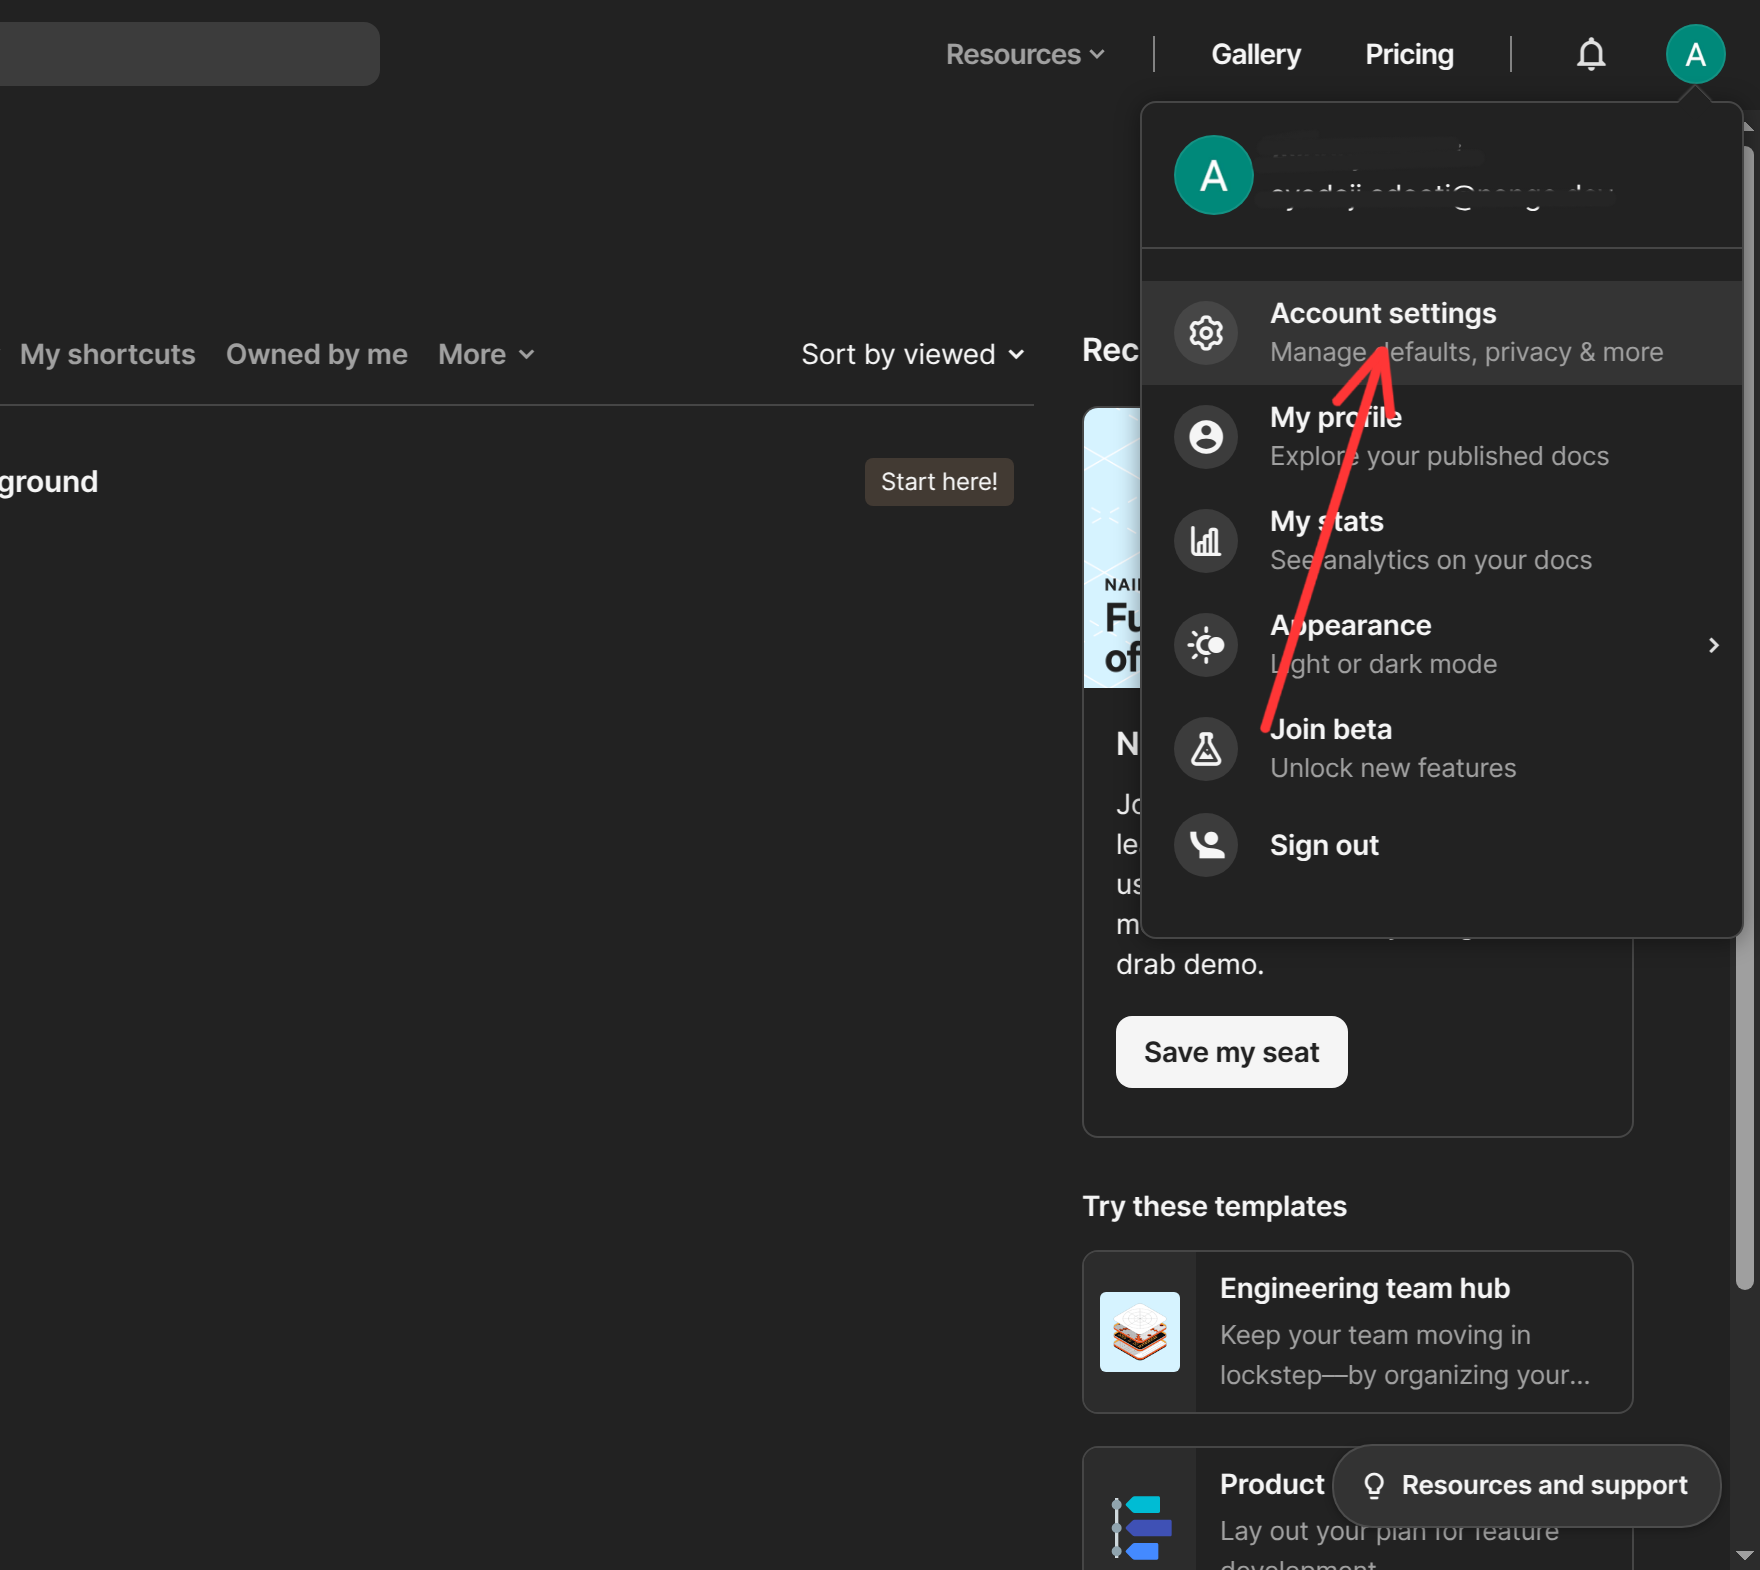
- Log in to your Coda.io dashboard.
- Click on your profile image in the top right corner of the screen.
- Select Account Settings from the dropdown menu.
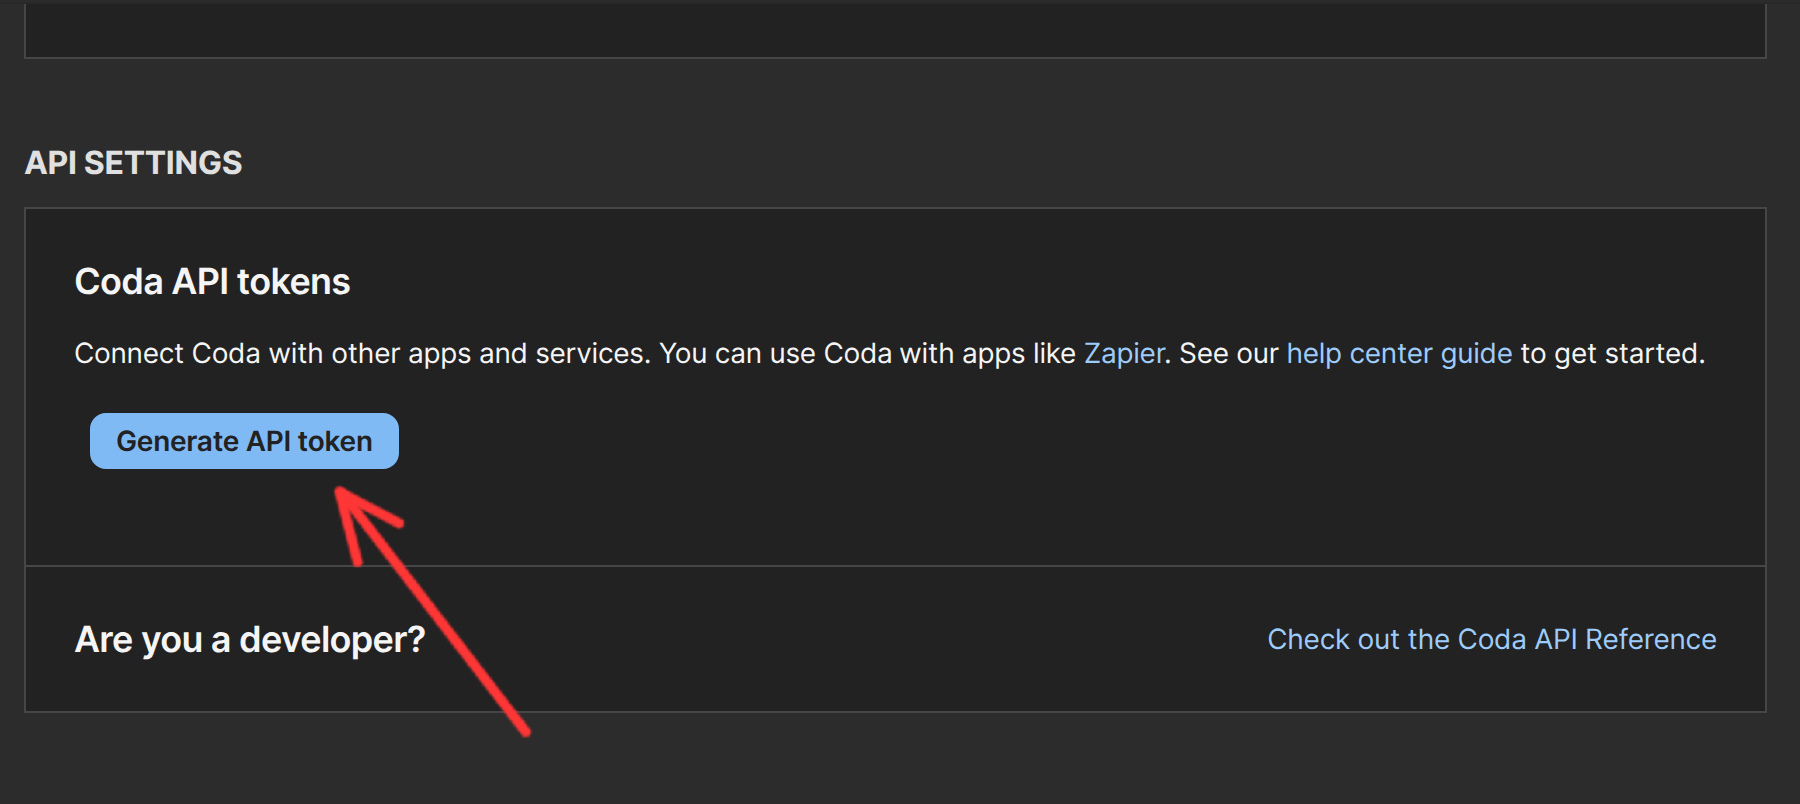
- Scroll down to the API Settings section and click on the Generate API Token button.
- Enter a name for the API Token. You can optionally Add restrictions for the API Token, though for full functionality with Nango, leaving it unrestricted is recommended. Once complete, click Generate API Token to save the token.
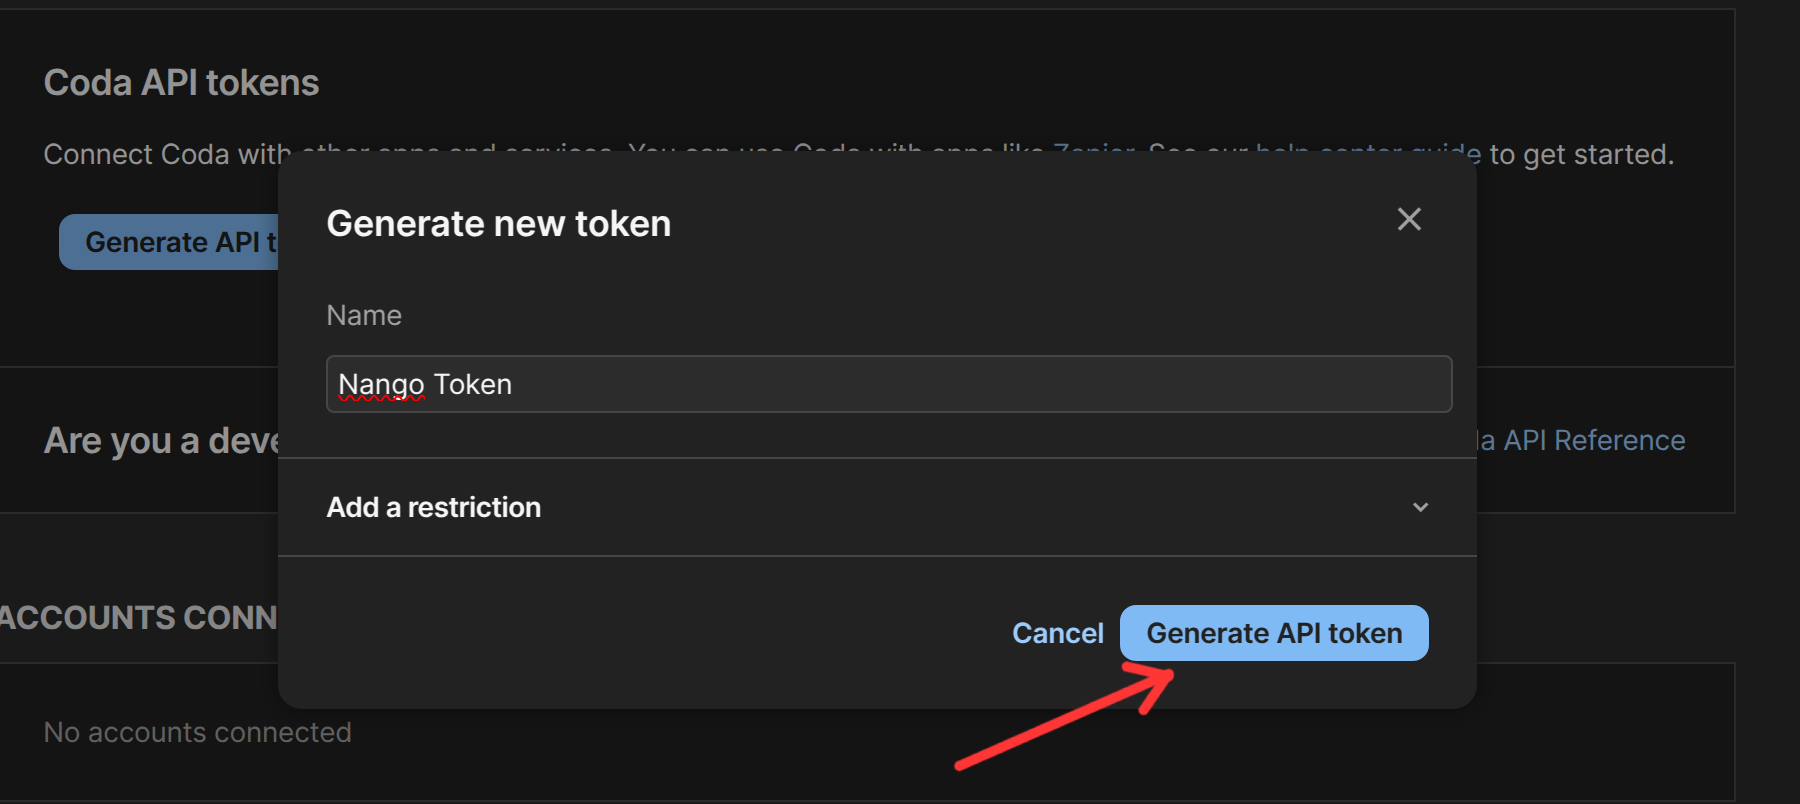
- Copy the API Token and store it securely. Once you leave the page, you won’t be able to retrieve it again.
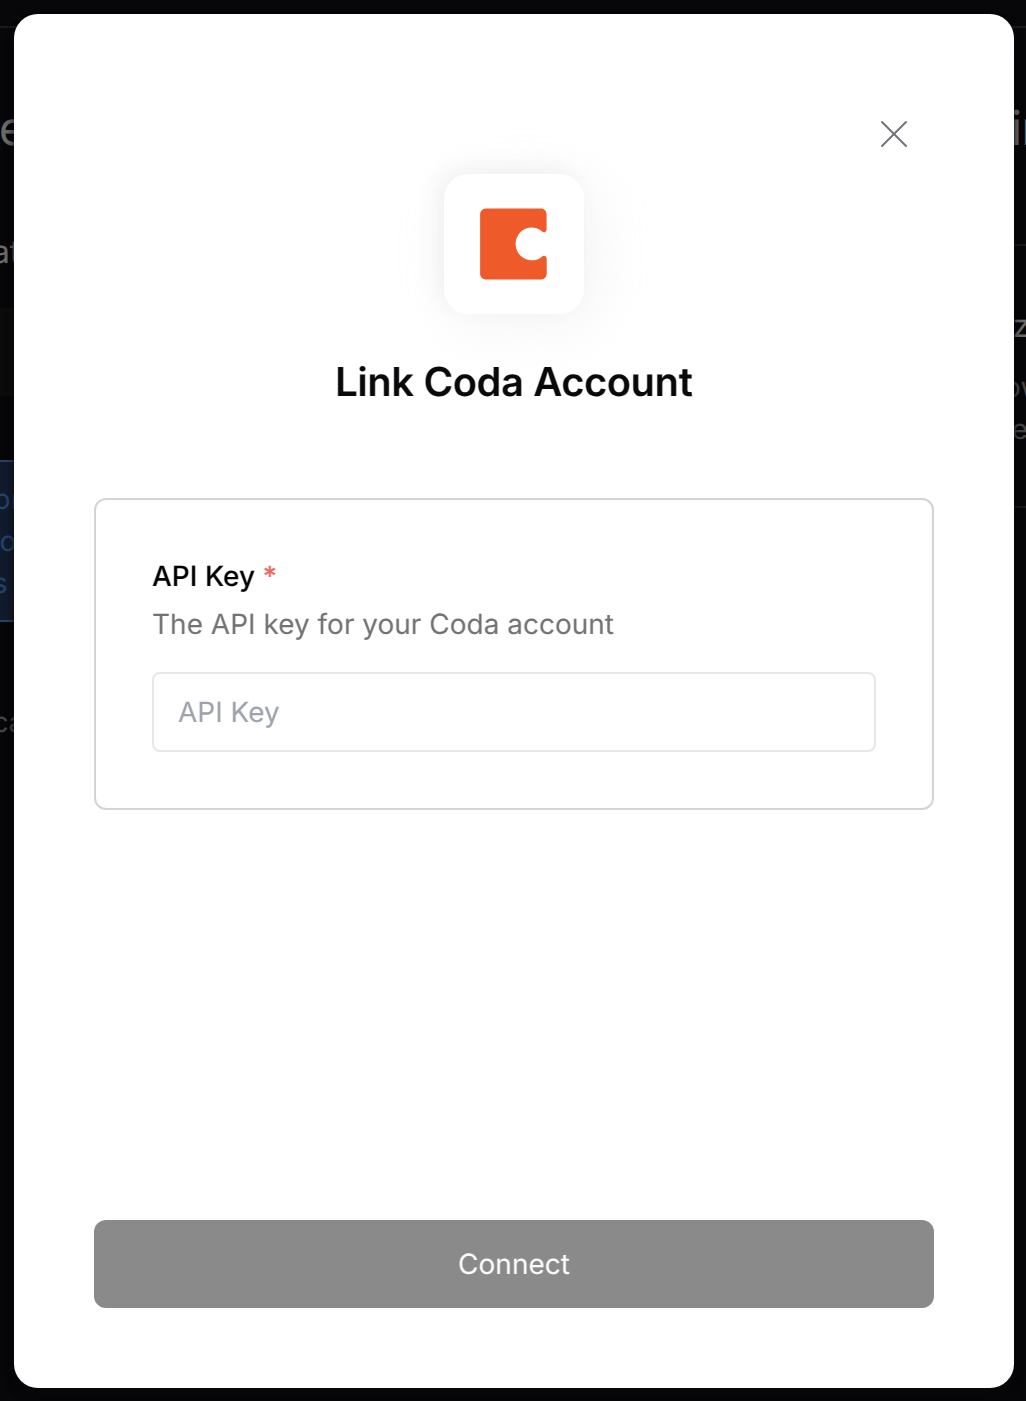
Step 2: Connect Your Coda.io Account
To authenticate using your API credentials, navigate to the Coda.io authentication form in Nango. Enter your credentials as follows:- API Key: Paste your API Key from Coda.io.