Overview
To authenticate with Chargebee, you will need:- API Key - A key that grants Nango permission to interact with Chargebee’s APIs resources and services.
- Chargebee Domain - The unique subdomain for your Chargebee account. It is usually in the form of
https://{your-site-name}.chargebee.com, where{your-site-name}is the unique identifier for your account.
Prerequisites:
- You should have a registered account with Chargebee. Create one on Chargebee Getting Started page.
- Permission to generate an API Key.
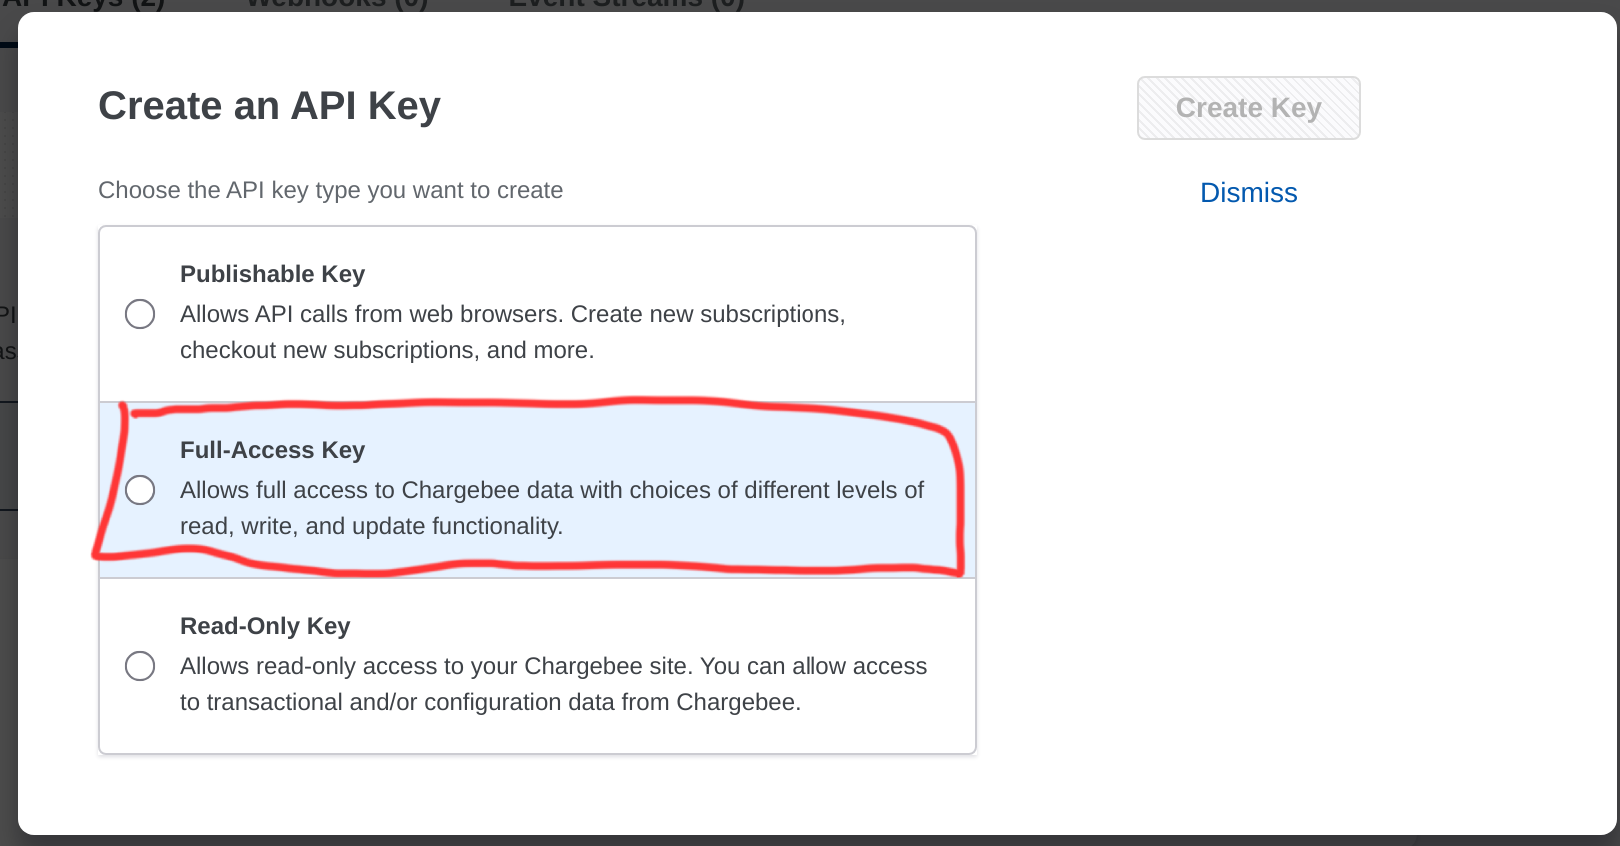
Step 1: Creating an API key
- Once logged in to your Chargebee dashboard, click on the Settings option from the left sidebar.
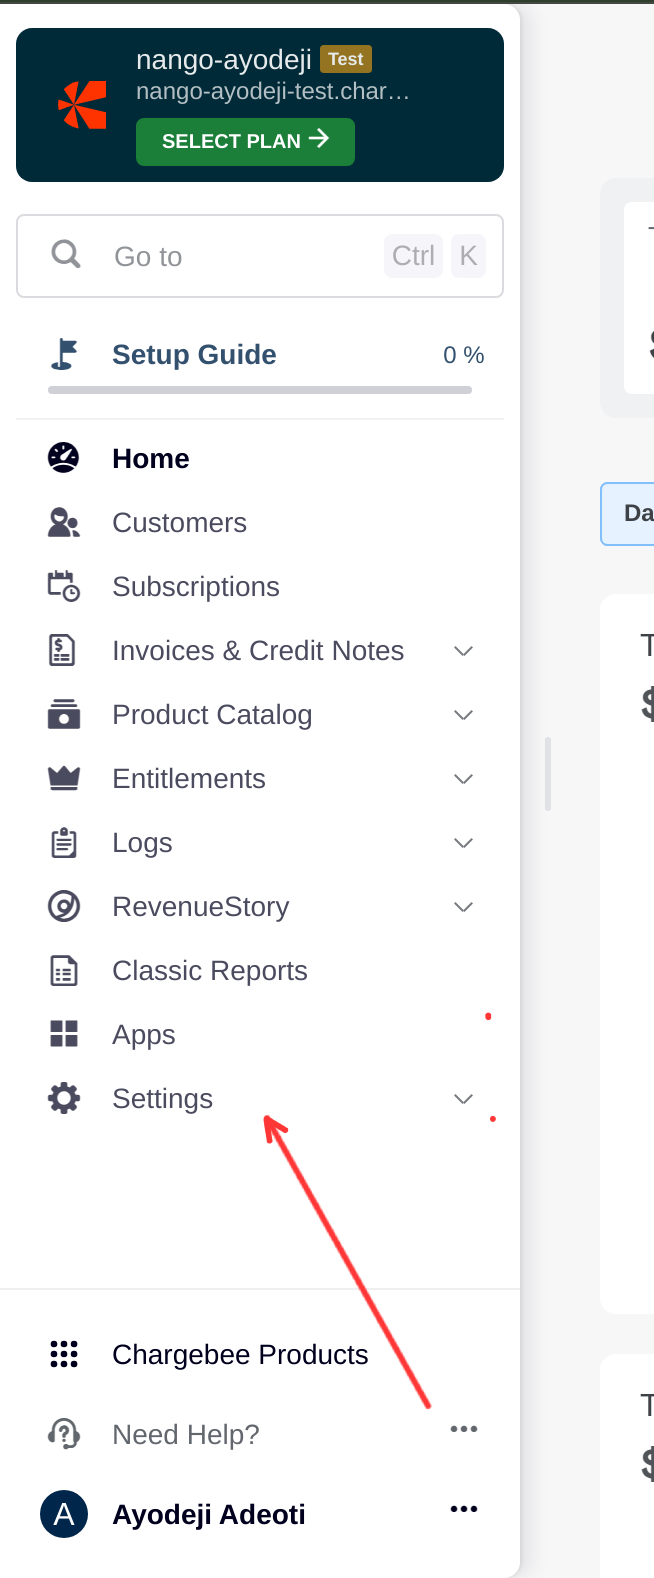
- Select Configure Chargebee from the dropdown menu.
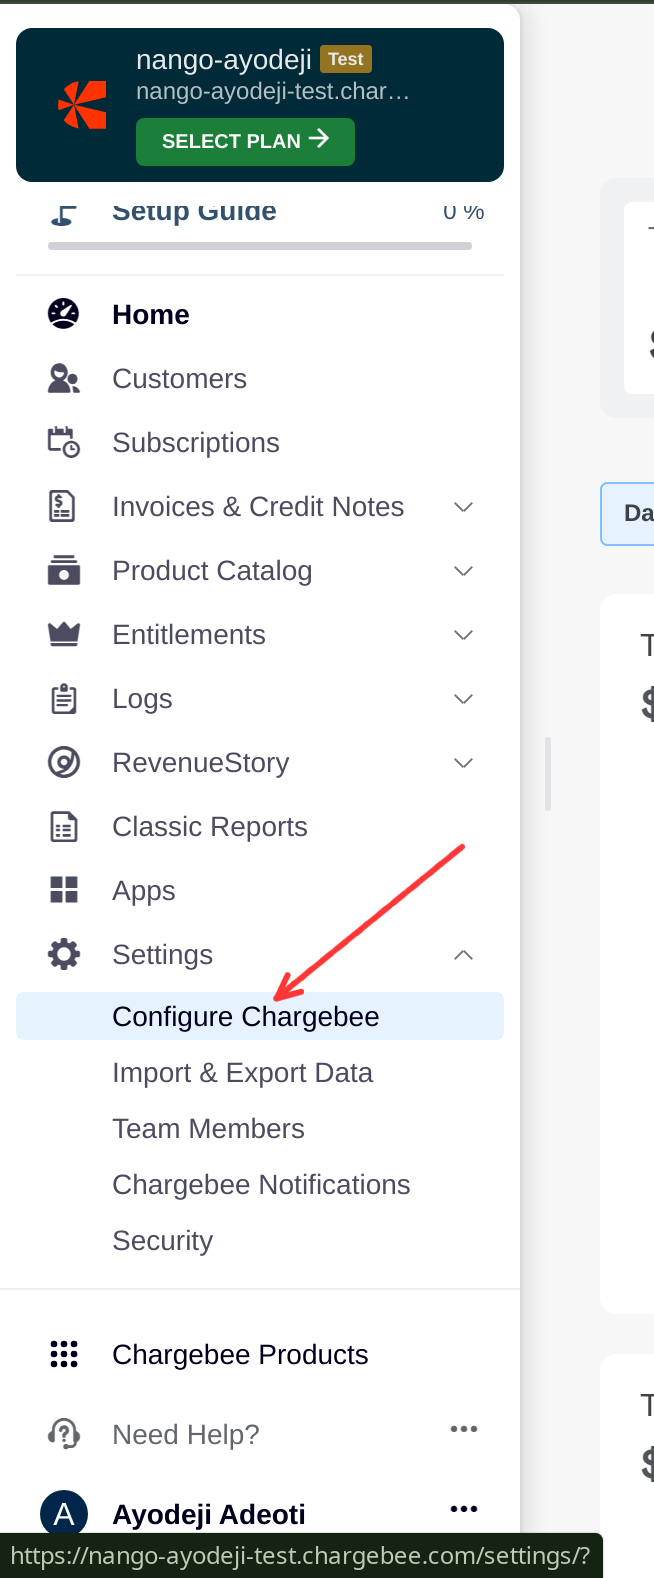
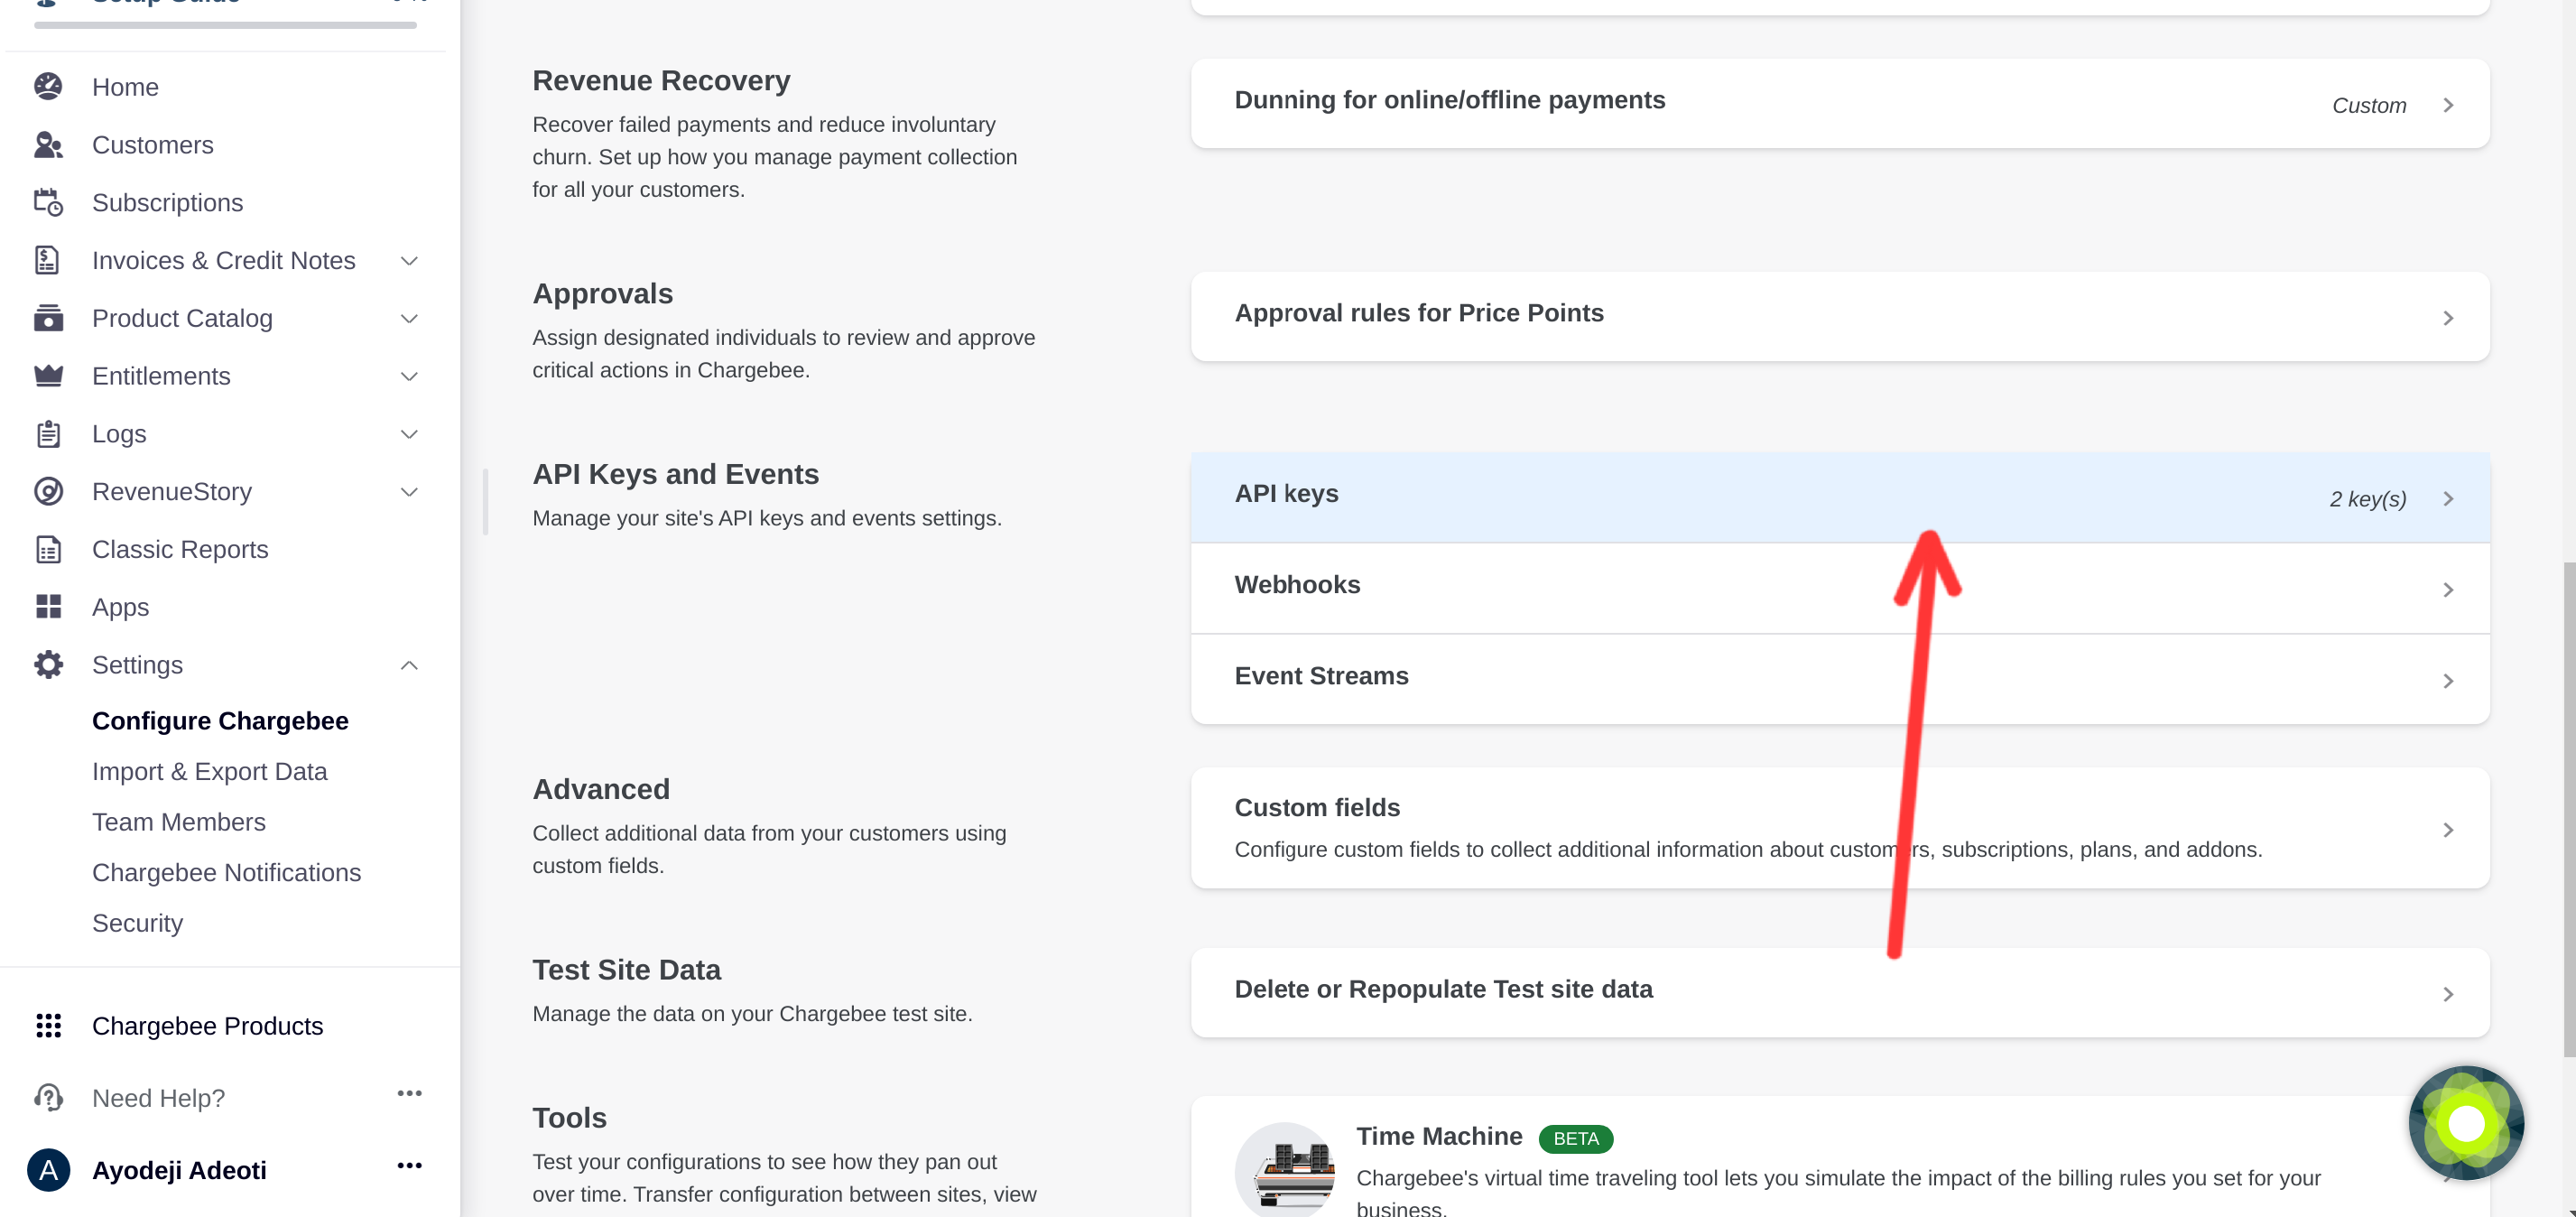
- Scroll to the API Keys section and click on the API Keys tab.
- Click on the Add API Key button.
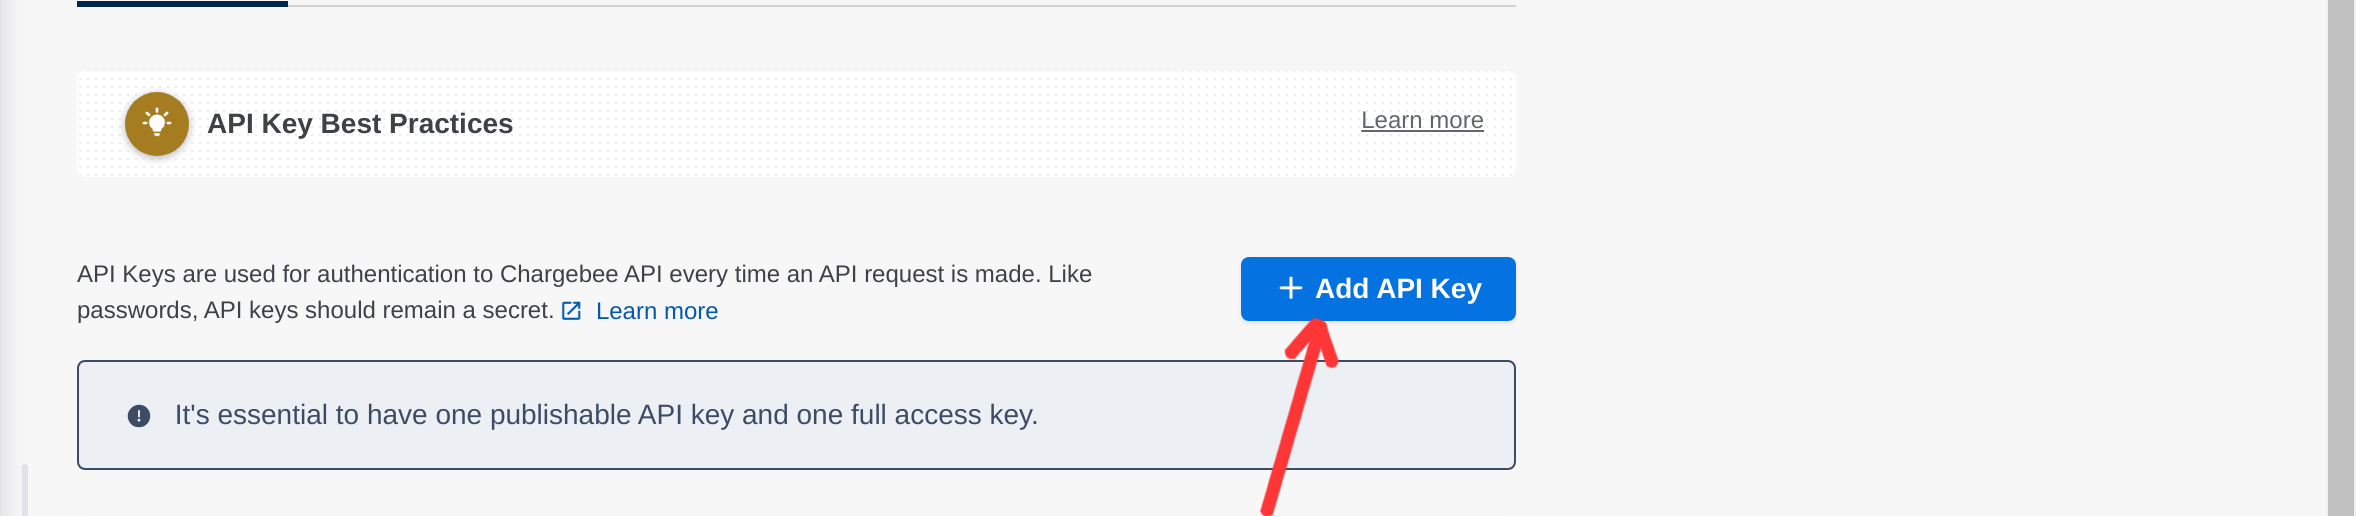
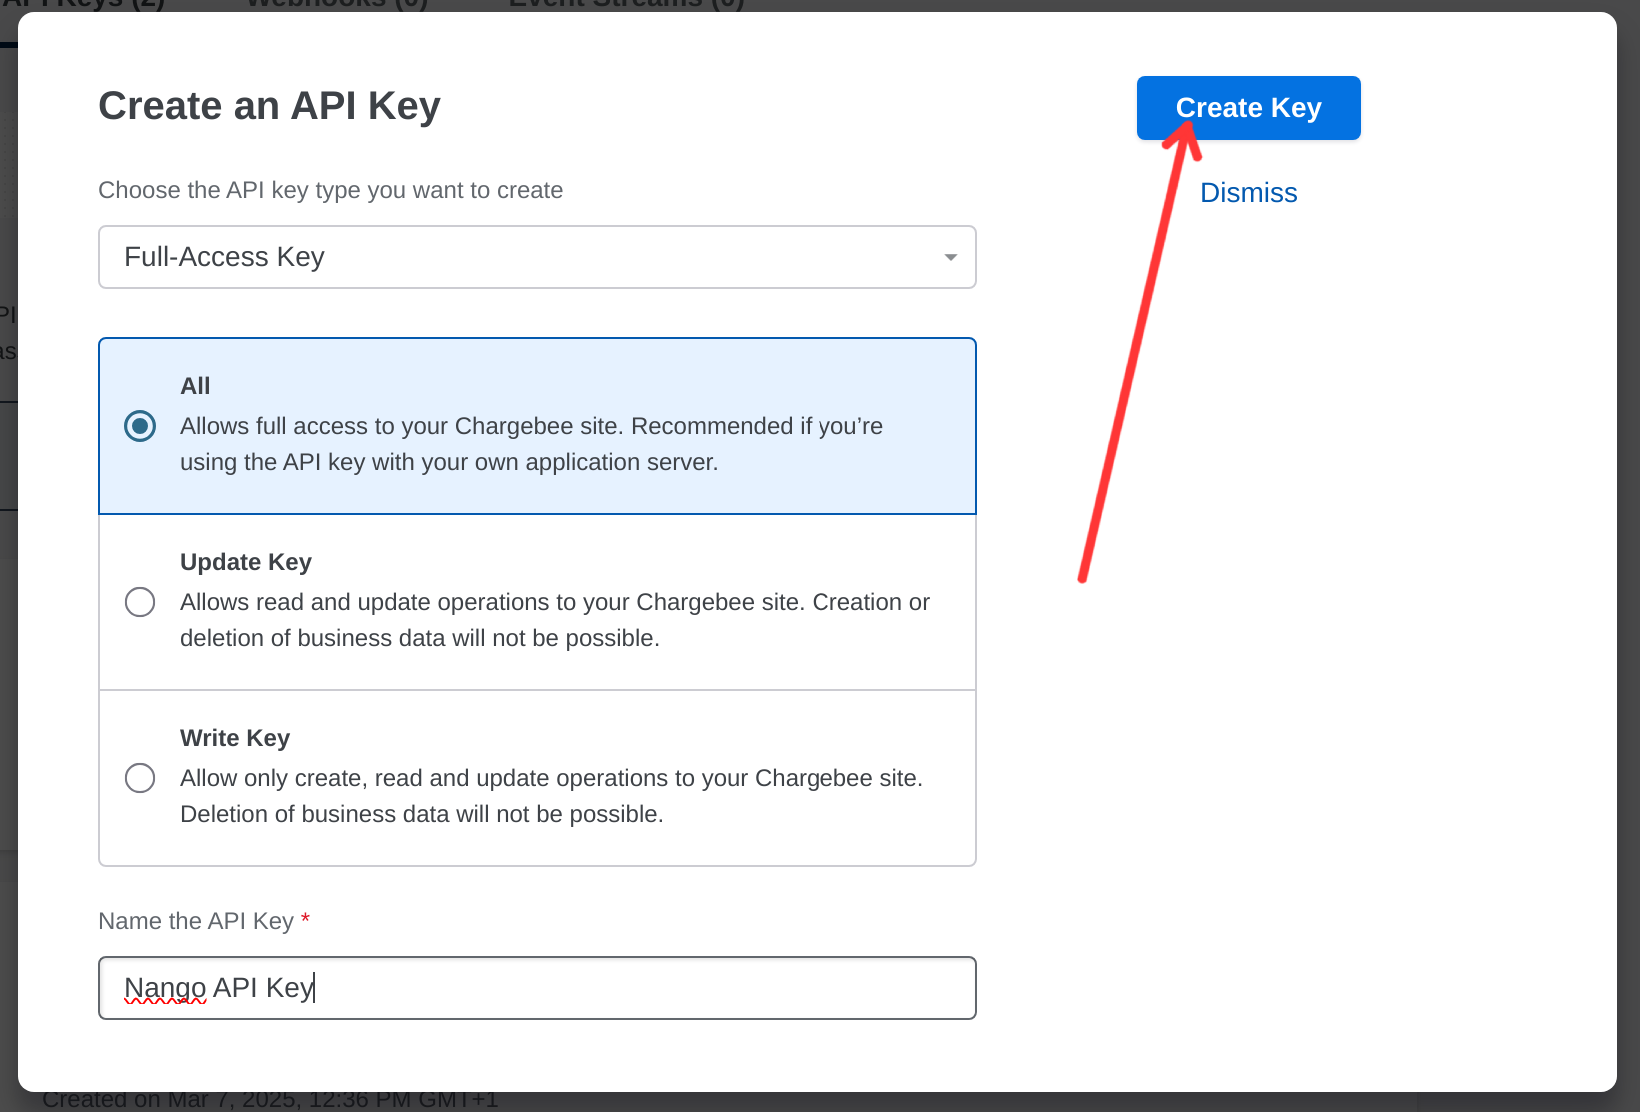
- Select the type of key you want to create. To take advantage of all Nango features, we recommend creating a Full-Access key.
- Enter a name for the API Key and click on the Create Key button at the top right of the modal.
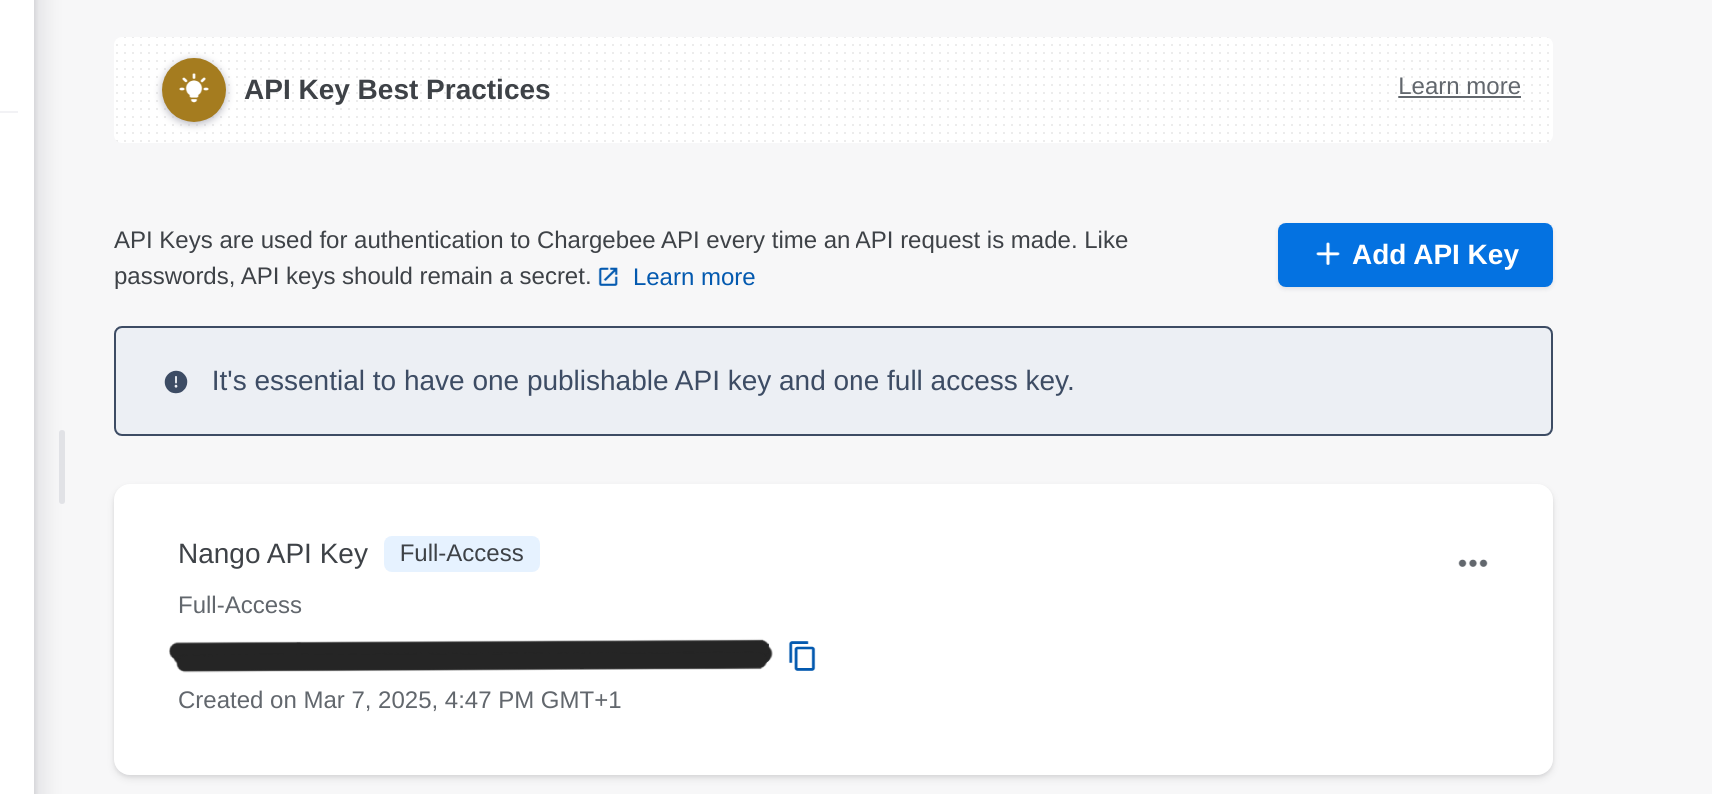
- Copy the generated API key and store it securely. You will need it for the next steps
Step 2: Connect Your Chargebee Account
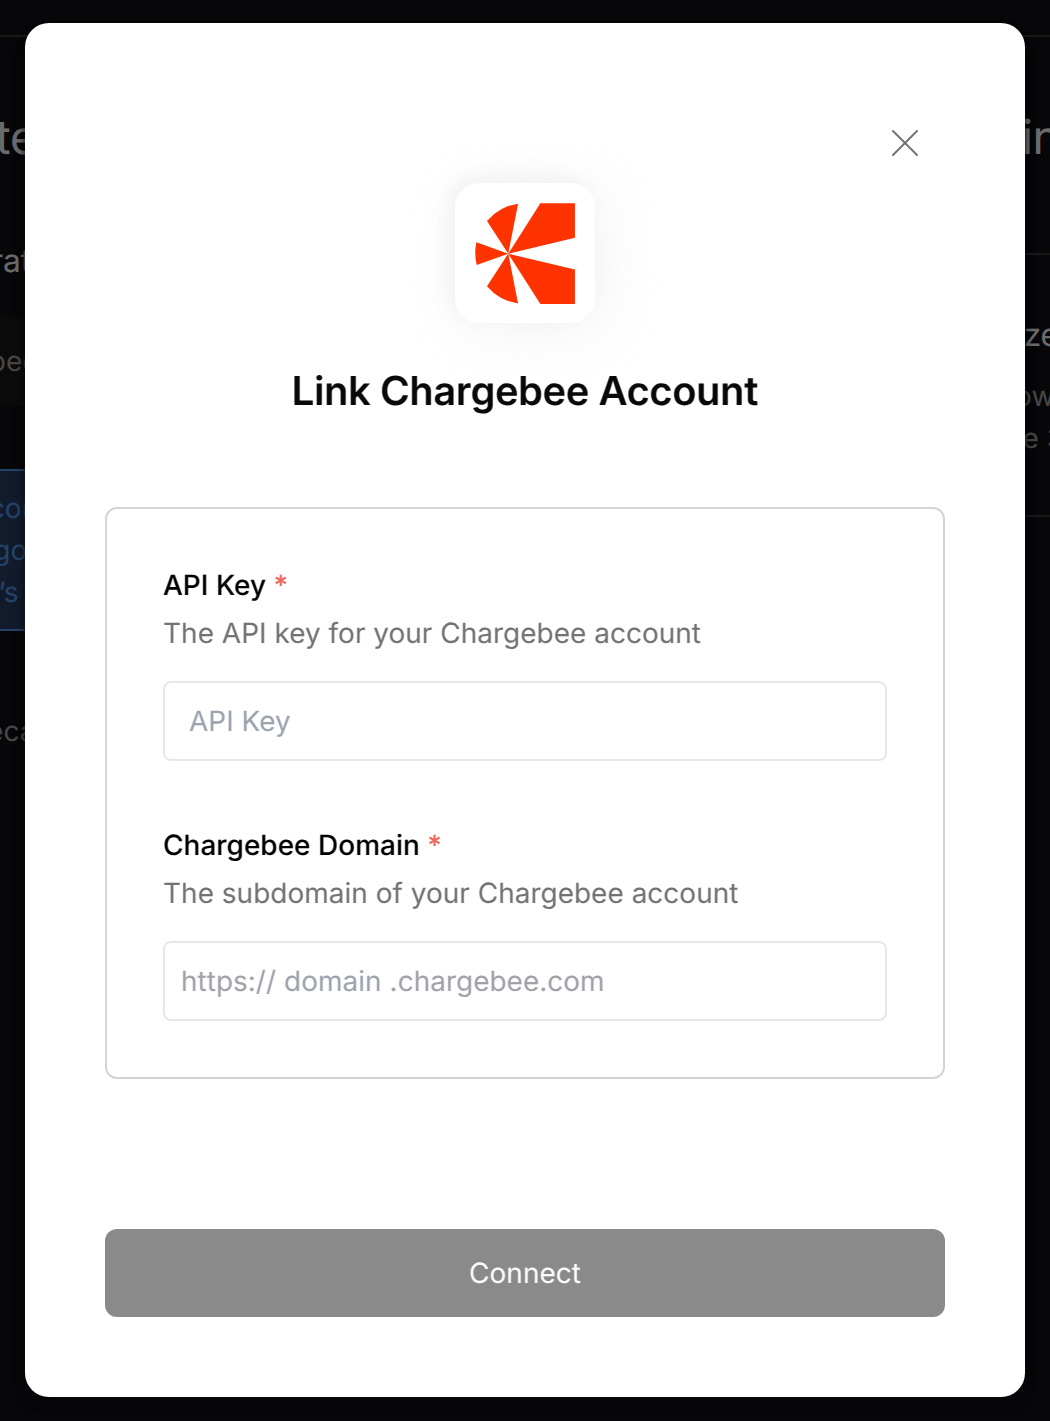
- API Key: Your API Key
- Chargebee Domain: Your Chargebee Domain (e.g.,
https://{your-site-name}.chargebee.com). You need only the{your-site-name}part of the URL. Click “Connect” to complete the authentication.