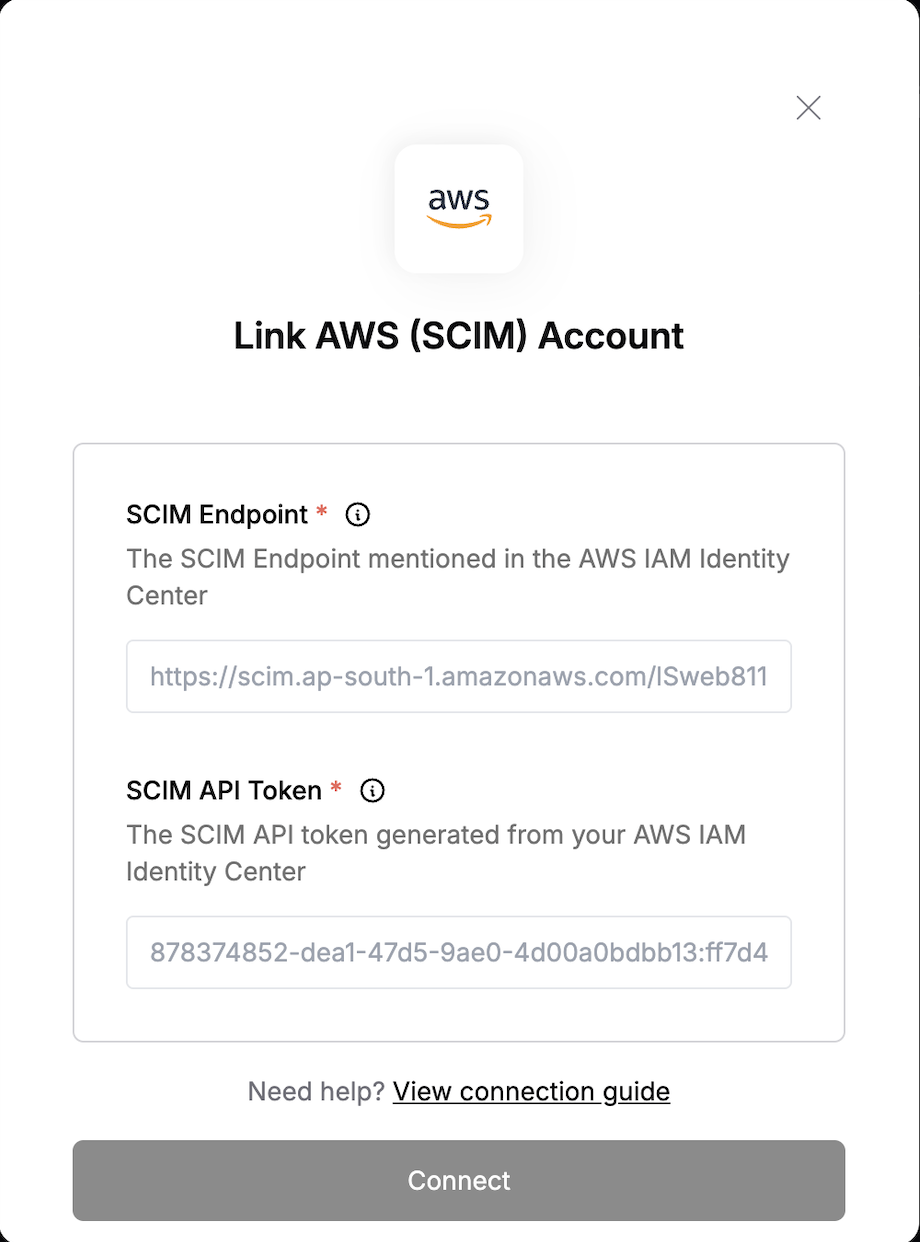
Overview
To authenticate with AWS SCIM, you need two key pieces of information:- SCIM API Token - A token generated from your AWS IAM Identity Center to authenticate SCIM requests.
- SCIM Endpoint - The base domain for SCIM API requests.
Prerequisites:
- You must have an AWS account.
- SCIM is supported only for IAM Identity Center users and not for IAM users.
- The logged-in user must have the necessary admin privileges to generate the SCIM API token in IAM Identity Provider.
Step 1: Configure the external identity Provider
- Log into your AWS account
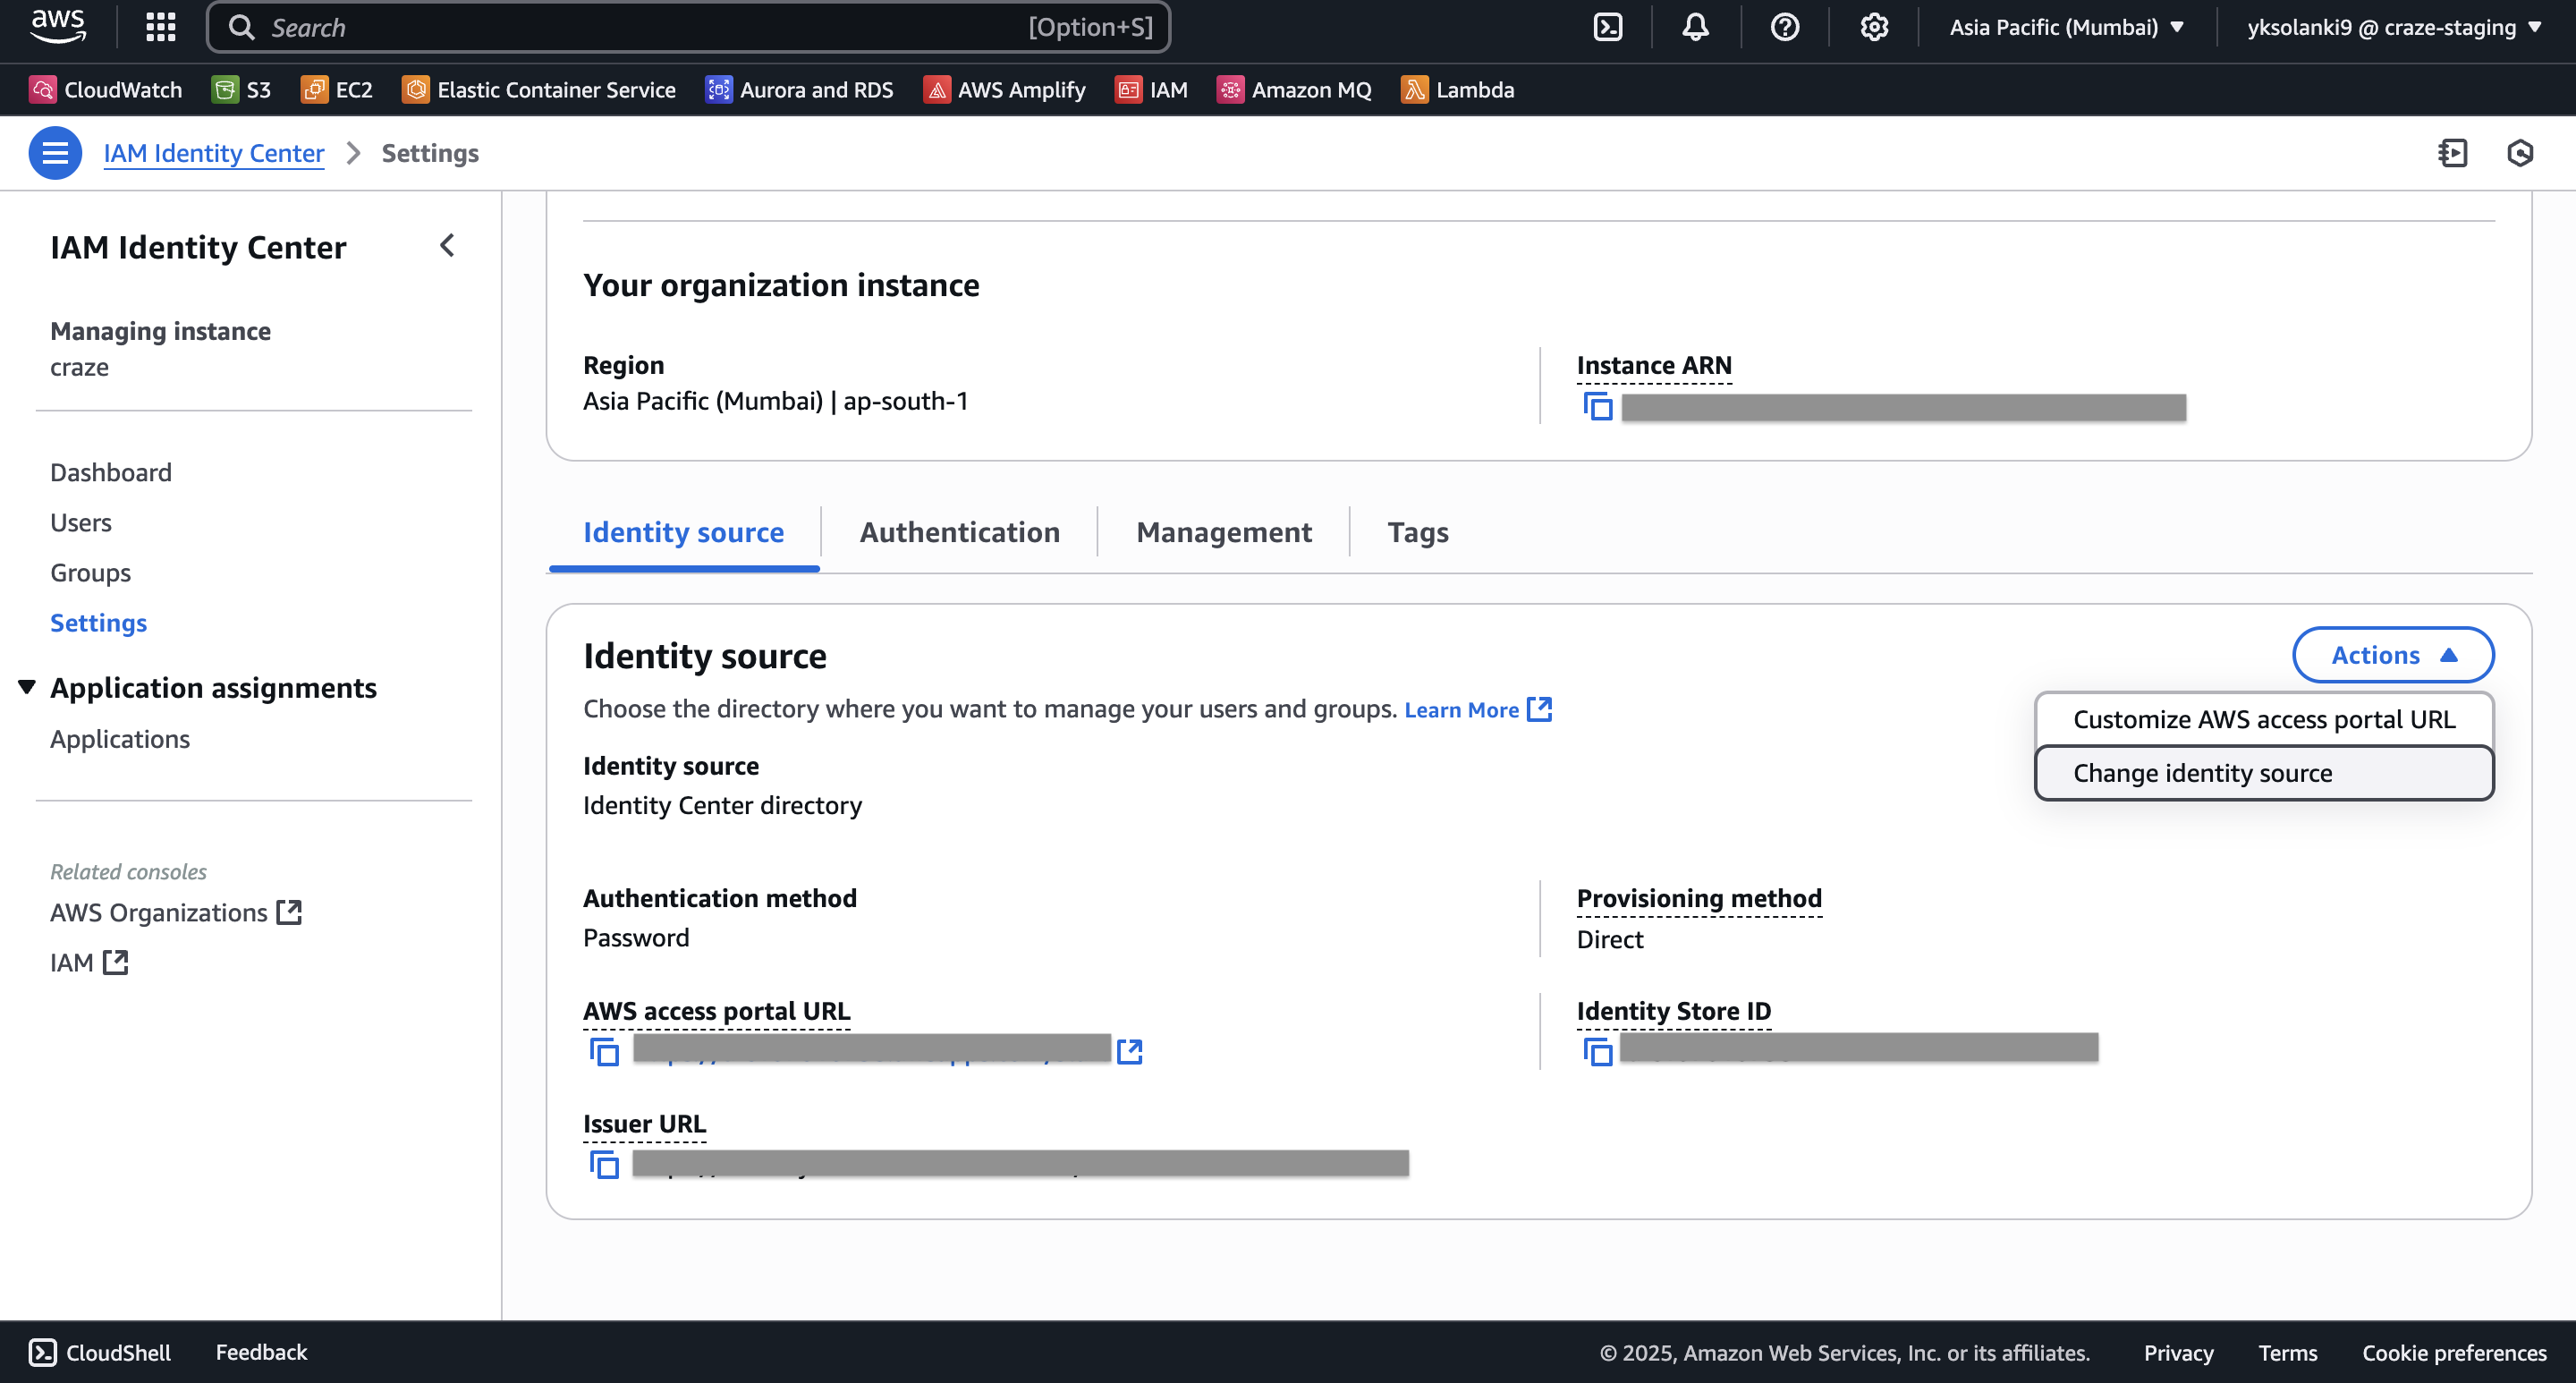
- Go to IAM Identity Center > Settings
- In the Identity Source tab, click on Actions > Change identity source
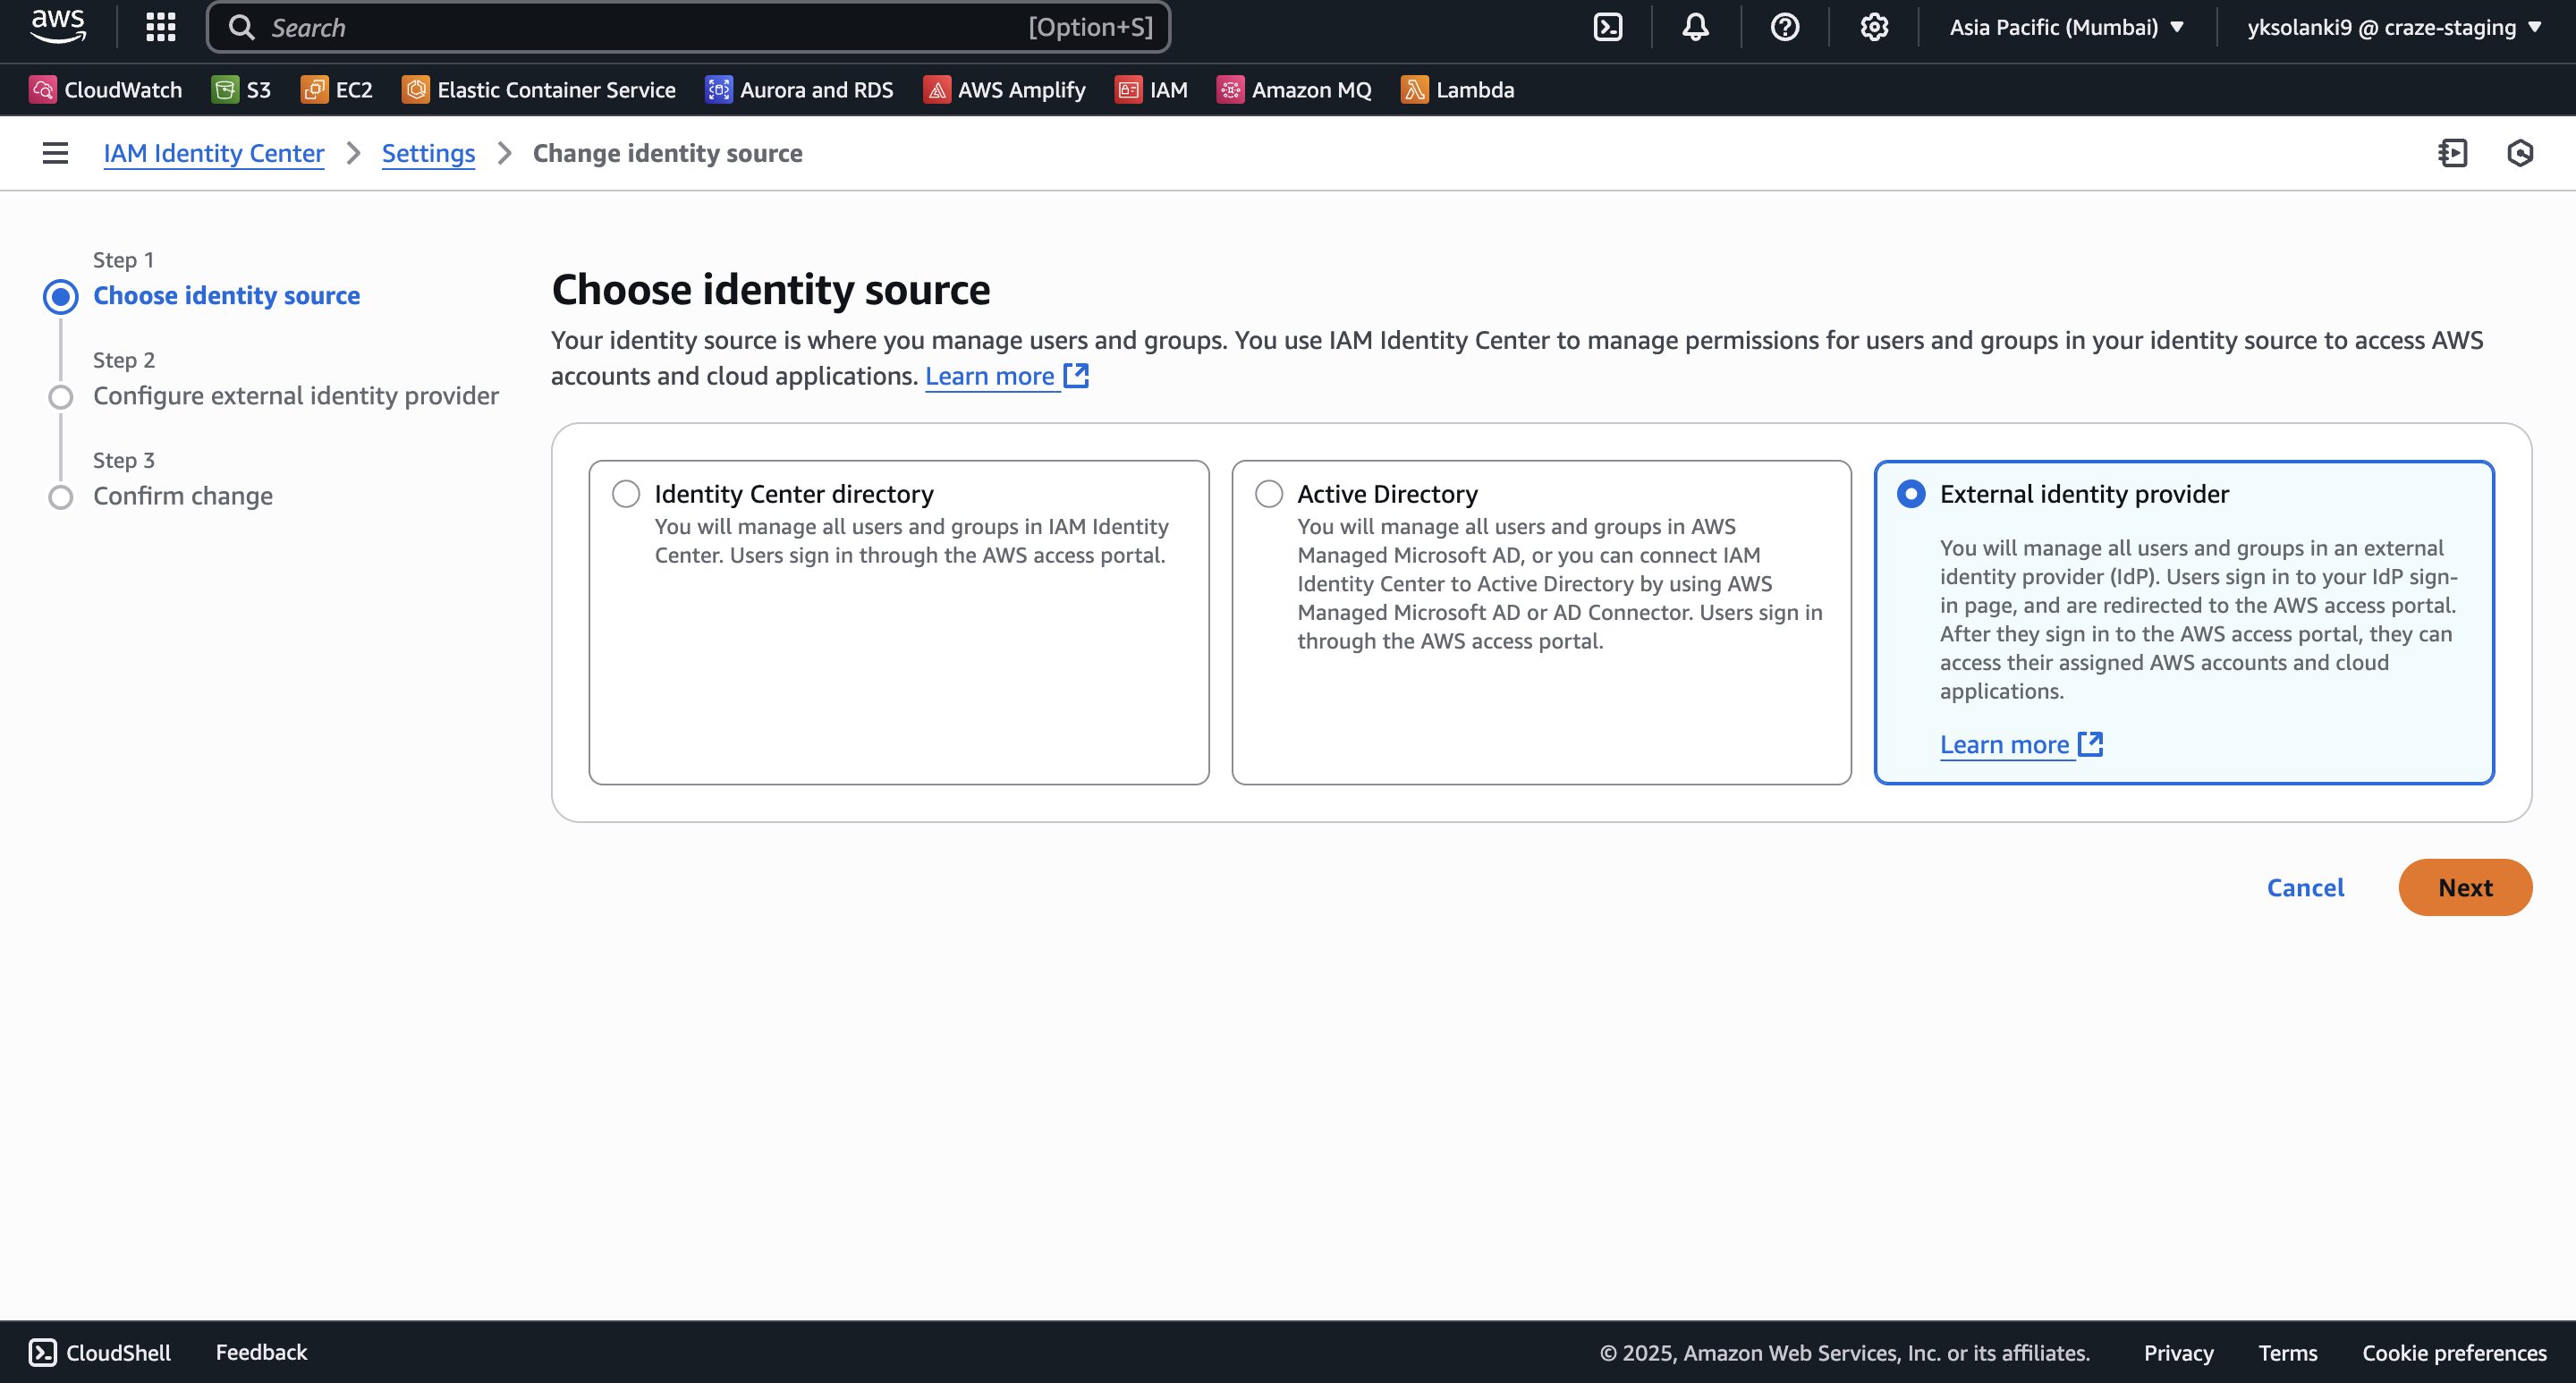
- Choose External identity provider as your identity source
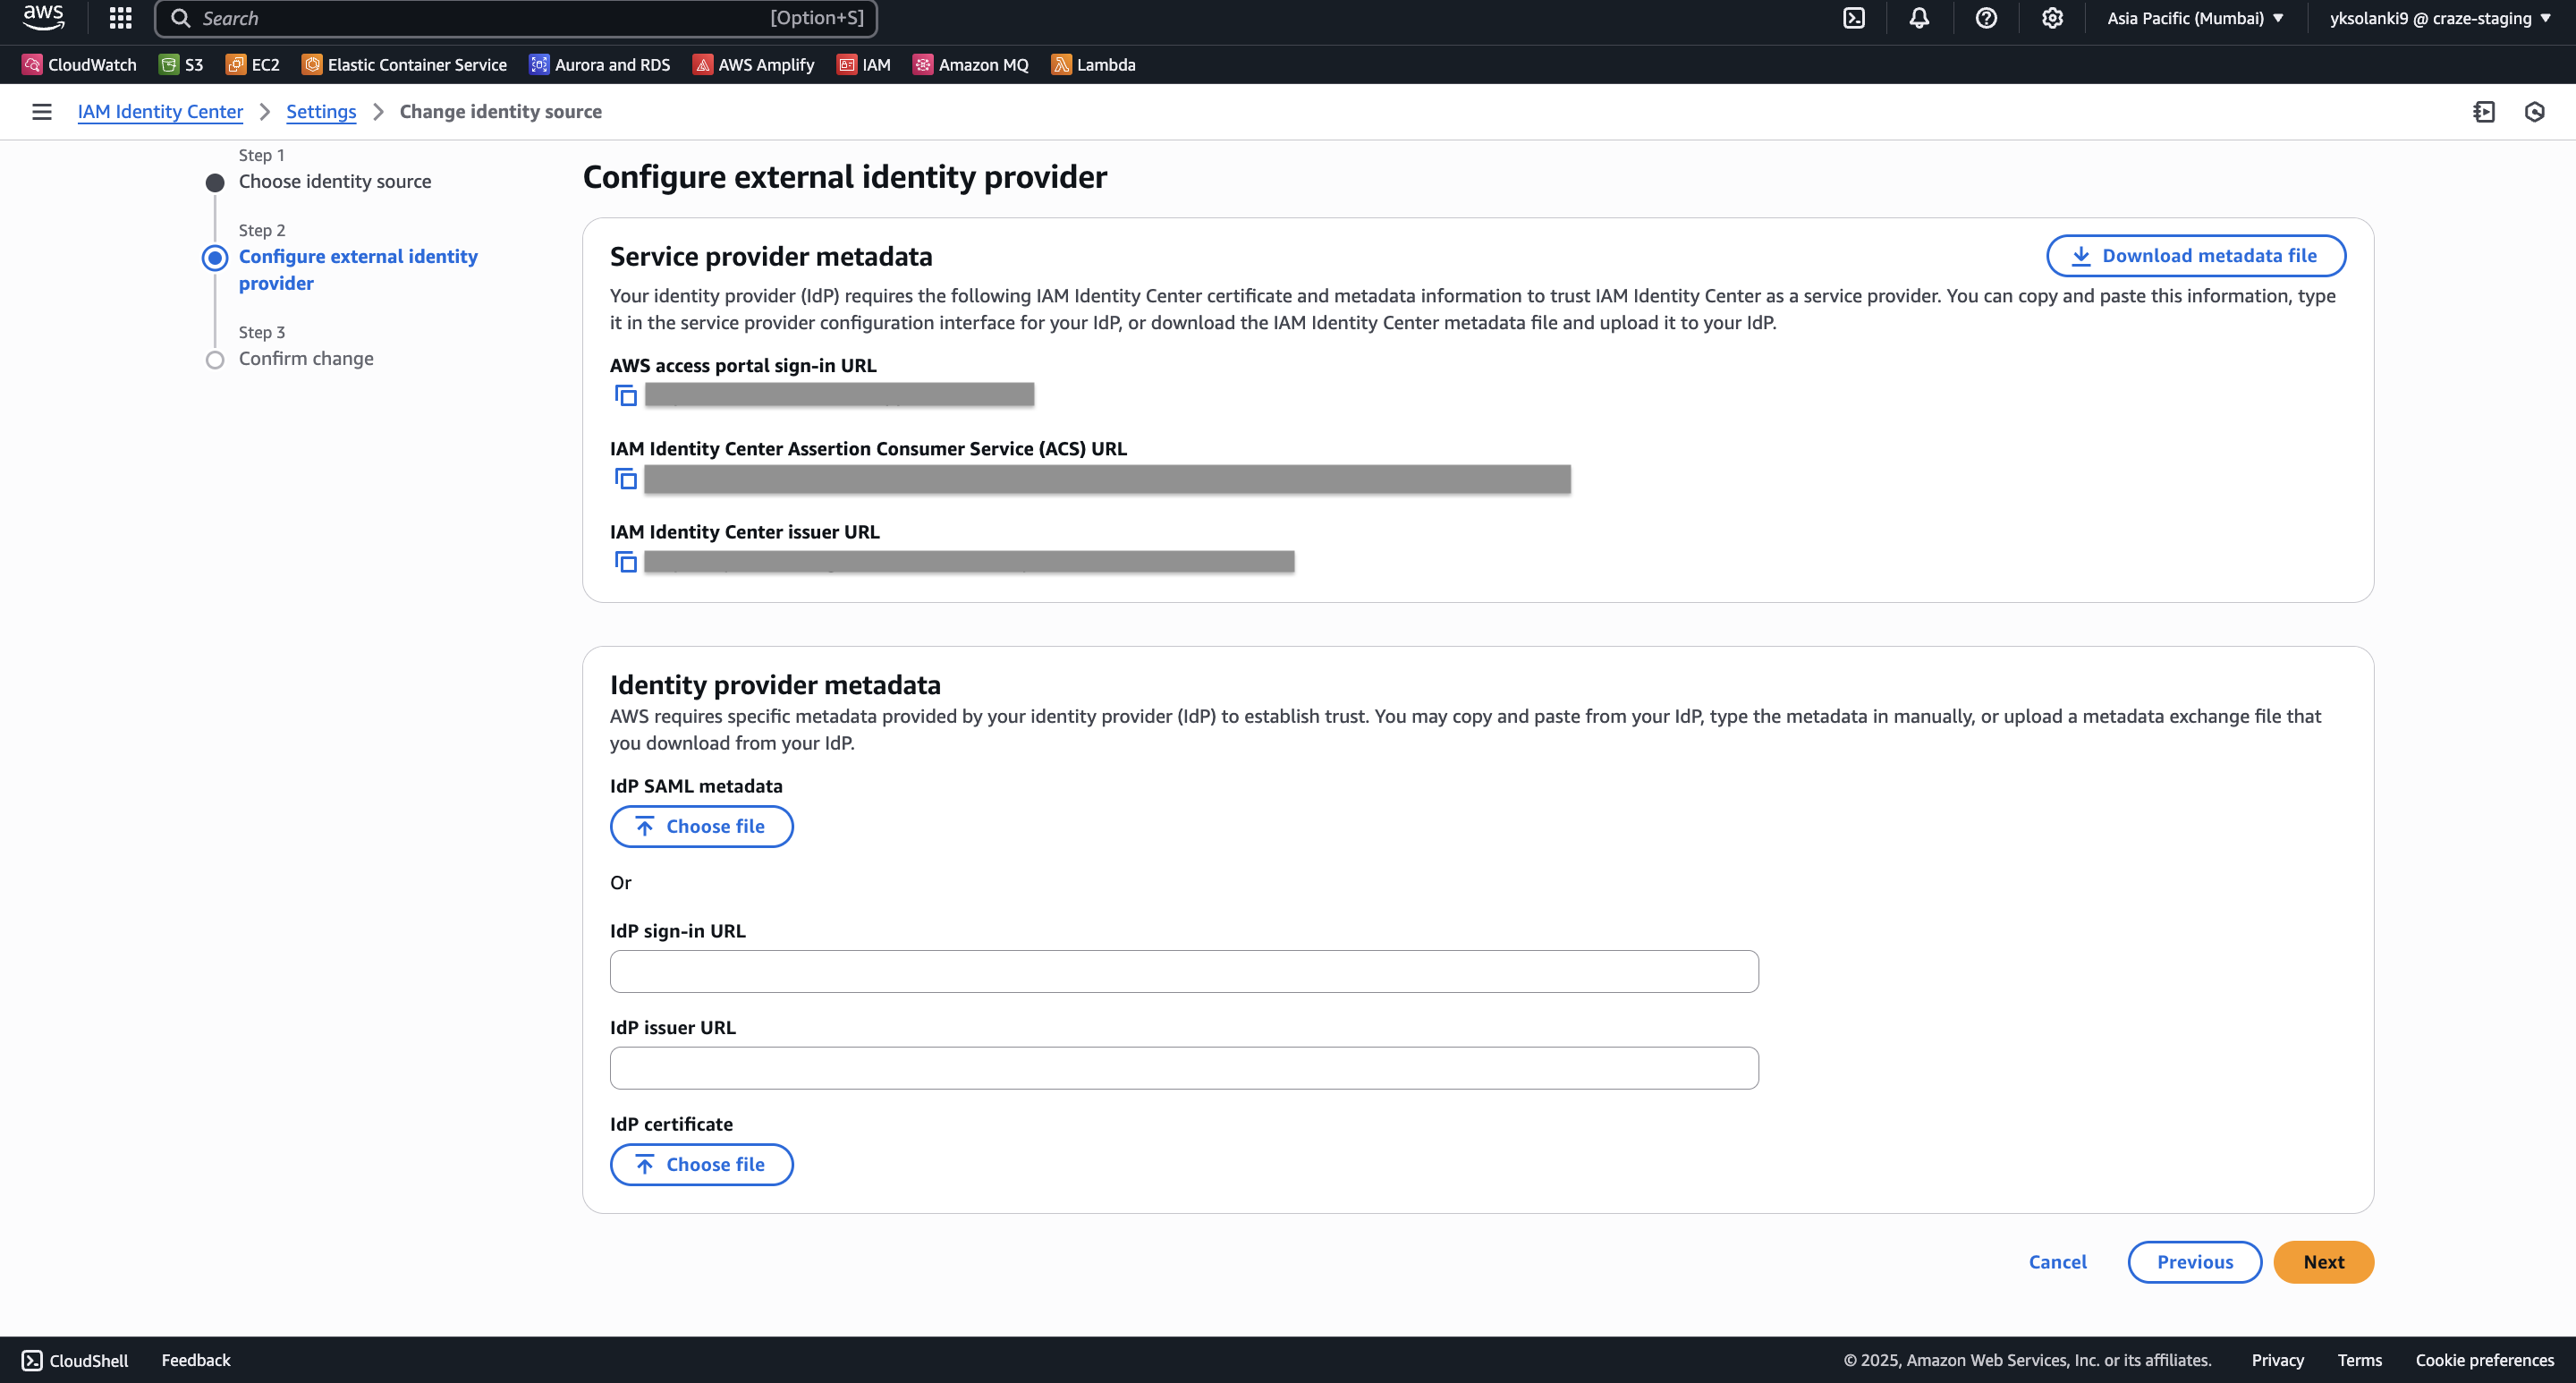
- On the next screen, configure the external identity provider
- Review and save the changes
Step 2: Setting up Automatic Provisioning
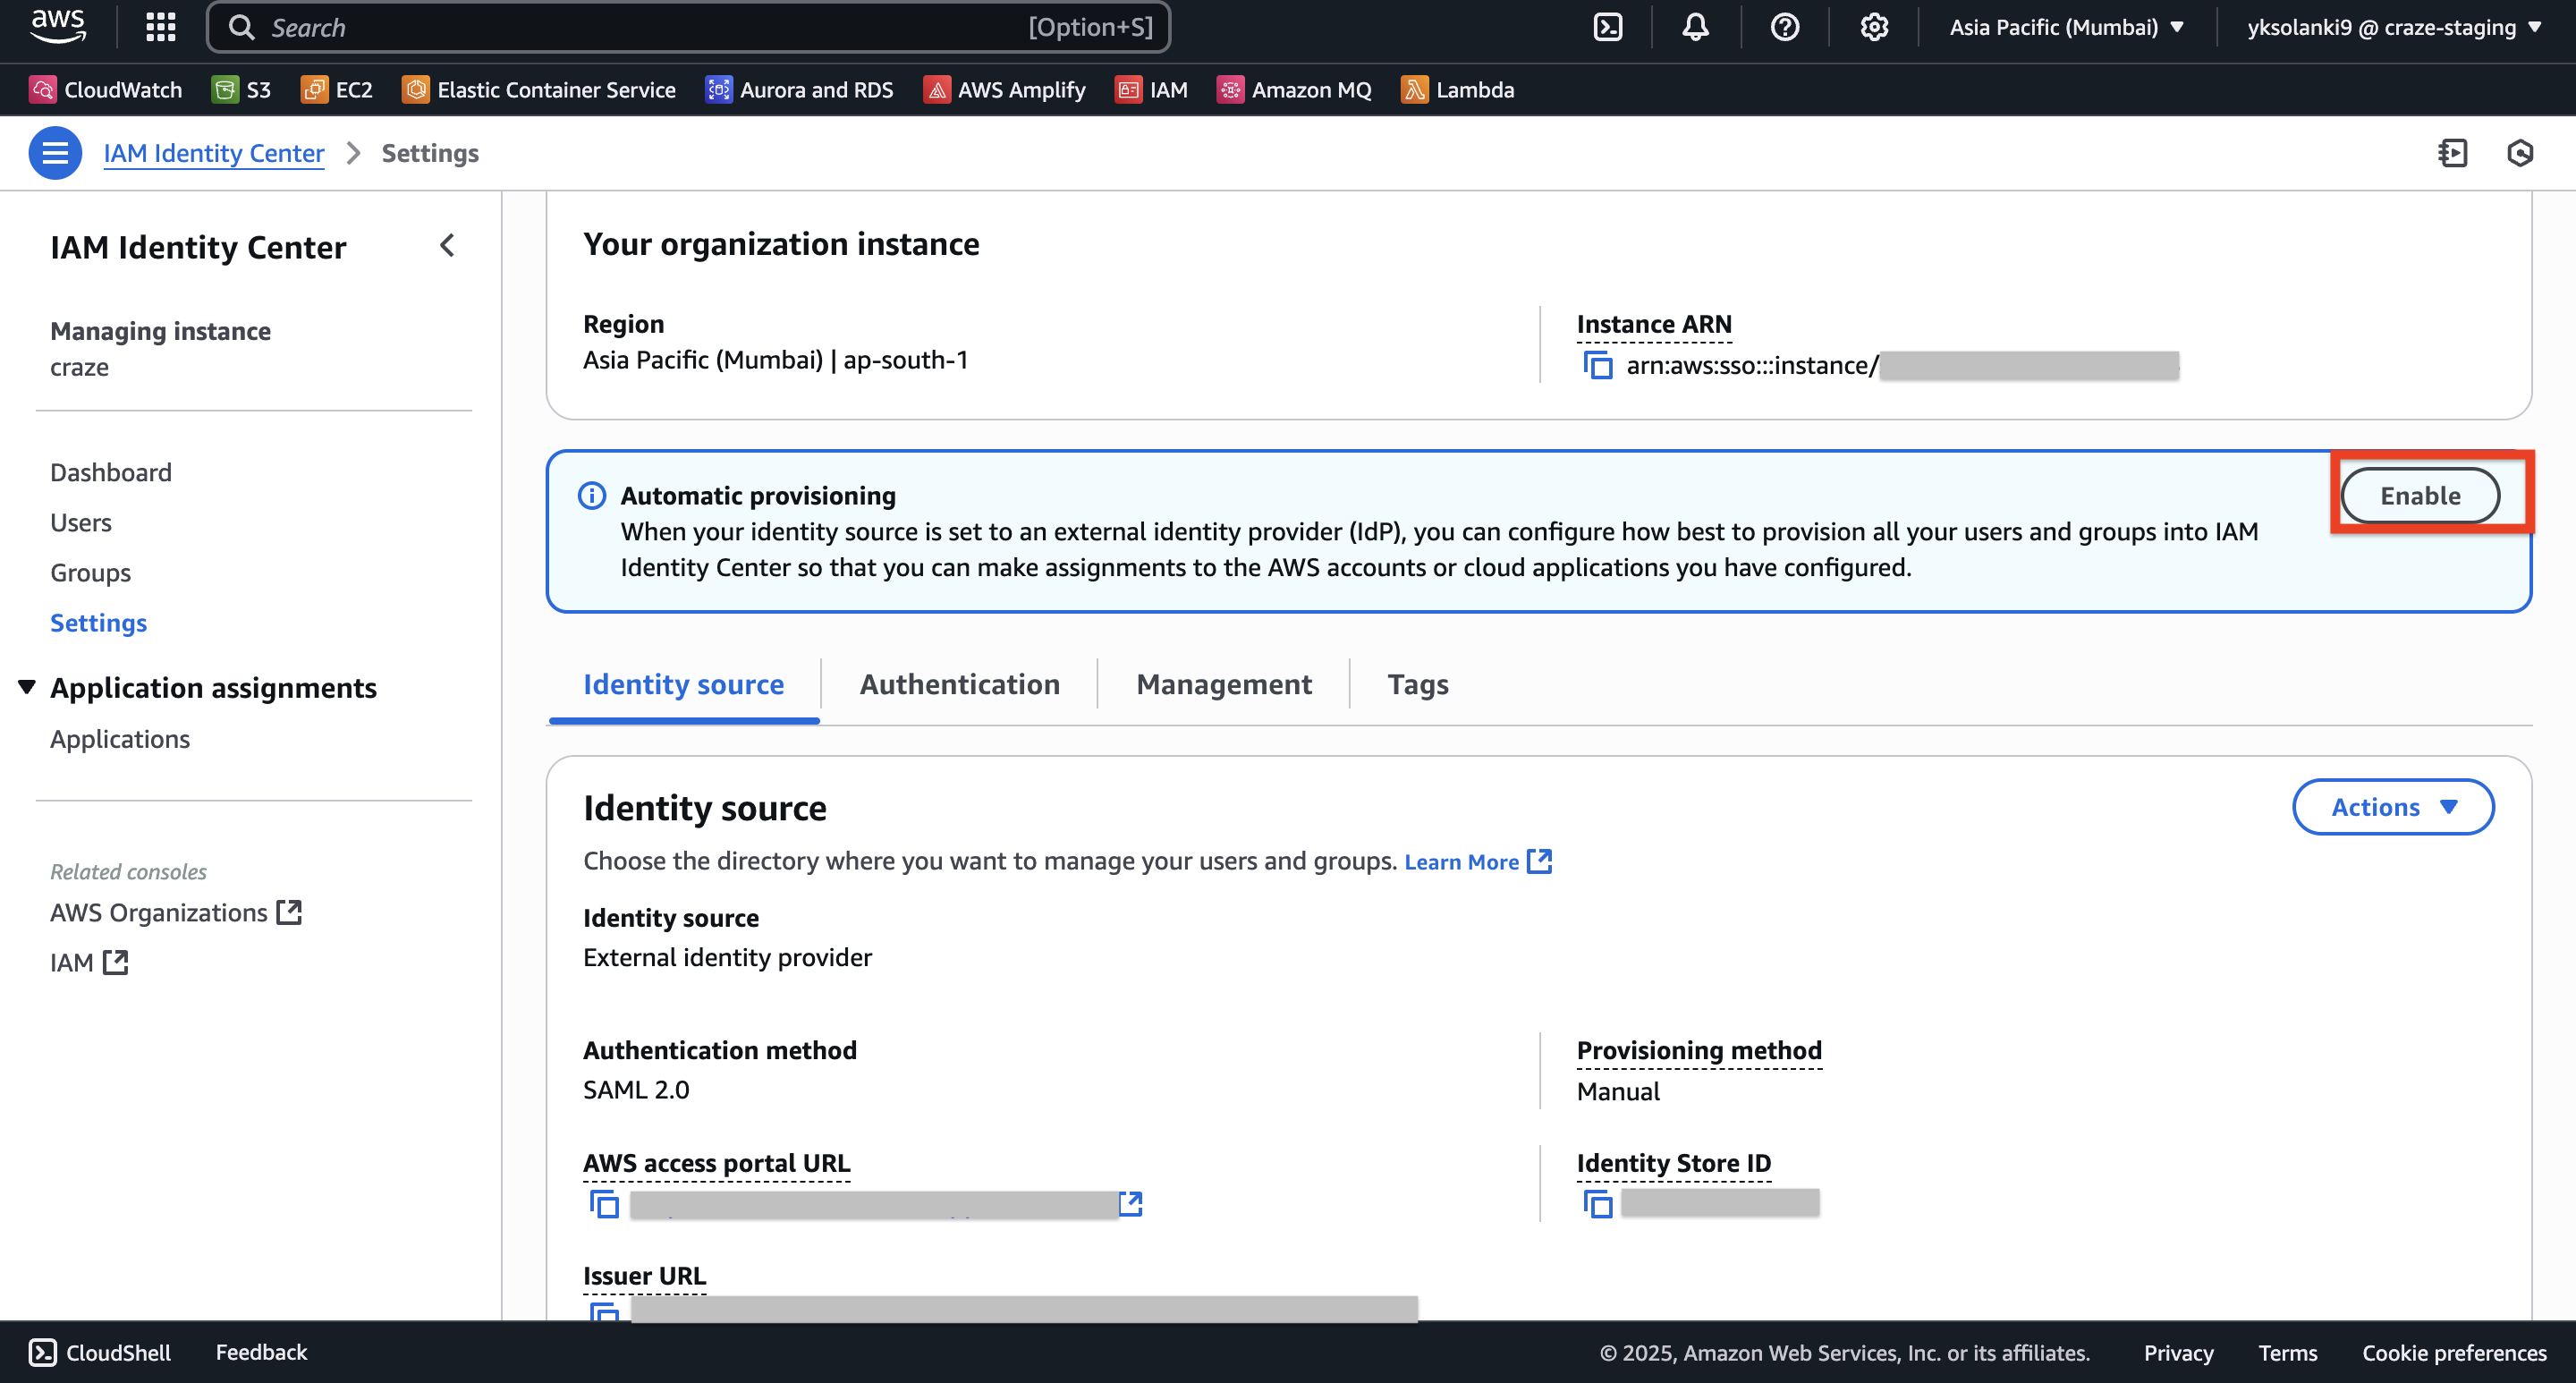
- Once you’ve setup SAML, you’ll see an Automatic Provisioning card on Settings page
- Click on Enable in the left sidebar to enable SCIM
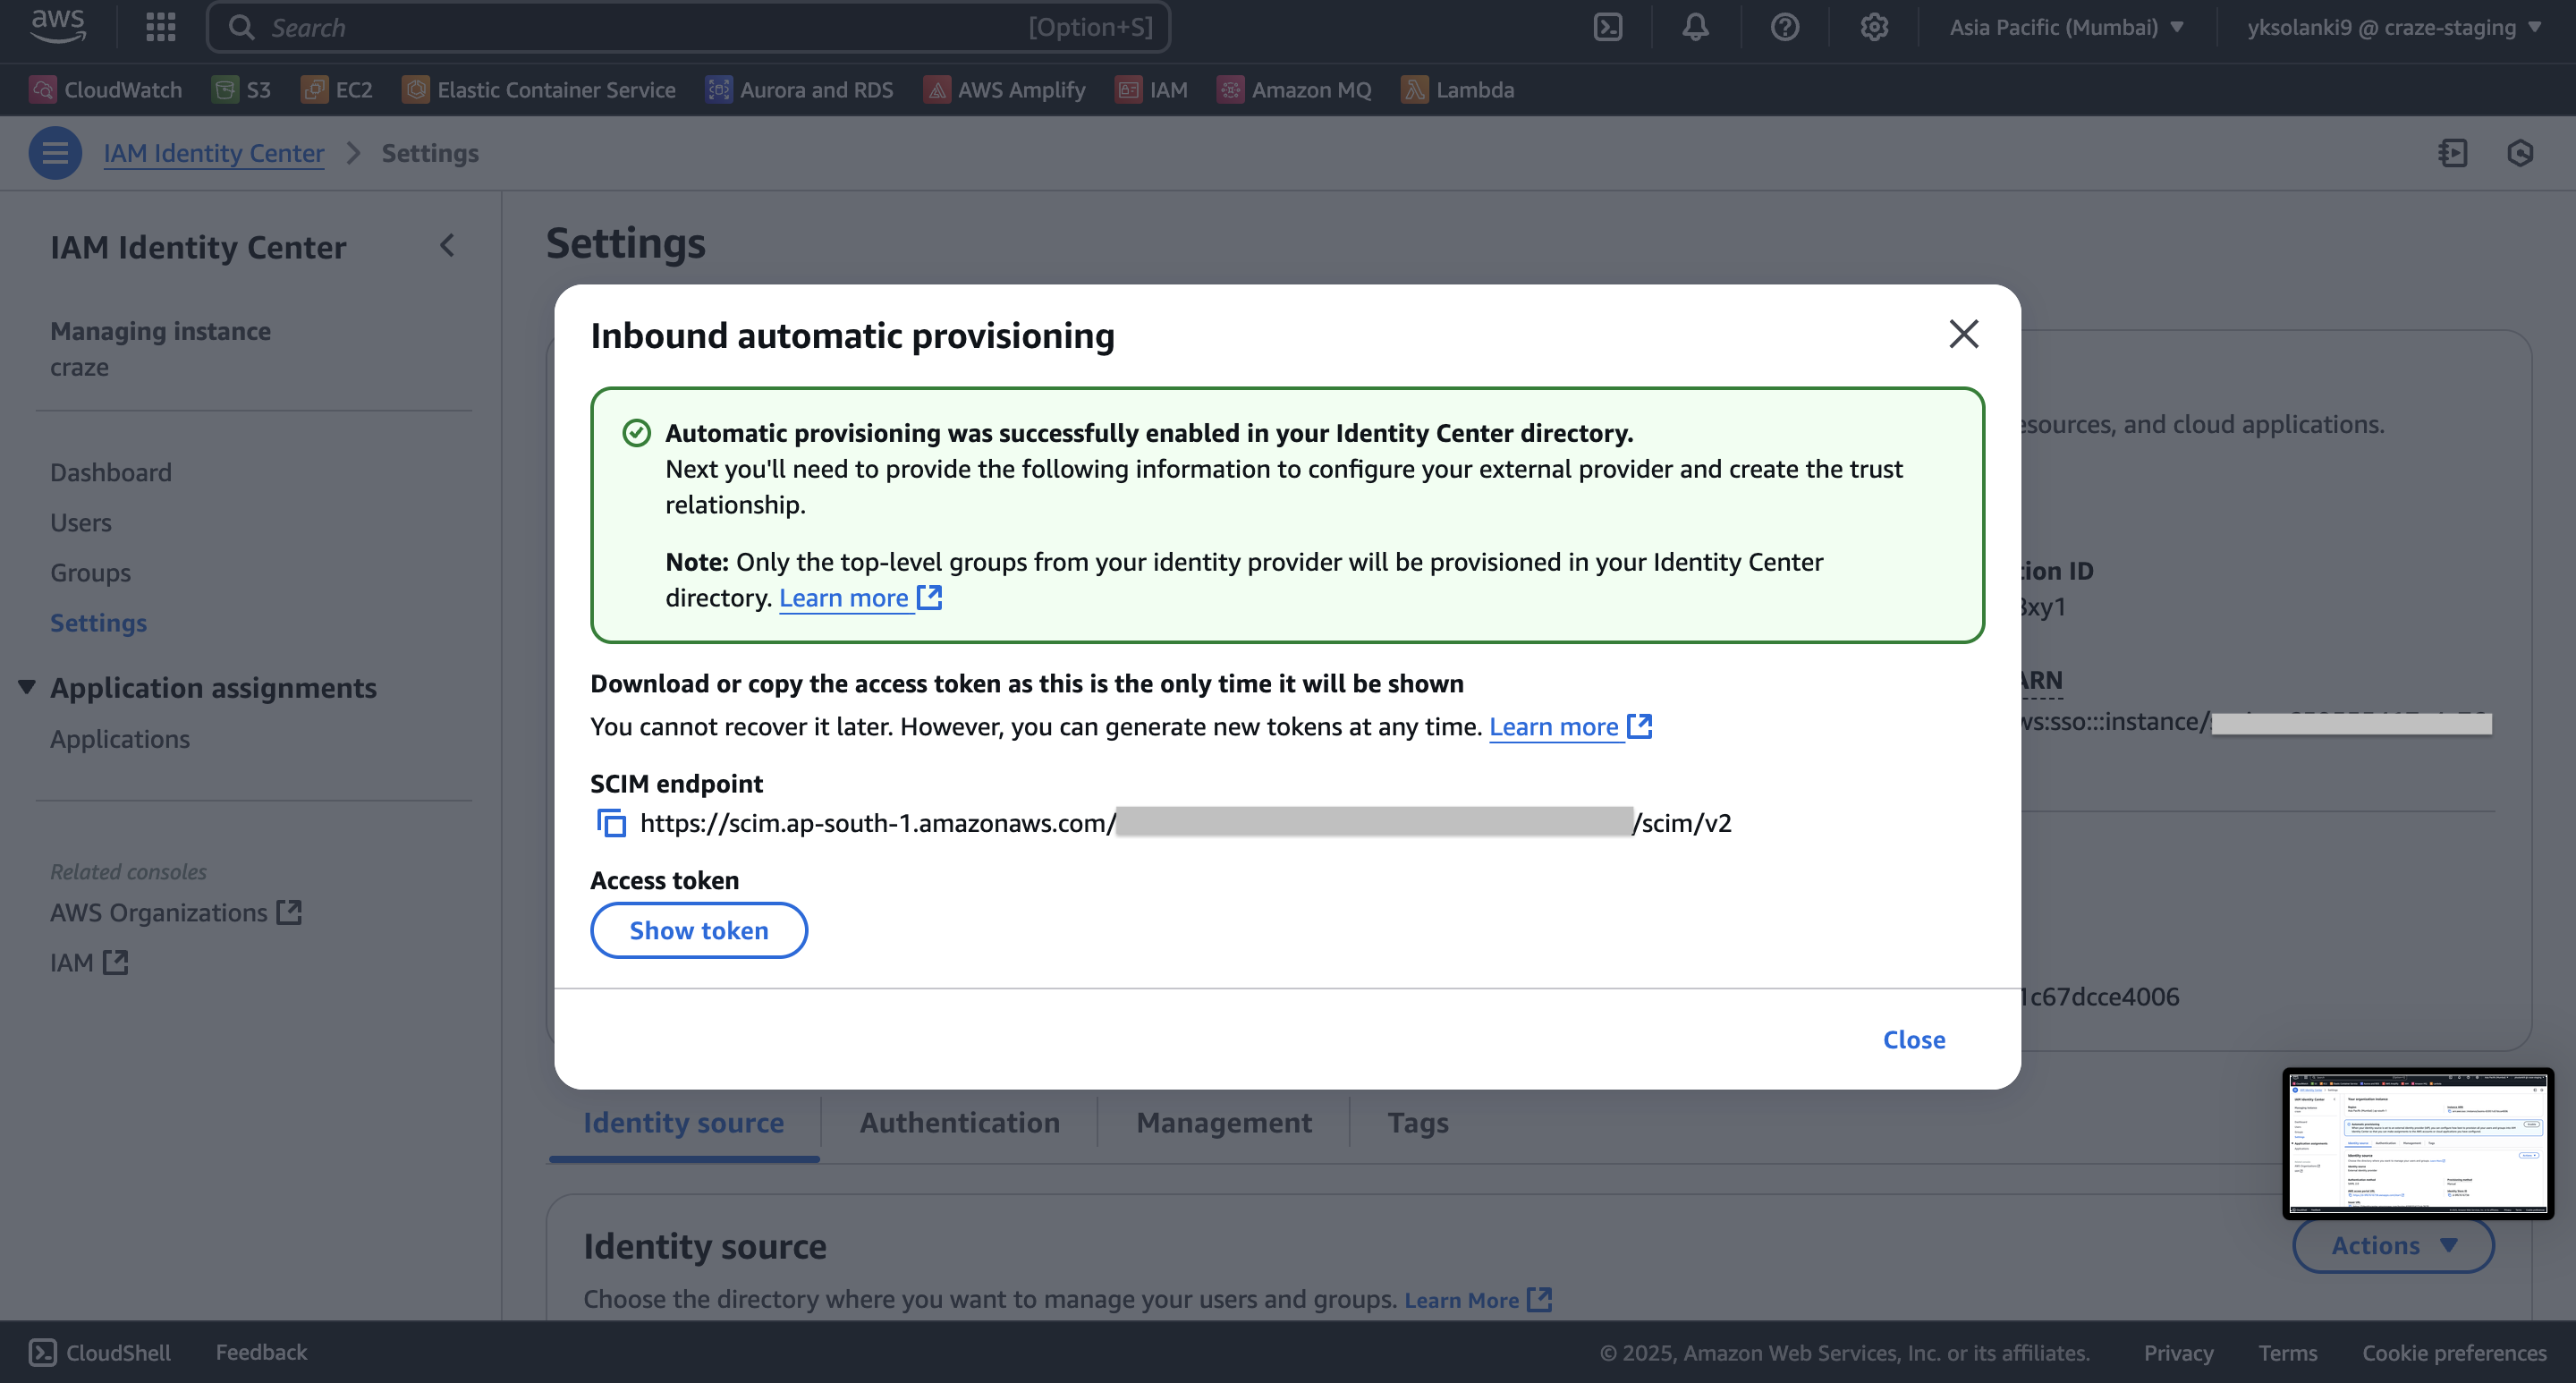
- The SCIM configuration will be shown, copy the SCIM Endpoint and Access Token to connect to AWS.
Step 3: Connect Your AWS Account
To authenticate using your Access Token, navigate to the AWS (SCIM) authentication form in Nango and enter the SCIM endpoint and Access Token.