Pre-requisite: complete the Configuration guide.
Authorization overview.
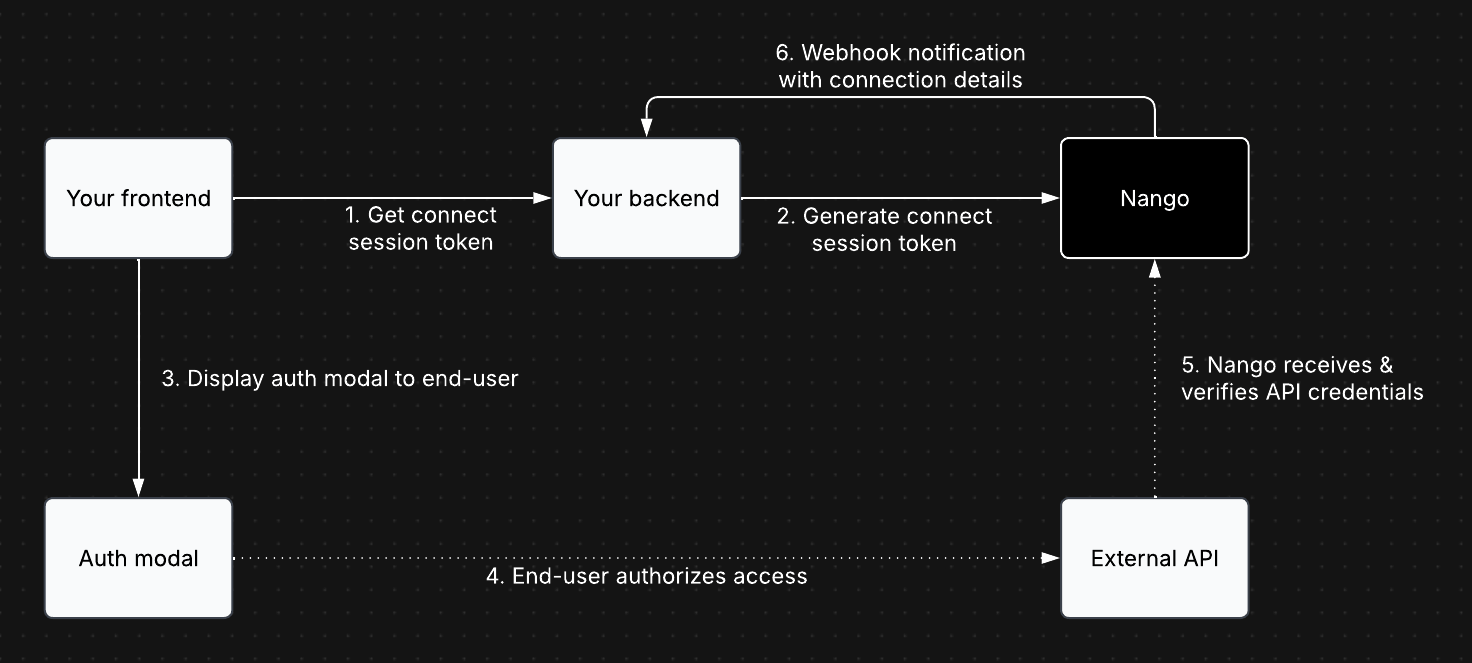
1. Generate a session token (backend)
In your backend, set up an API endpoint that your frontend will call before each authorization attempt to retrieve a session token from Nango. Here’s an example of how your backend can retrieve a session token from Nango (API / Node SDK references):- Node
- cURL
ℹ️ Details on end user and organization information
ℹ️ Details on end user and organization information
The
end_user fields help identify which connection belongs to which end user. This information is also used for display purposes in the Nango UI.The
end_user.id is required. Pass in your internal ID of the user who initiated the authorization flow. This ID, and potentially the tags, are necessary for reconciling the connection details that your backend receives from Nango after the connection is created (as described in the section 3).It’s possible that the end use’s email in your app will not match the email they use to connect their external account, which is fine.
An endUser is linked to a single connection even if the
end_user.id is the same across multiple connections.allowed_integrations will display a list of integrations that the end user can pick from:
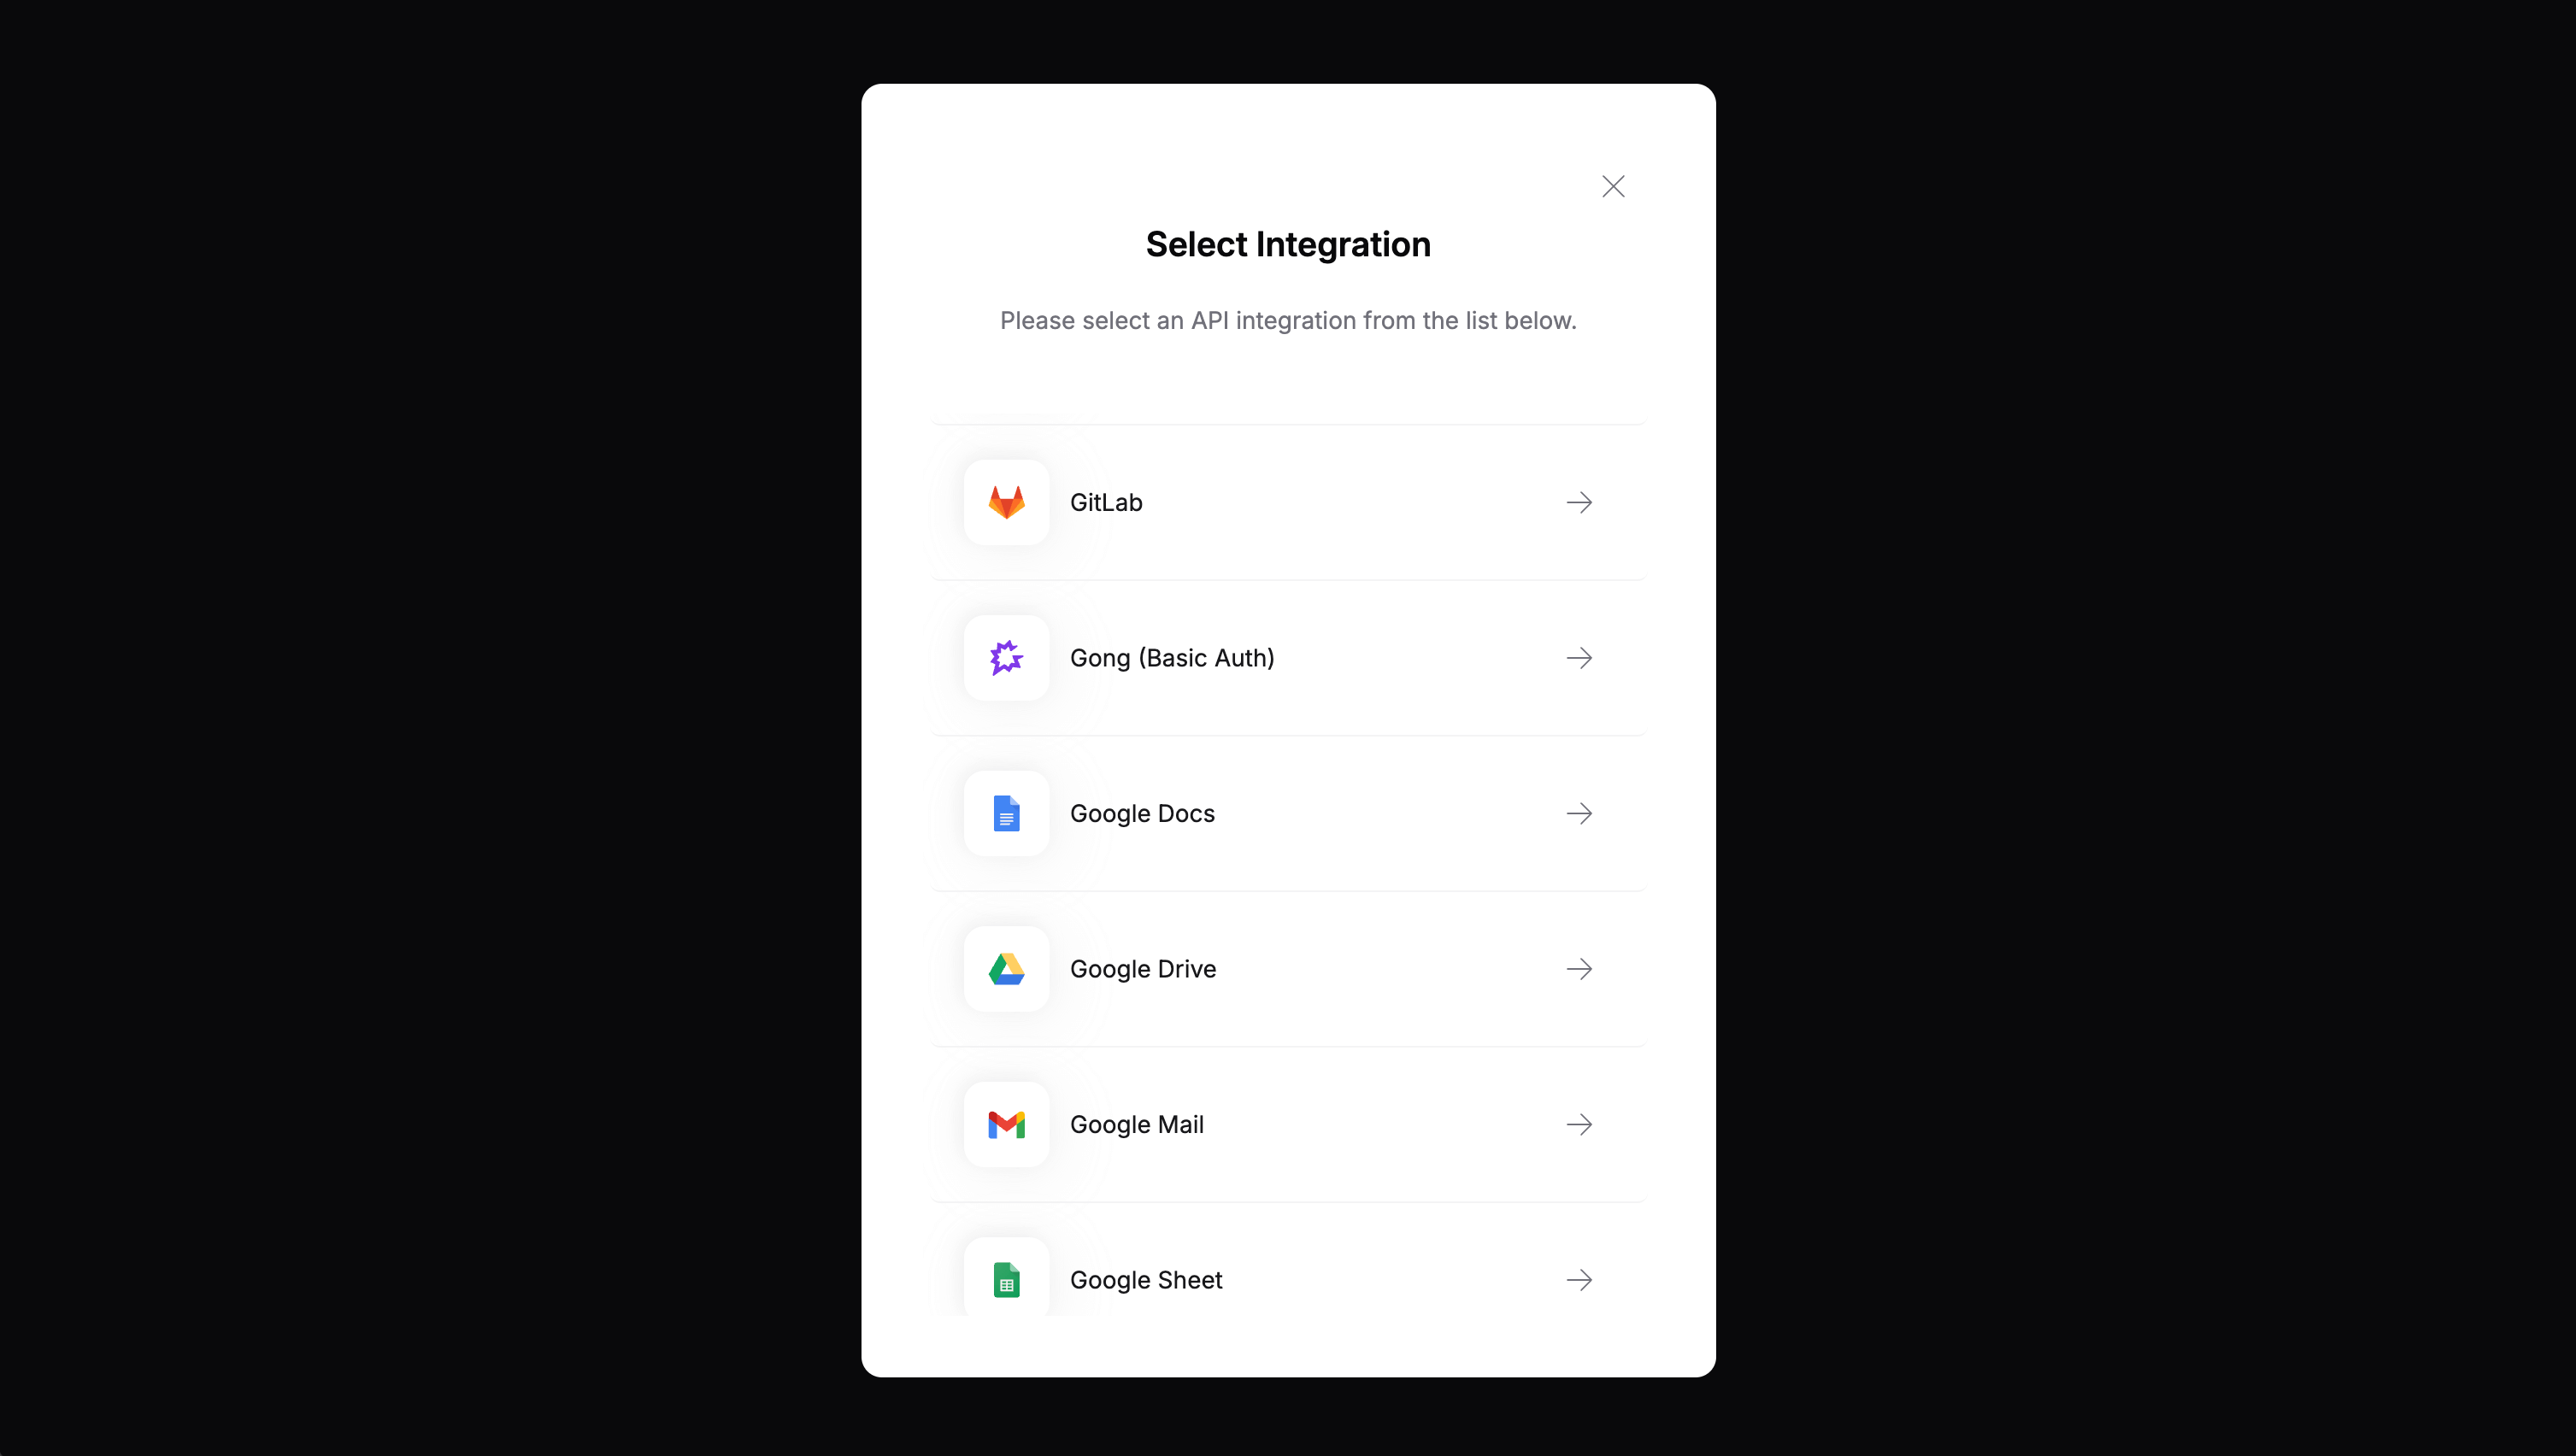
Connect UI with list of allowed integration ids
allowed_integrations will send the end user directly to this integration’s authorization flow:
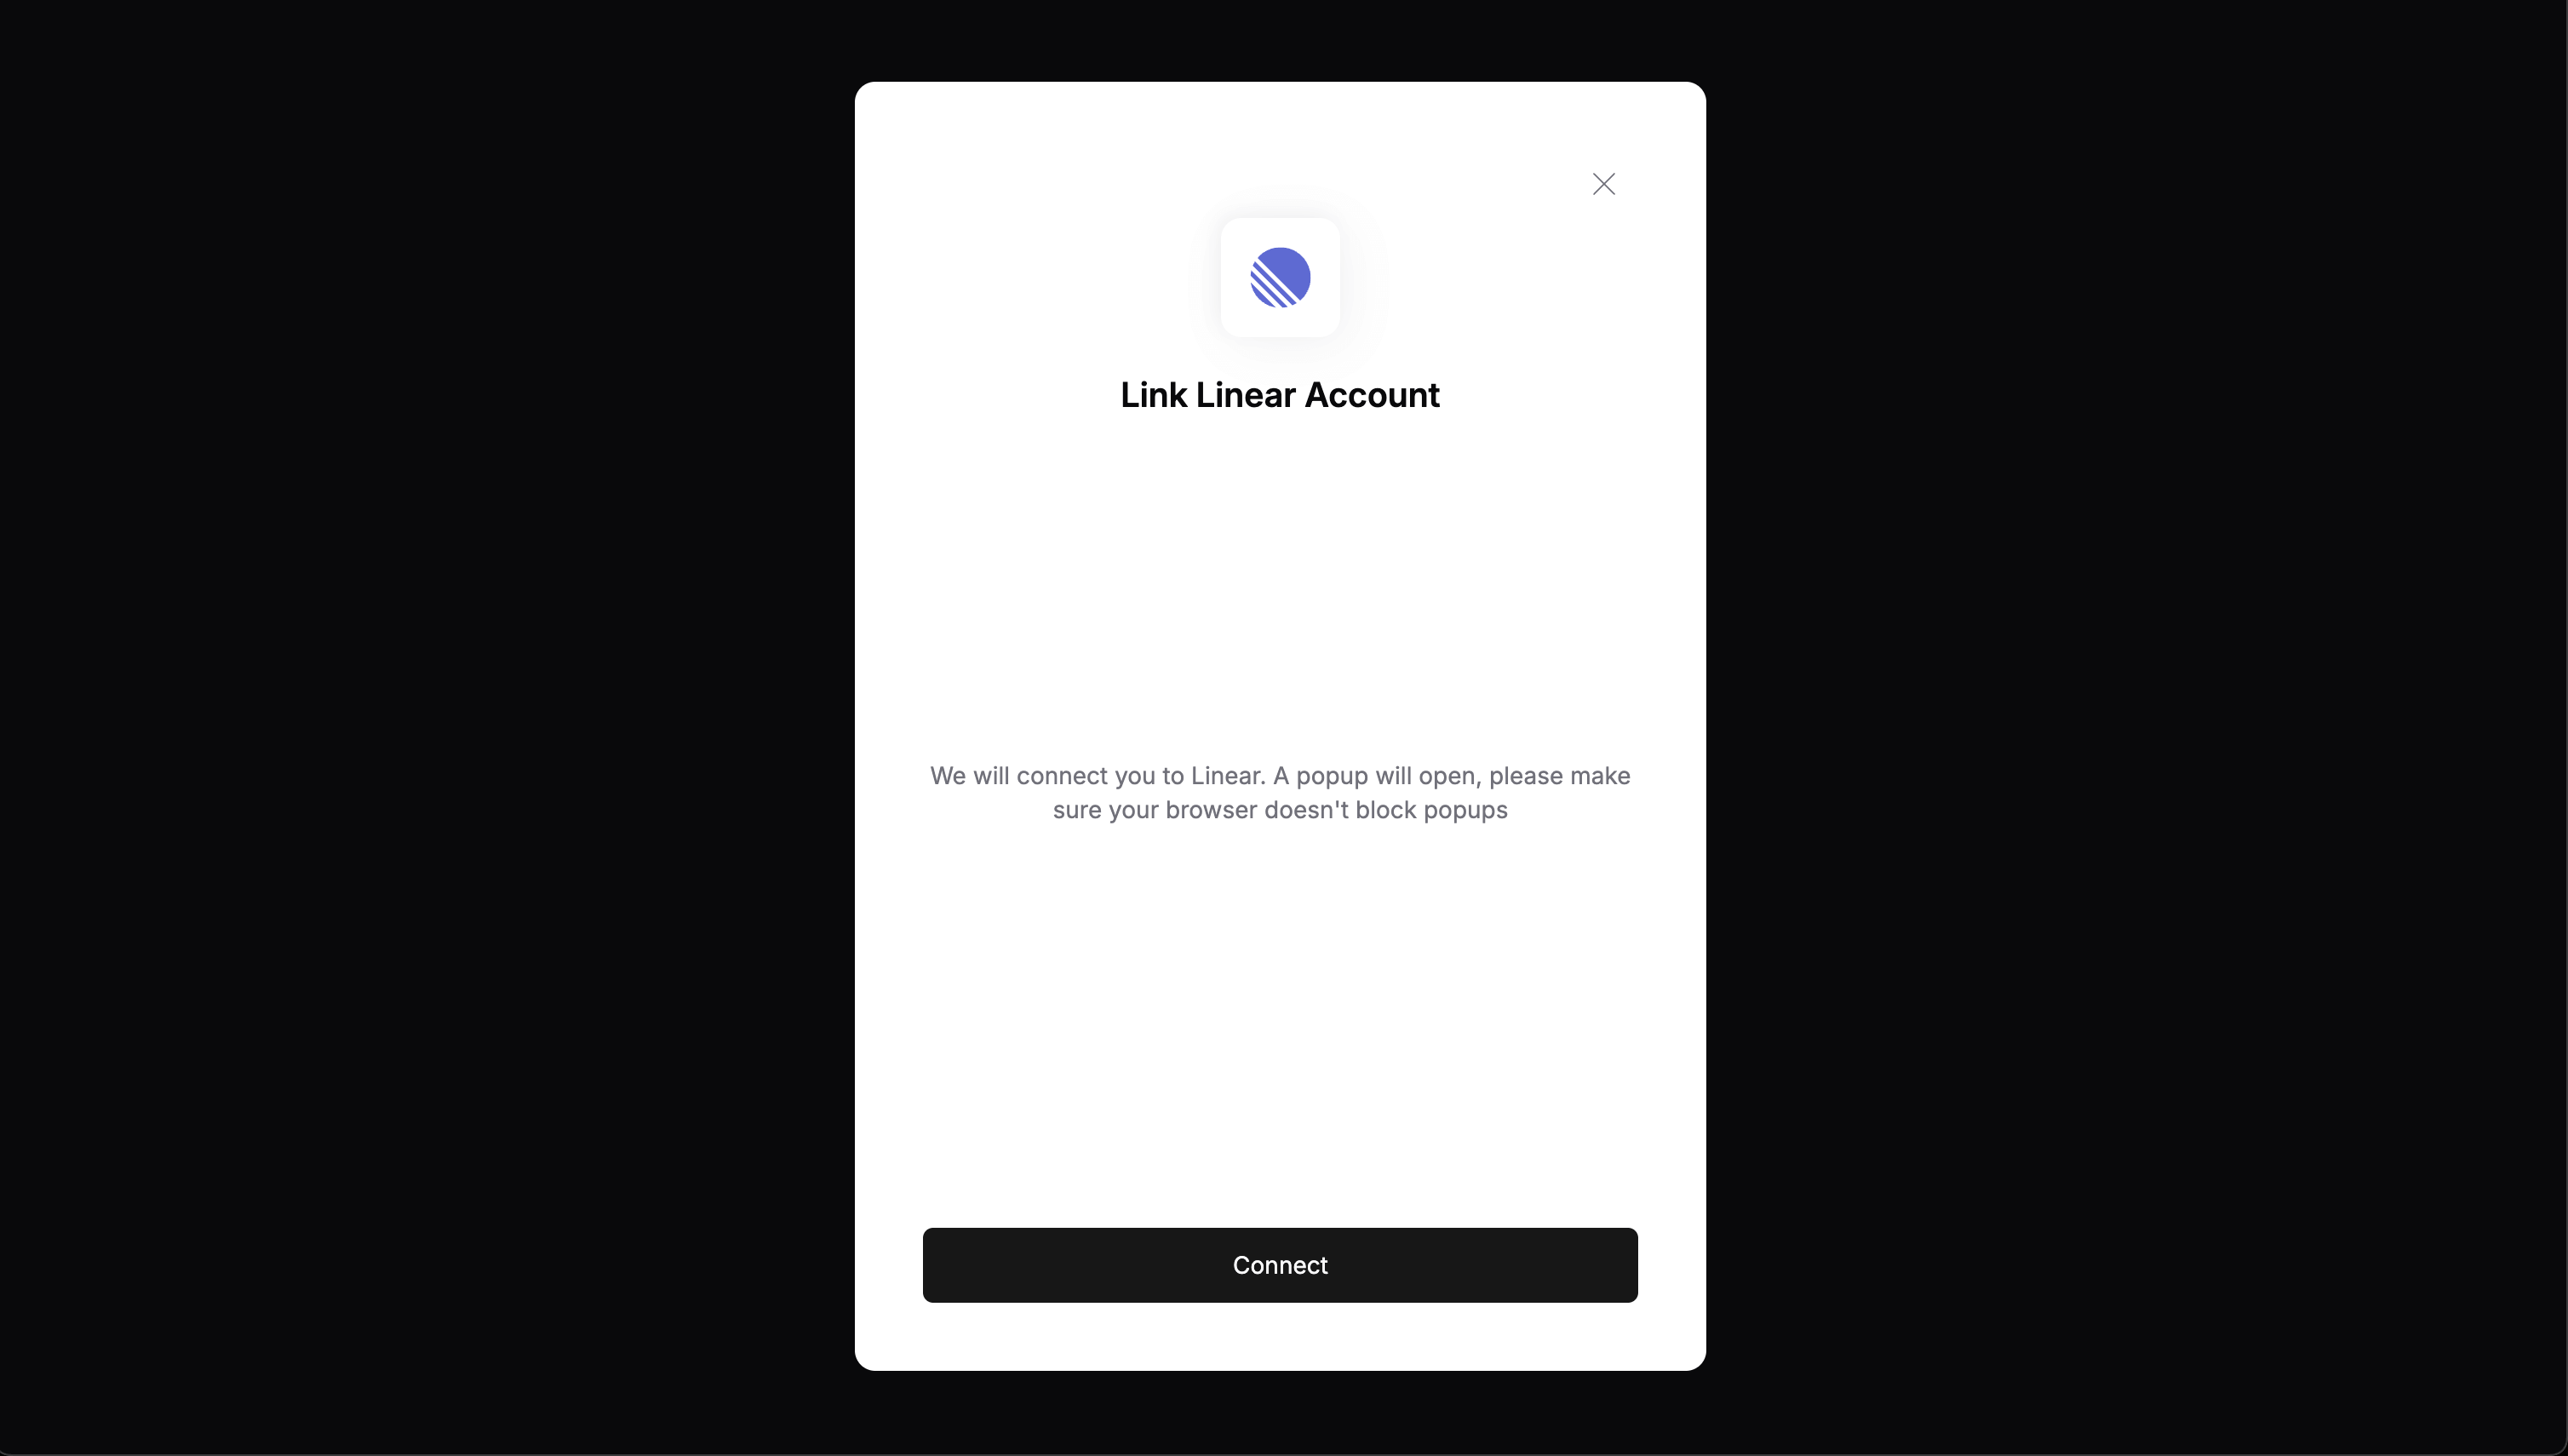
Connect UI with one allowed integration id.
2. Trigger the auth flow (frontend)
In your frontend, load the Nango frontend SDK, retrieve the session token from the backend, and trigger the authorization flow.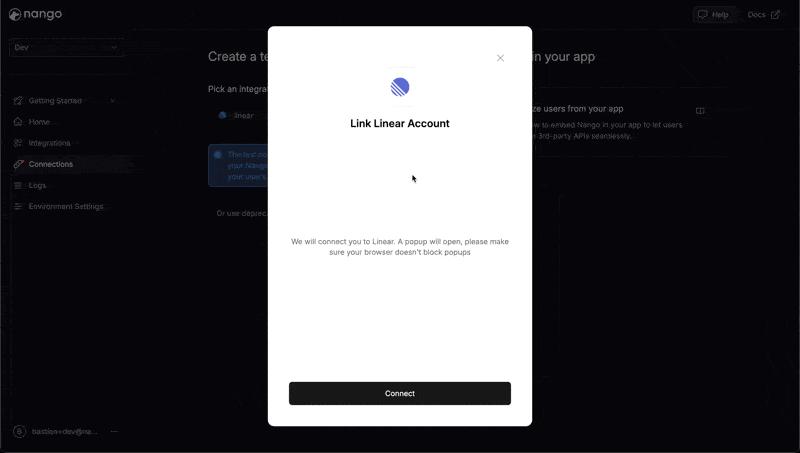
Connection flow with Nango's pre-built Connect UI
3. Listen for webhooks & save the Connection ID (backend)
👩🏻💻 Simplified flow for development
👩🏻💻 Simplified flow for development
In development, you can retrieve the connection ID without relying on webhooks.When using the However, we do not recommend using this approach in production, as it is safer to avoid exposing the connection ID to the frontend.
nango.openConnectUI() method in the frontend SDK, the connection ID is available in the event parameter of the callback:User level, organization level, project level connectionsNango doesn’t have a concept of a user-level, or organization-level connection.It is up to you to decide to which entity you attribute the connection in your application. For example: User, Organization, Project, Workspace, etc.We recommend creating a table that stores the association of
connection id < - > [owner object] in your application.From Nango’s perspective, every connection is treated the same and unique. Data is never shared between connections.- Go to the Environment Settings tab in the Nango UI
- Specify a Webhook URL where Nango should send notifications
- Enable the Send New Connection Creation Webhooks option
- Create the specified route in your backend to handle Nango webhooks
POST requests with the following JSON body:
connectionId value with the object you want to the attribute the connection to in your application.
4. Run the authorization flow
You can now test the authorization flow directly from your app and verify that a connection is created in the Nango UI Connections tab. If an authorization request fails, you can analyze the relevant log in the Logs tab of the Nango UI.5. Setup a custom OAuth callback URL (optional)
This step is not strictly required, but recommended. By default, the domain of the OAuth callback URL isapi.nango.dev. Some APIs (e.g. Google and Zoom) require domain verification for the callback URL and will not accept the api.nango.dev value for your app.
Some API providers (e.g. Google) also show the domain of the callback URL to the user during the OAuth flow.
Setting up a custom callback URL lets you use https://yourdomain.com/oauth-callback as your callback URL and takes only a few minutes.
- Add a new endpoint in your app, e.g.
https://EXAMPLE.com/oauth-callback- All requests to this endpoint should redirect to
https://api.nango.dev/oauth/callbackand pass along all original parameters - The easiest way to do this is with a 308 redirect
- All requests to this endpoint should redirect to
- Change the registered OAuth callback URL with all API providers. Otherwise, they will refuse new authorization flows!
- Before updating the callback URL in the Nango Environment Settings tab, double check (and ideally test) that steps 1 and 2 are done
- If the redirect is missing or the wrong callback URL is registered with an external API, authorization attempts will fail
- Additionally, since settings are specific to each environment, you must manually update the callback URL for every environment you have
6. Re-authorize an existing connection
There are cases where you need to re-authorize a connection, e.g. credentials have expired or the scopes/permissions have changed. Re-Authorization vs. delete & re-createRe-authorization with the flow below updates the existing connection’s credentials, while preserving all it’s associated data, configuration, etc. Deleting and re-creating the connection does not. If you delete the connection, Nango will also delete all associated data and configuration. We strongly recommend implementing the re-authorization flow before you go to production.
Detect invalid connections
Before displaying integration settings, check if the connection is still valid using theGET /connection endpoint:
- Node
- cURL
- User navigates to integration settings/dashboard
- System detects invalid connection and displays error state
- User clicks “Reconnect” button
- Reauthorization flow is triggered
- Connection is restored and user returns to normal settings view
Re-authorize a connection from your app
The flow is very similar to the flow for new connections:- You backend calls the re-connect session token endpoint or SDK function to get a re-connect session token
- You pass this token to the Nango Frontend SDK (same property as outlined in step 2 above)
- Nango shows the reconnection flow to the user
- Once the flow succeeds, you receive an
Auth Webhookfrom Nango withoperation = override
- Node
- cURL
You are connected!
You have successfully set up the authorization flow for your users. 🎉 Next steps:- View new connections & associated credentials in the Connections tab of the Nango UI
- Retrieve connection credentials with the API or Node SDK
- Use Syncs, Actions, Webhooks, or any other Nango tool with your connection
Questions, problems, feedback? Please reach out in the Slack community.