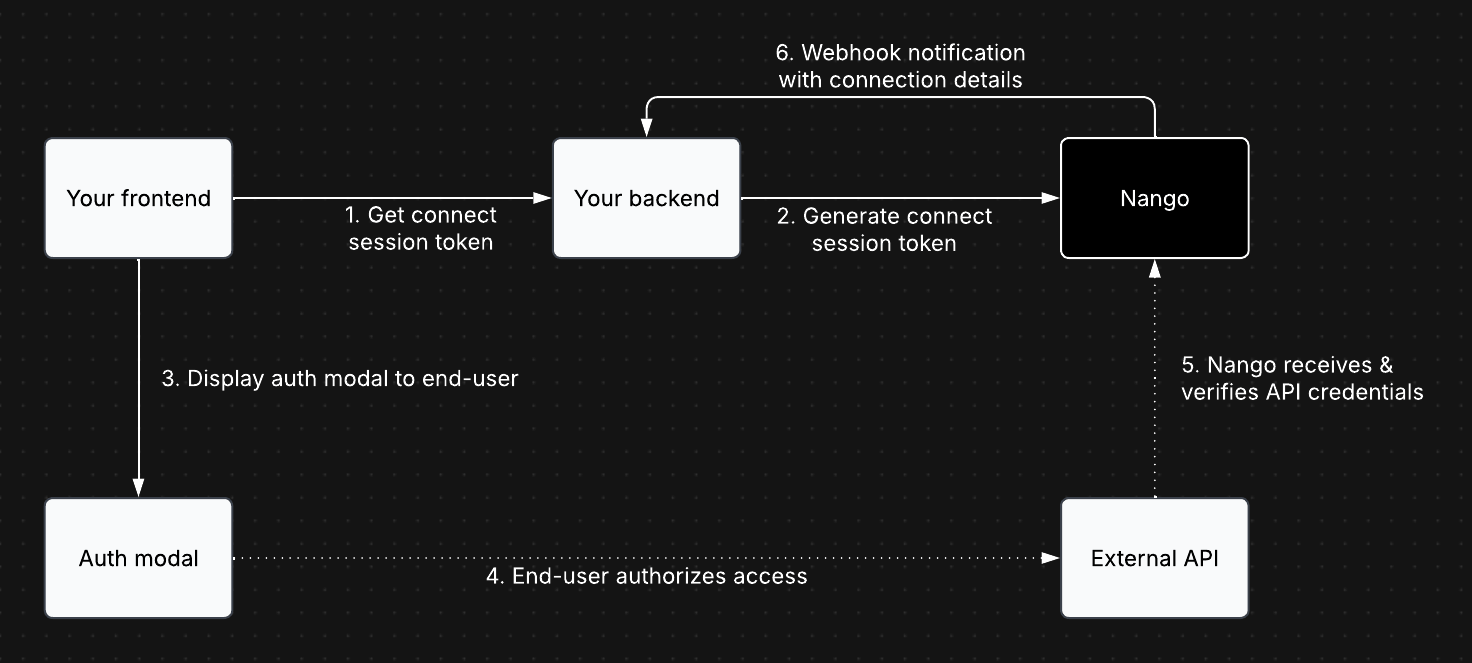
Authorization overview.
1
Generate a session token (backend)
In your backend, set up an API endpoint that your frontend will call before each authorization attempt to retrieve a session token from Nango.Here’s an example of how your backend can retrieve a session token from Nango (API / Node SDK references):
- Node
- cURL
ℹ️ Details on end user and organization information
ℹ️ Details on end user and organization information
The
end_user and organization information fields help identify which connection belongs to which end user and organization. This information is also used for display purposes in the Nango UI and, in some cases, for custom billing plans.The
end_user.id is required. Pass in your internal ID of the user who initiated the authorization flow. This ID, and potentially the tags, are necessary for reconciling the connection details that your backend receives from Nango after the connection is created (as described in the section 3).It’s possible that the end use’s email in your app will not match the email they use to connect their external account, which is fine.
Organization-level connectionsIn some cases, a connection belongs to an organization rather than a user. In such cases, fill in the relevant organization information and use a place holder for the required
end_user.id (or use the information of the user who initiated the authorization flow).2
Embed the auth flow (frontend)
In your frontend, load the Nango frontend SDK, retrieve the session token from the backend, and trigger the authorization flow.
Nango's default authorization UI.
You can override the Nango default UI by following this guide).
3
Listen for webhooks (backend)
Upon successful authorization, Nango will send a webhook to your backend with the connection ID. This connection ID, a UUID generated by Nango, is required to manage the connection and access its credentials & data. So you need to persist it in your database.To process Nango webhooks:For each successful authorization, persist the
- Go to the Environment Settings tab in the Nango UI
- Specify a Webhook URL where Nango should send notifications
- Enable the Send New Connection Creation Webhooks option
- Create the specified route in your backend to handle Nango webhooks
POST requests with the following JSON body:connectionId value alongside its corresponding user or organization.Questions, problems, feedback? Please reach out in the Slack community.